Sunday, October 4, 2009

10/3/09

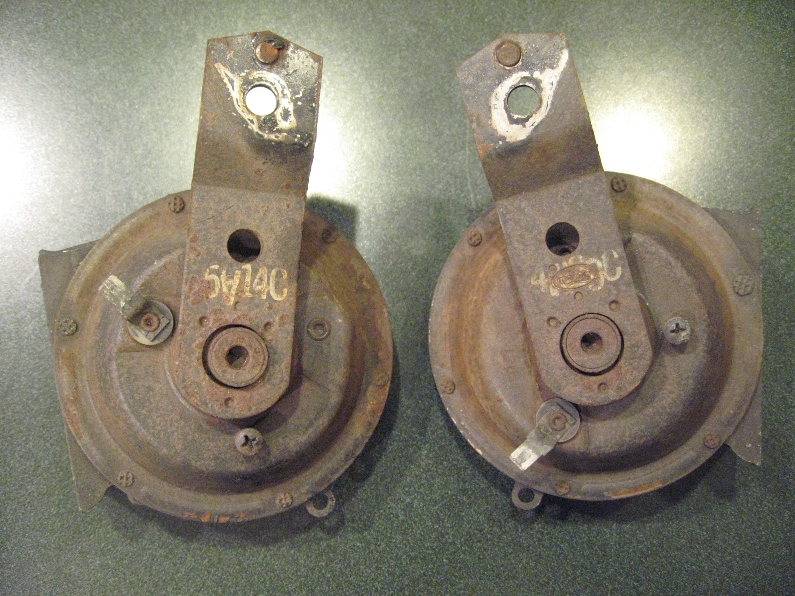
After spending a few days organizing parts and zip-lock bags from the bins, I now am able to move quicker on restoration of the K convertible. First up today is a picture of the original horns. Evidently, there were different date formats and locations used throughout production in '65. What's interesting about these date stamps is the upside down month codes. I have a good template of these stamps made and plan to get rubber stamps done locally. The horns are already cleaned/painted.


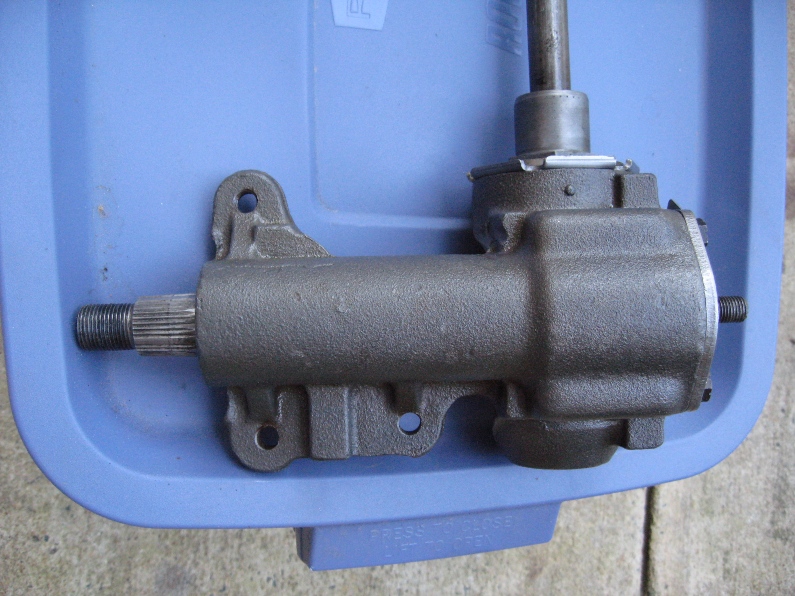
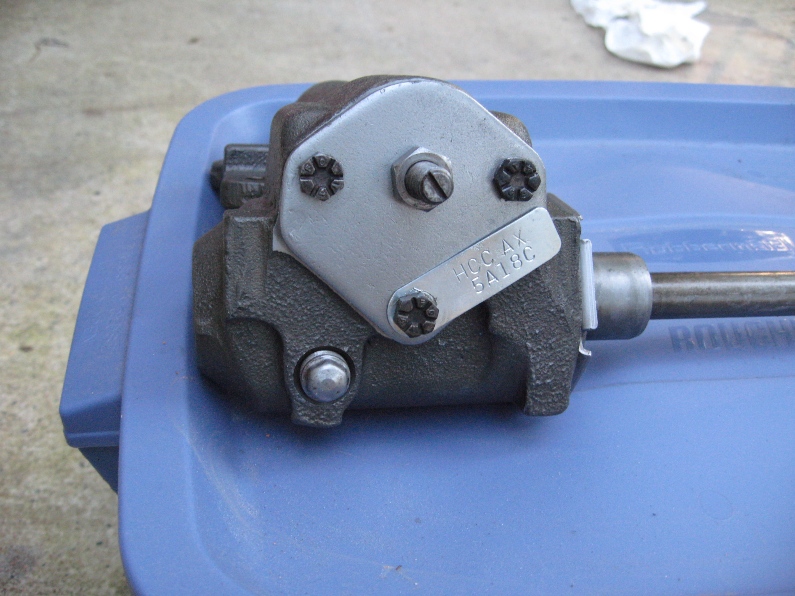
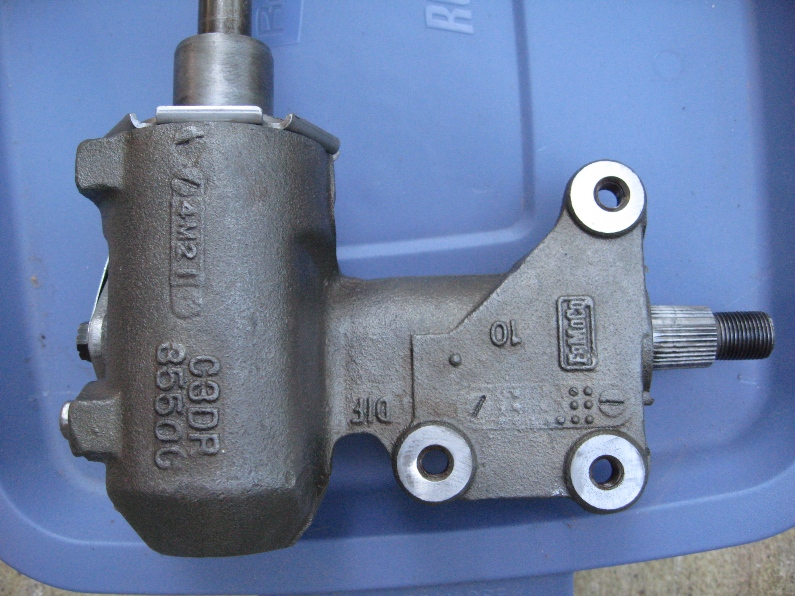
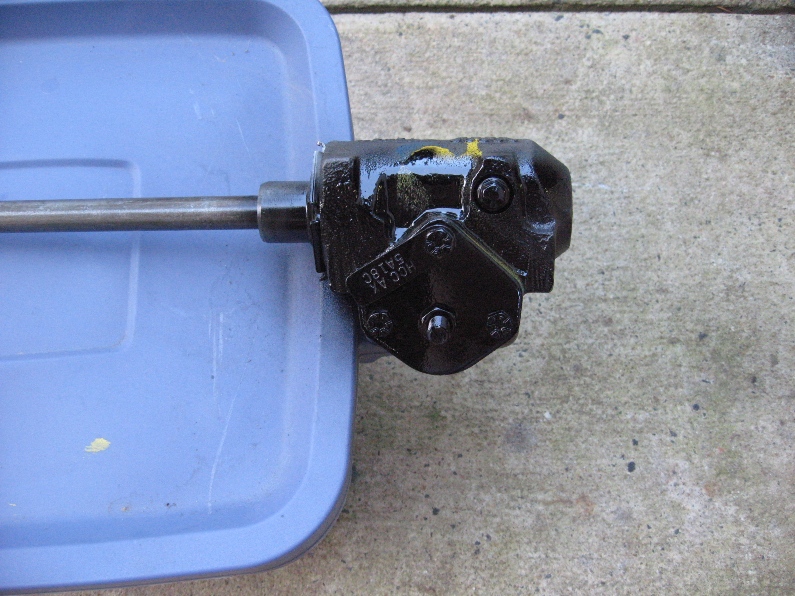
The rest of the day was spent restoring the original steering box. To do this properly, the box was disassembled and each piece detailed properly. New needle bearings and sector shaft bearings were installed. Unfortunately, Ford chose to blackout the top of the steering boxes, so I had to obliterate all that nice detailing! If you look in posts here from a couple months ago, you can see the original box was blacked out. The blue/yellow paint marks were applied before blackout, which can be seen on the back edge once installed. I'll go ahead and share the trick for getting the cast appearance back on the case. First the case must be glass beaded to remove all rust/dirt. Then it must be cleaned completely to remove all grease and media. To get the slight darkened appearance the case is dipped in a phosphate solution for about 30 seconds. After that, it is dried and submerged in oil for about a half hour. Once removed, the surface is rubbed with coarse steel wool and then wiped clean.


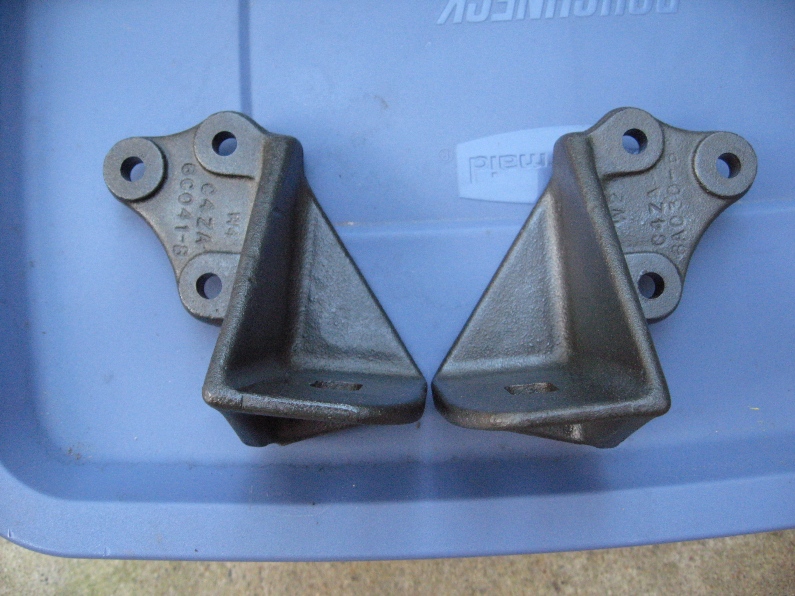
While doing the steering box, went ahead and restored the engine mounts.

Monday, September 28, 2009

9/27/09

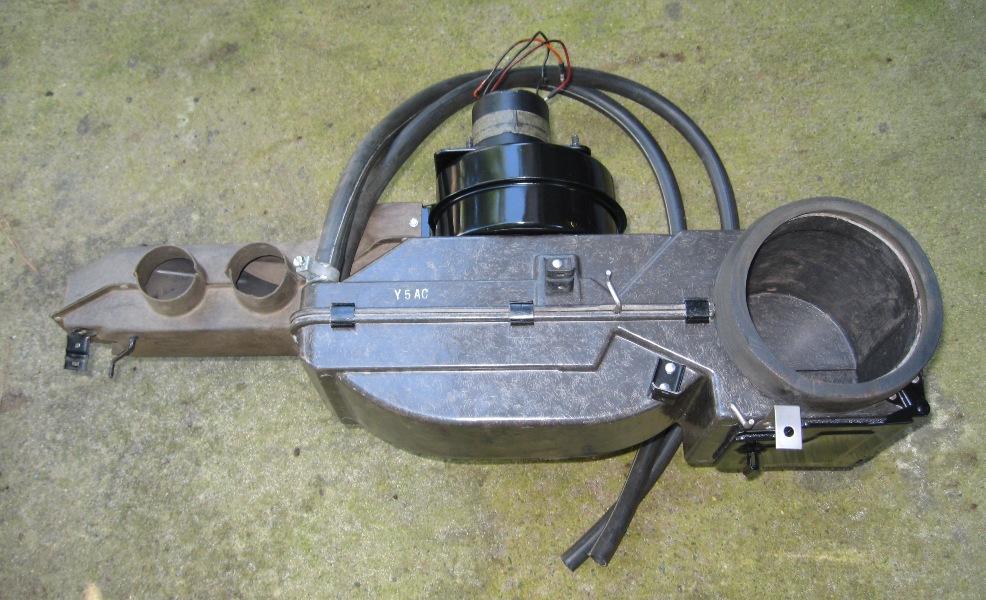
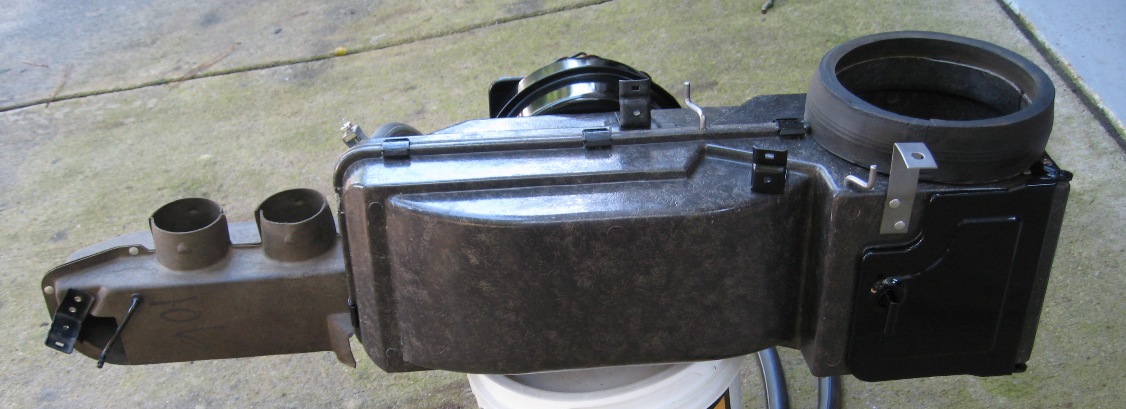
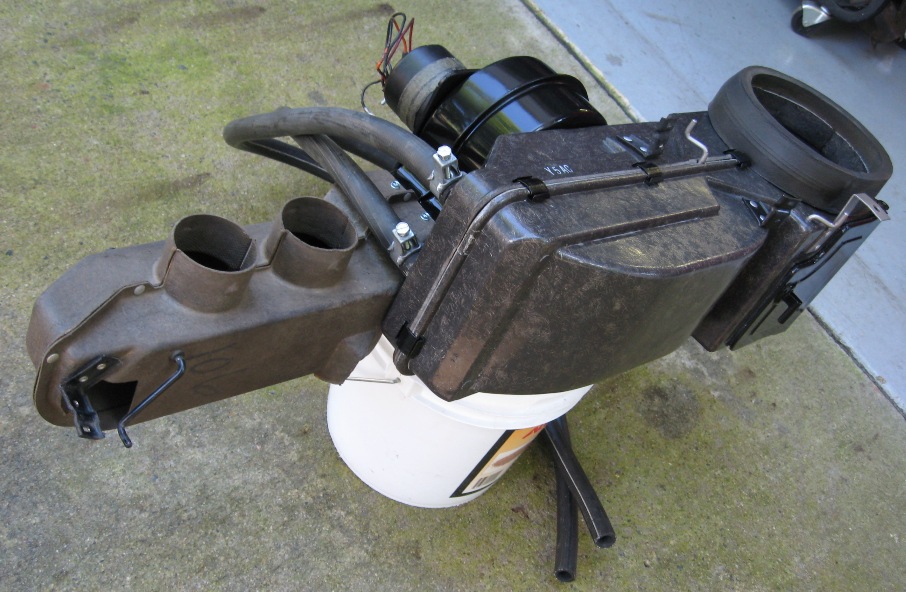
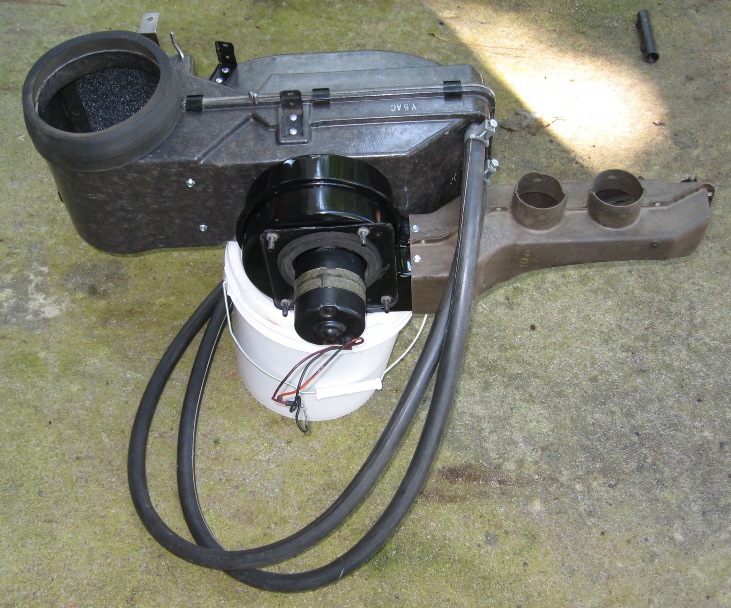
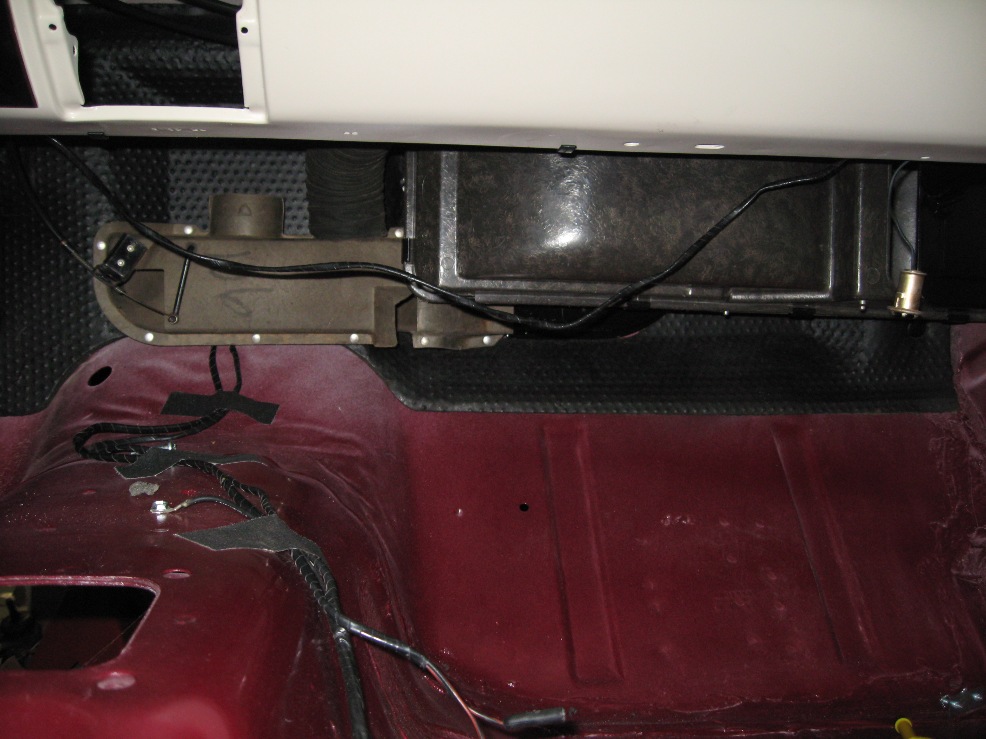
More dash assembly progress. Spent the better part of an entire day restoring the heater box. There is quite a bit of detail if you want to do it right. The heater box I used is an original 5AC dated case, which had a nice enough original finish that it just required cleaning/polishing. The door and fan plenum had to be repainted black. An NOS heater core was used, along with NOS heater hoses. The gem of the assembly is the original cardboard heater plenum. Those that are observant may notice the '106' rotation number on the front, which is the same rotation number used throughout the car. One other detail is the NOS fan motor, which is an early 1965 piece with 3 wires. Notice the correct tape seal in the middle.


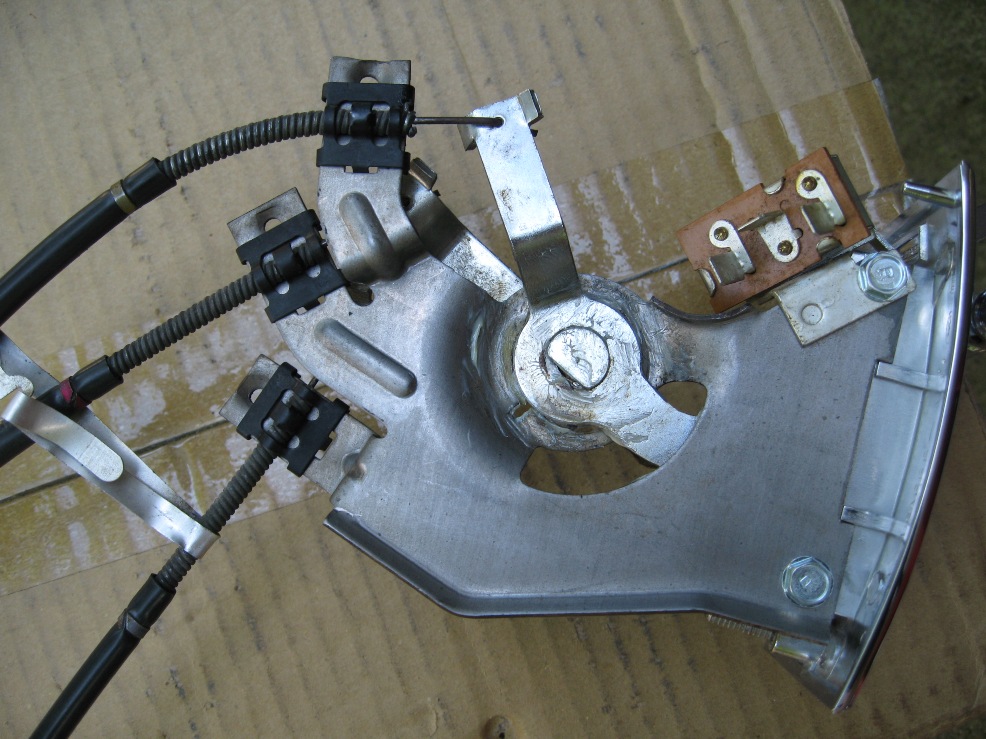
The heater cable assembly was also restored and installed. An interesting detail is the clips that hold the cables to the control unit. No screw and clamp like others that are typically seen. The original from the convertible was like this, as well as the 2 parts coupes. One final detail is the aluminum strap to hold the cables together.


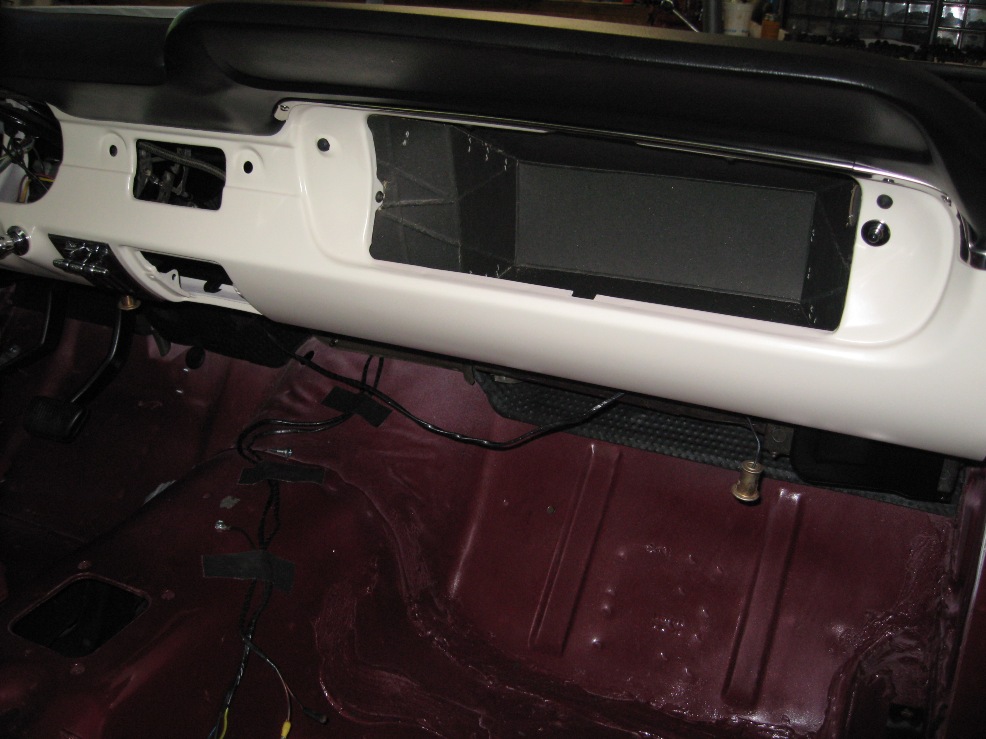
Heater box was installed without any problems. Sealer used where the hoses come through the firewall. Also installed was an NOS glove box liner. This service part came with incorrect screw clips, had to remove a set off an original liner and install on the service piece. It went in without too much trouble.


Last item installed this weekend is the headlight wiring lead. The one used is a mint condition original. It just required cleaning and was ready to install. The wiring loops are also original, that just required cleaning to install. Installed the NOS voltage regulator, dated 5A22 on the bottom. Will be needing a better cap though.


Tuesday, September 22, 2009

9/21/09

Concentrating on dash assembly now. Have detailed/installed the pedal assembly, master cylinder, wiper motor assembly, fresh air vent and parking brake handle/chassis.

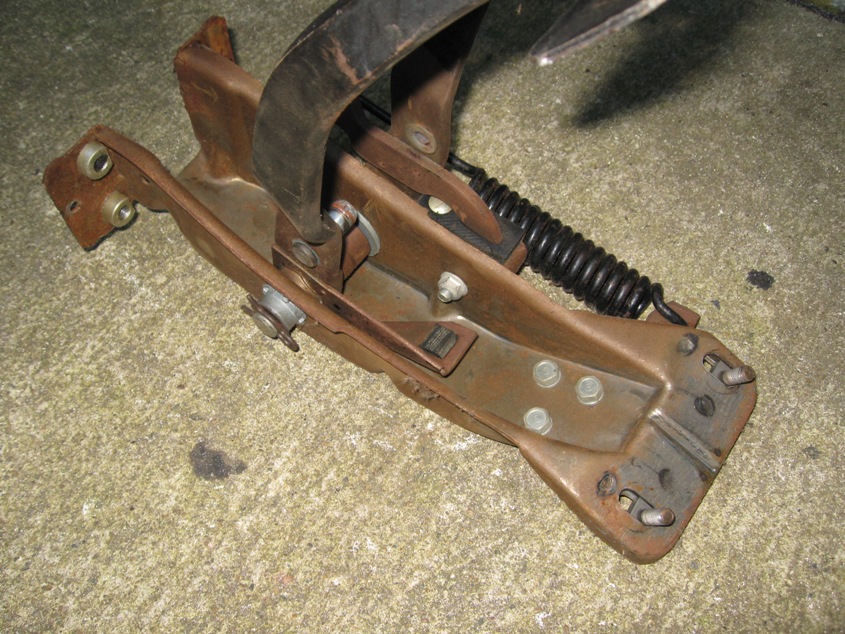
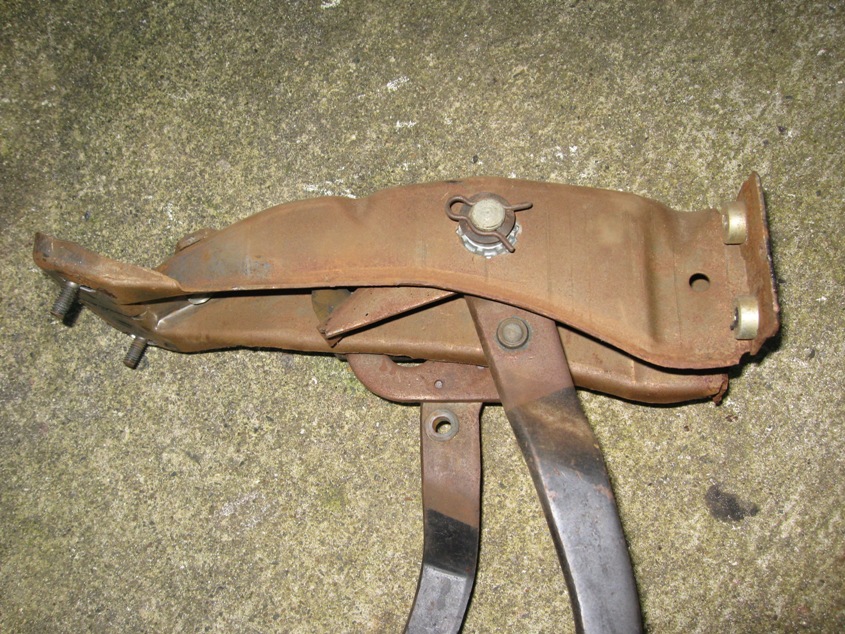
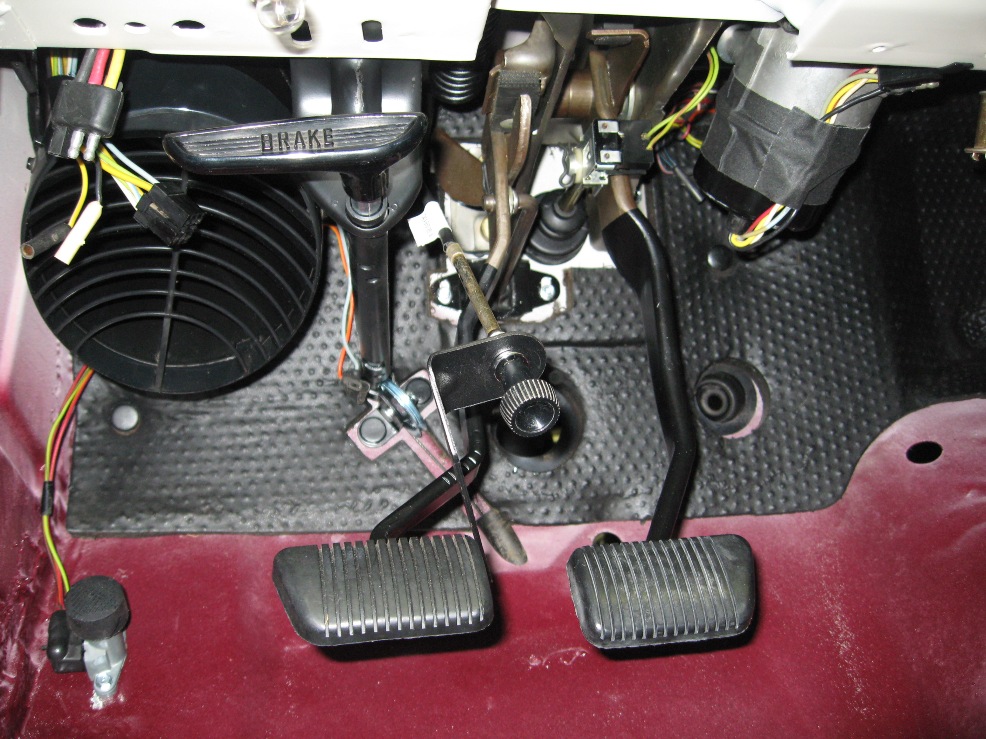
The clutch/brake pedal assembly came out very nice. There is a lot of detail that a lot of folks might not notice. Such as the clutch pedal shaft being cad plated, not natural steel. Also, the pedals were a bit of a darkened appearance at top, which I was able to save by a very light glass beading at 20psi. Also, there are heat marks on the metal where the stop bracket is welded to the clutch pedal. One interesting detail is the difference in the black paint dip lines. I was able to save the original lines and reapply black paint in the exact position as it was. Kind of cool detail! Last item of interest is the ultra-rare clutch pedal pad w/out the indentation around the perimeter. This is a genuine Ford NOS part, which was acquired before the repro's came out. Nice detail you don't see very often on restored cars.


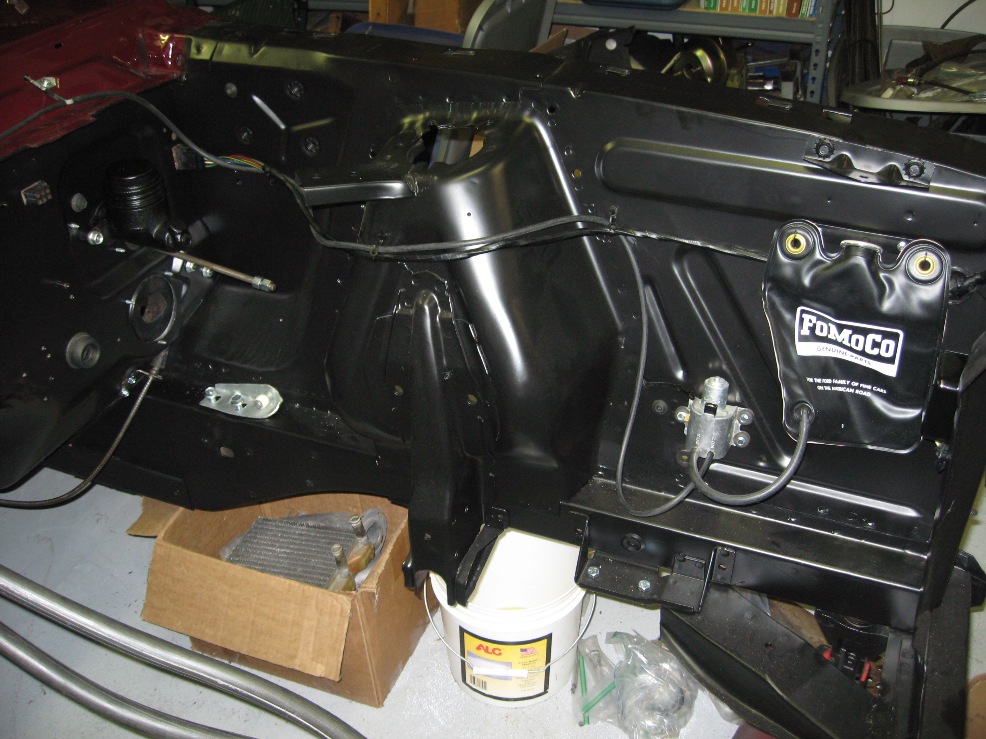
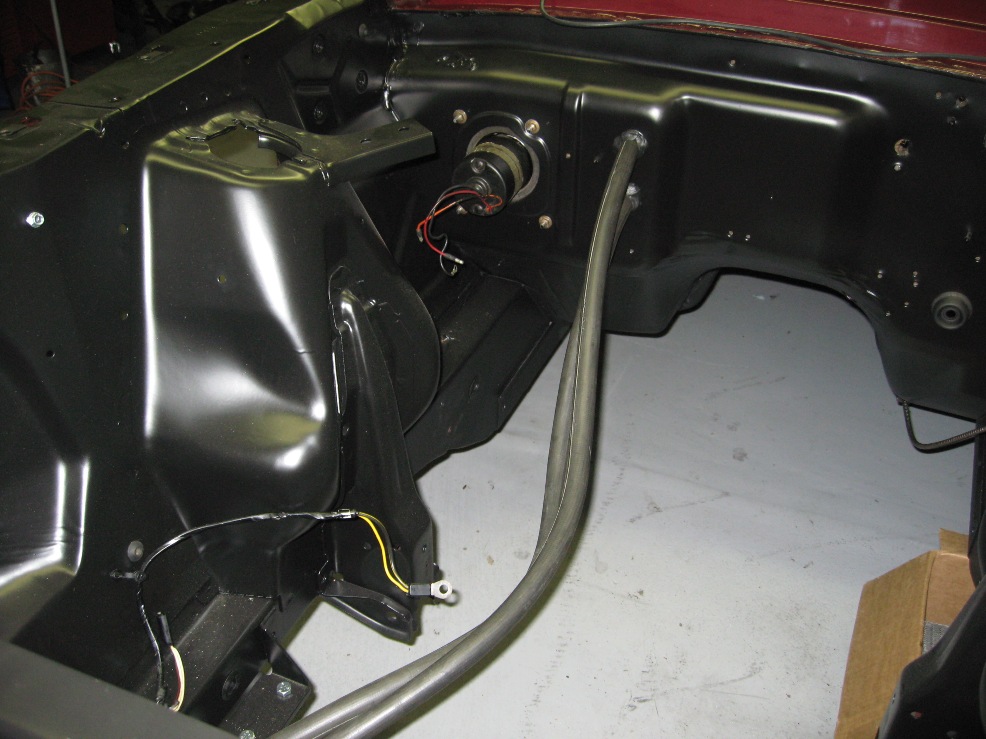
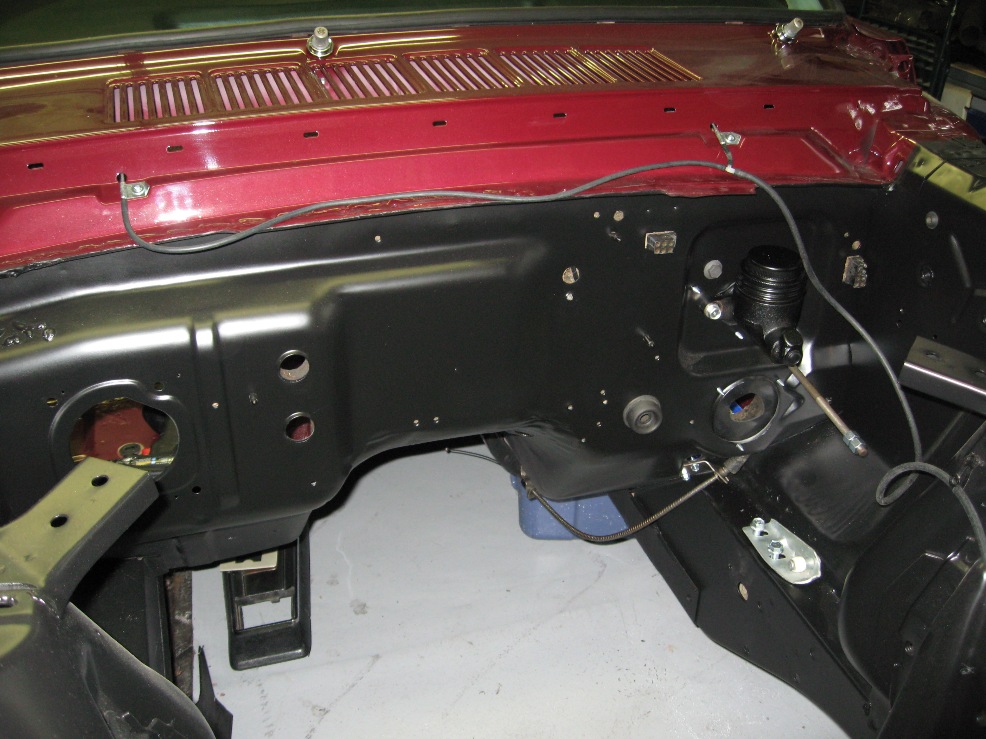
Not a whole lot going on in the engine bay right now, but as mentioned, the master cylinder was installed when the pedal assembly went in. The MC is an NOS FoMoCo piece, 100% exactly the same as the original that was in the car. Nice detail showing the lid and body painted together as a unit with the fitting plug in place. Fasteners are original pieces that were re-plated proper finish. Also, notice the clutch rod has been installed. This is an NOS Ford piece with re-plated original nuts. Last noticeable item in the engine bay is the installation of the windshield washer system. This is from an NOS FoMoCo kit that included ribbed hoses and all the correct pieces.


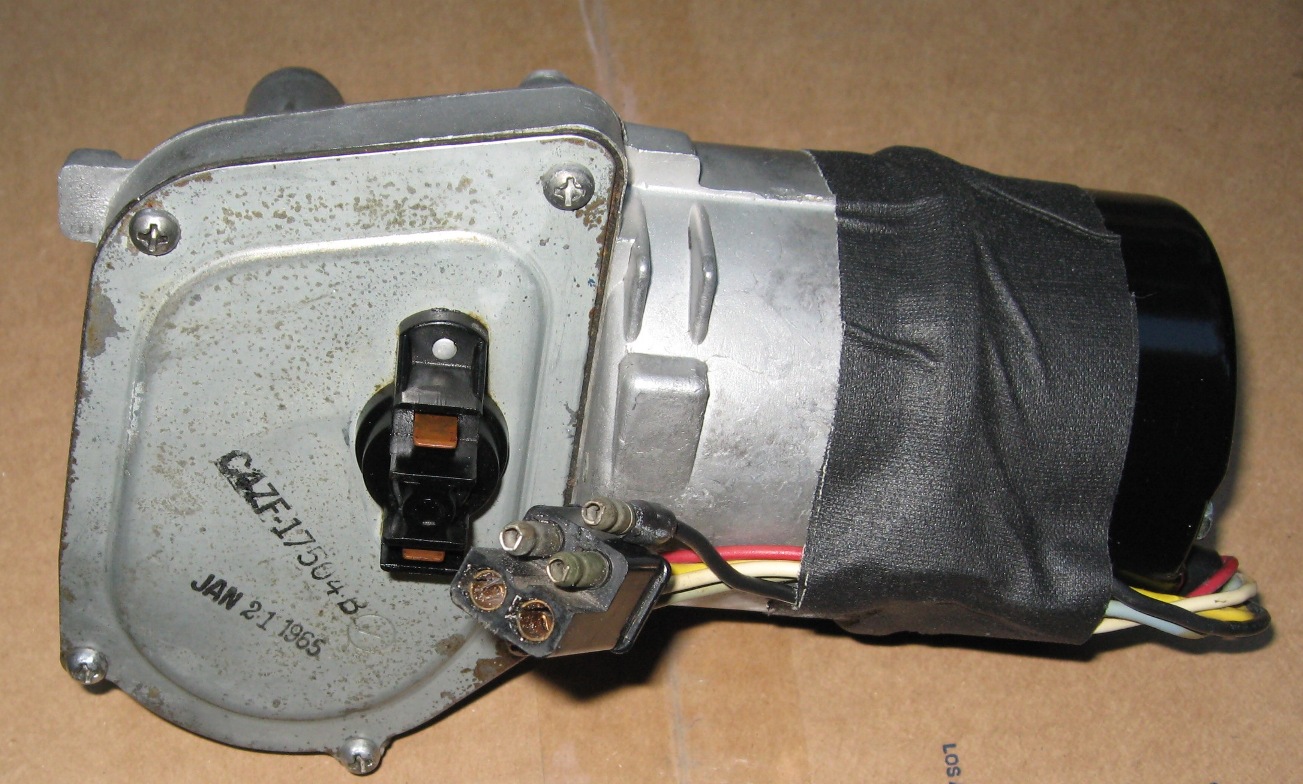
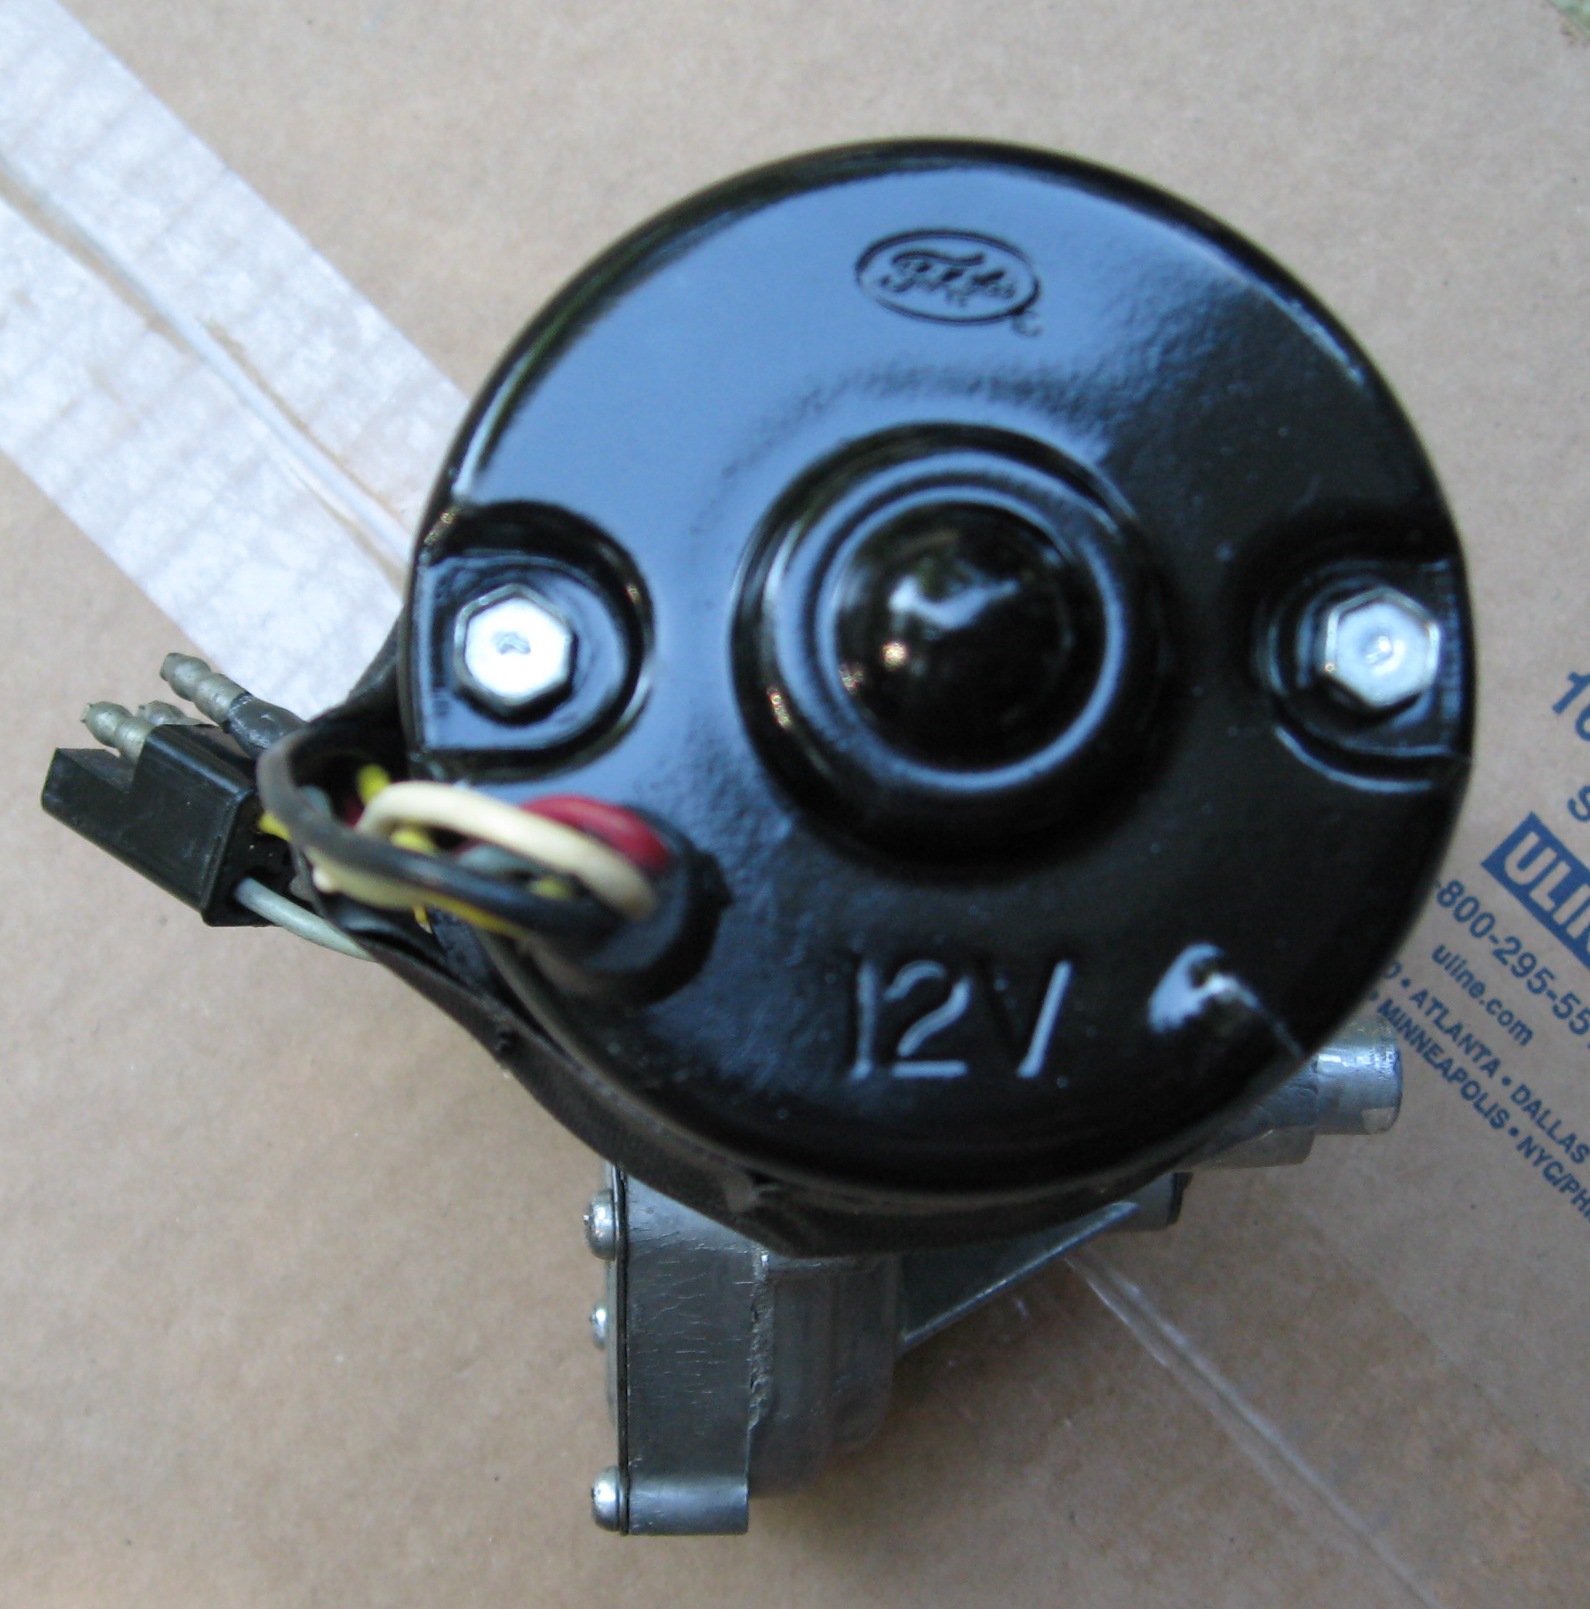
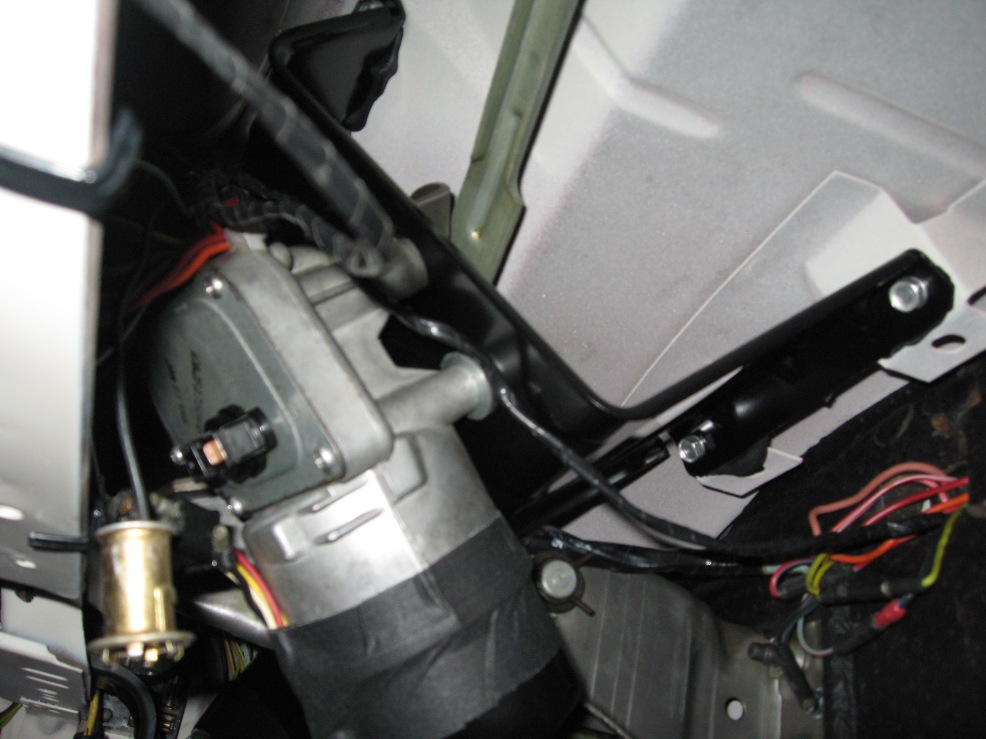
Back to the interior... Restoration of the wiper motor and arm assembly was somewhat time-consuming. There is a lot of detail that has to be done. The 2-speed wiper motor has a cover with a date stamp, I chose to keep this the original finish and not disturb the original "Jan 21, 1965" stamp. The end cover of the motor is painted black, which had to be re-finished. Original attaching screws were nice original plating and were just put back in. Cloth tape was applied how it was found, which hold the wires up so they can't be seen from the edge of the dash. The wiper bracket is semi-gloss black with strip caulk used to attach it back in the car (prevent vibration noises.) The wiper arms were originally like a cadmium plating. The left one is NOS while the right is a very nice used original that was cleaned up. Original wiper bezels and attaching nuts for the exterior were re-chromed and look perfect.


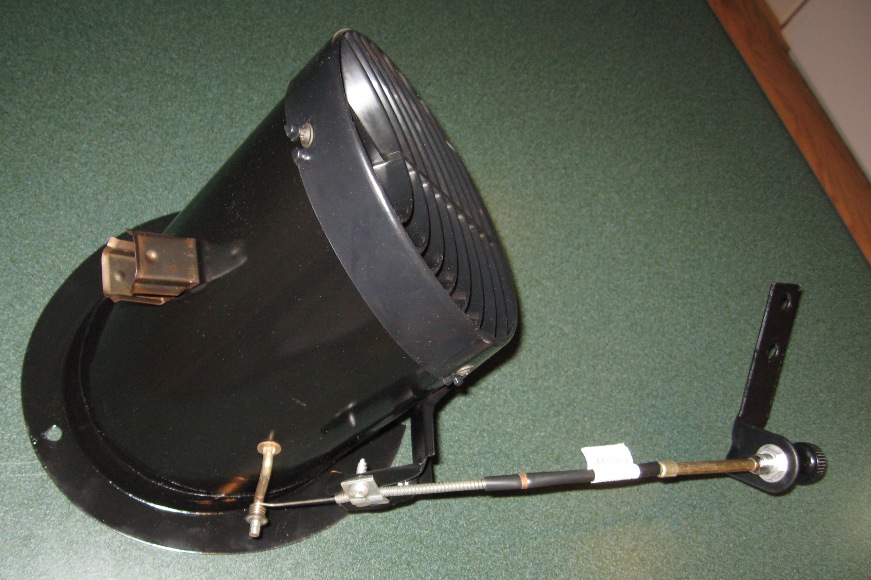
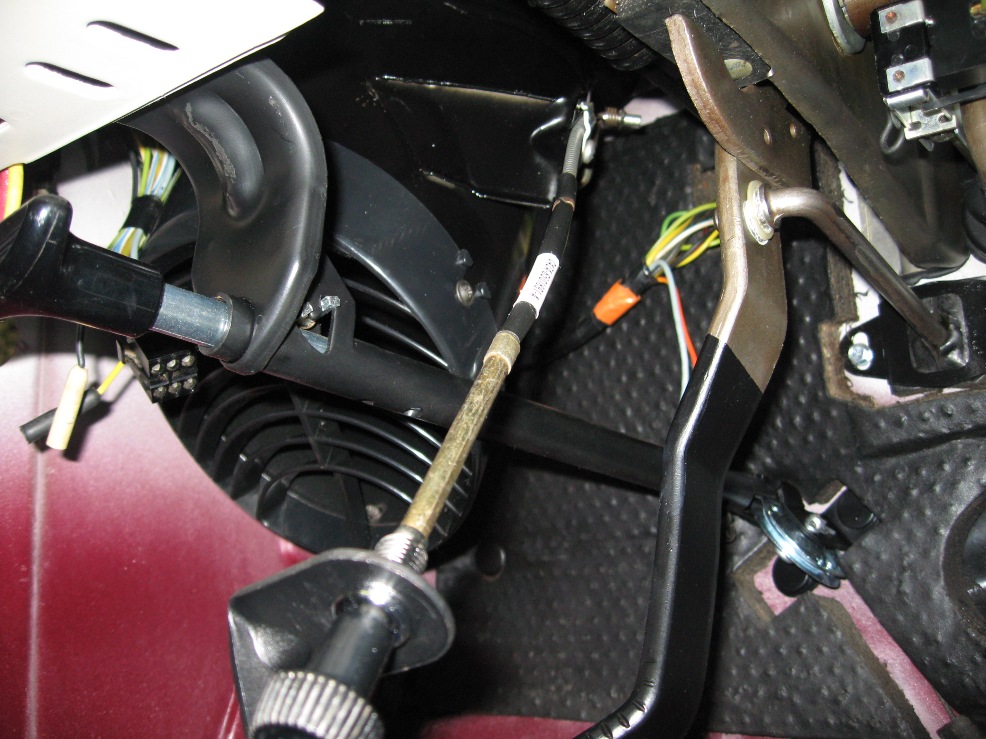
The fresh air vent was rather easy to restore. The only thing that takes time is detailing the plastic vent cover. I had an extremely nice original vent assembly that probably didn't need re-painting, but I shot a new coat of paint on it anyway. The vent cable is really nice, showing the zinc dichromate plating on the shaft. Also, notice the C4ZA part number decal. Found this on several San Jose cars. Have never seen it on any other assembly plant car. Also, notice the finish on the flasher clip. It might have originally been black zinc as it has a bit of a darkened "rainbow" appearance. Flapper shaft on this assembly was zinc dichromate, have another one that appears to be more red in appearance.


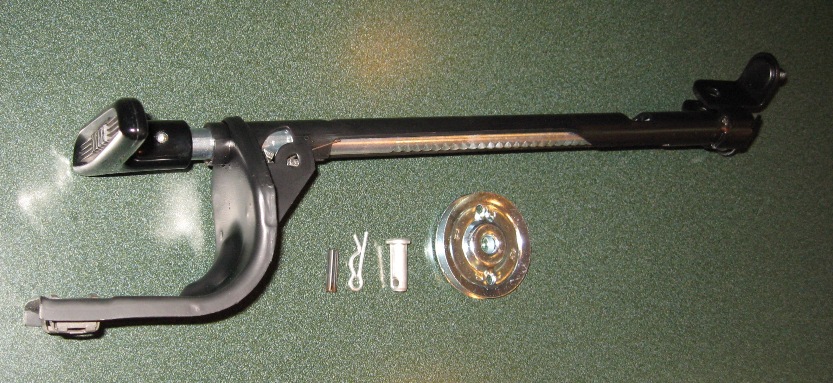
Next is the parking brake handle and chassis. Restoring one of these is not that hard. Have always been baffled that some choose to pay upwards of $300 for an NOS unit when they could restore an original for a fraction of that cost. The wheel at the end, the pin and clip can be re-plated. The handle shaft can also be plated in clear zinc. I had a really nice original plastic pull handle which was cleaned and installed. It was much nicer than the NOS piece I had bought.


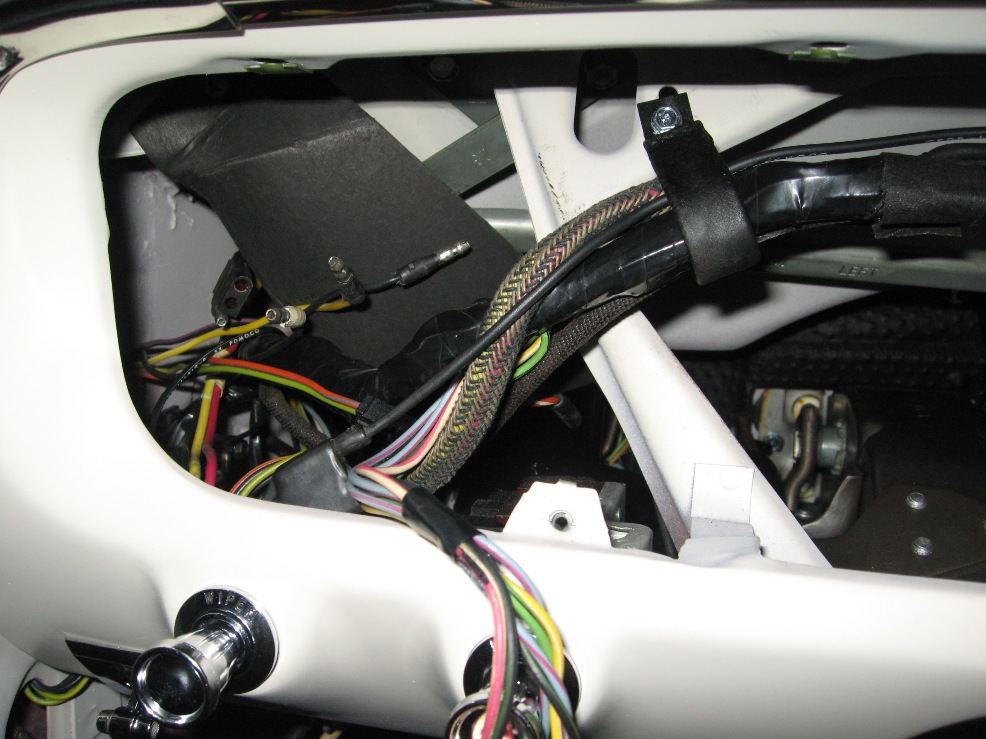
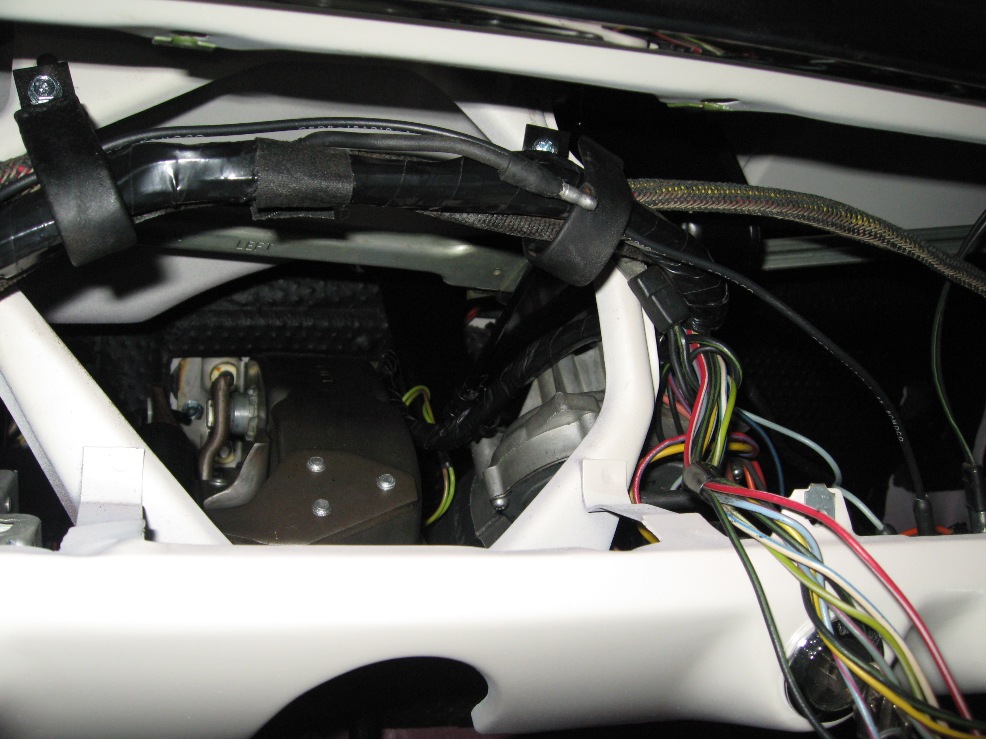
Here are a few shots of the pieces installed in the dash. Notice the original wiper arm cover. Had a super nice original that just needed to be cleaned up. Also notice that loop clips for the main wiring harness. These were only used on convertibles from that time period. Coupes/fastbacks had plastic wire clips. Only reason I can figure is that convertibles had the loops in case a power top was installed, which would allow the extra space needed for the power top lead that goes behind the dash to the switch.


Tuesday, September 1, 2009

8/31/09

Back from CA now. The MCA show in Van Nuys was nice, but HOT!

Just wanted to write a quick note that I found another dimmer switch on a junkyard car in Sacramento. It was a coupe and it had a 2" high dimmer. So, there goes my little theory that convertibles had the higher switch!

Monday, August 24, 2009

8/24/09

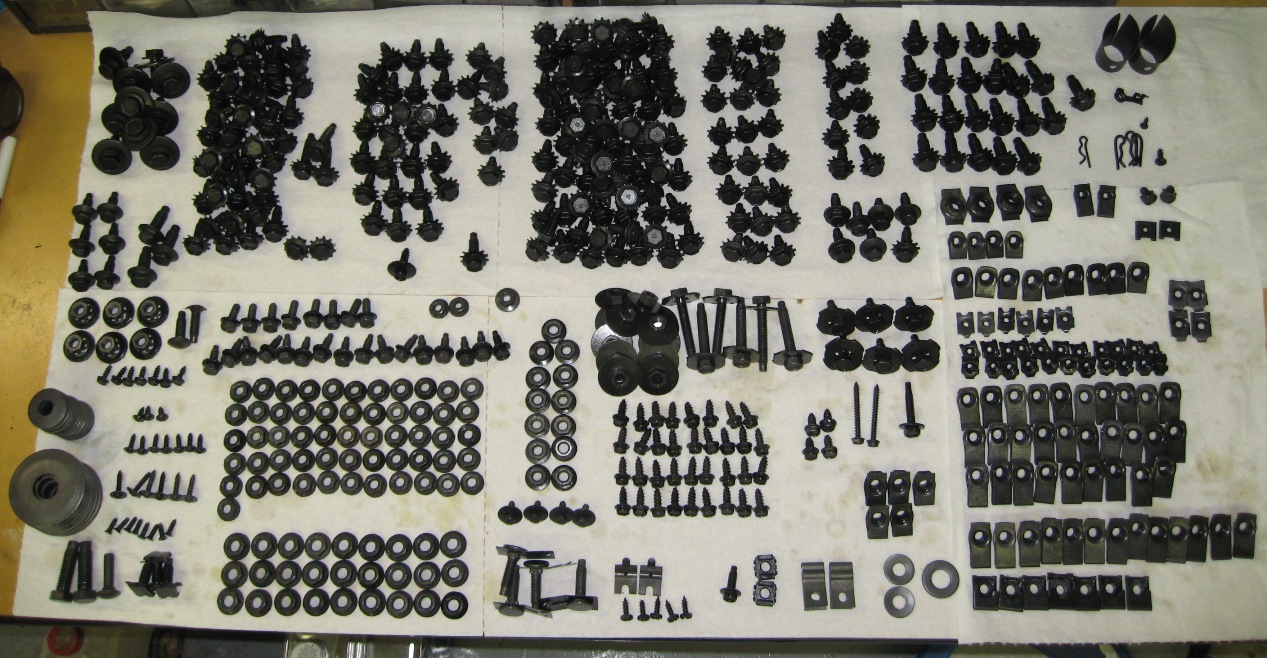
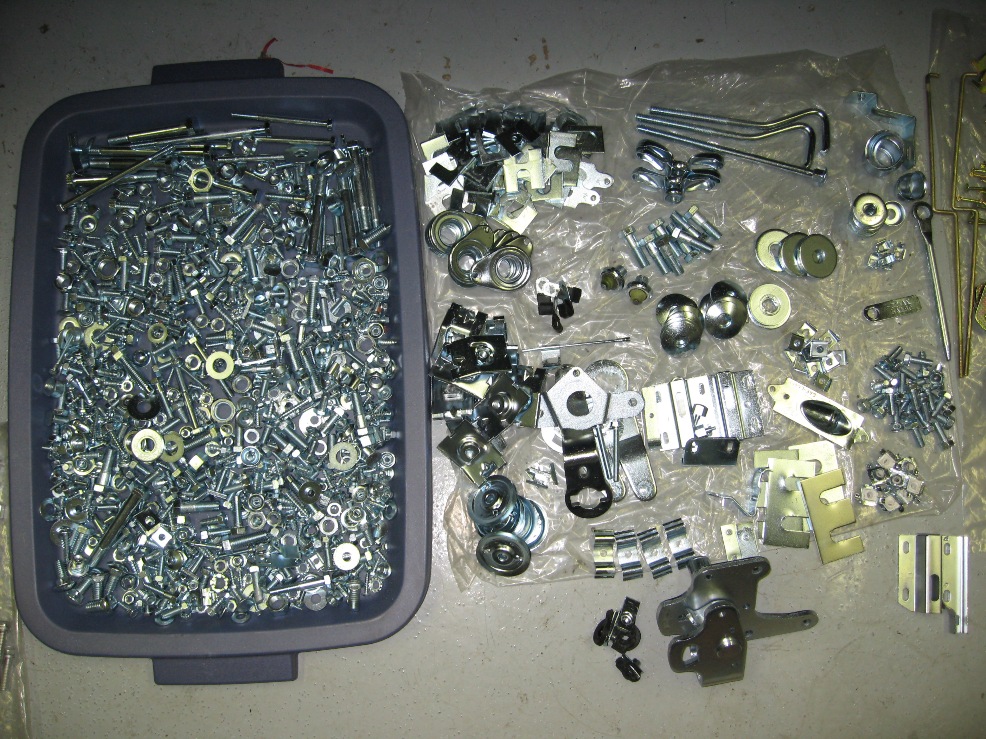
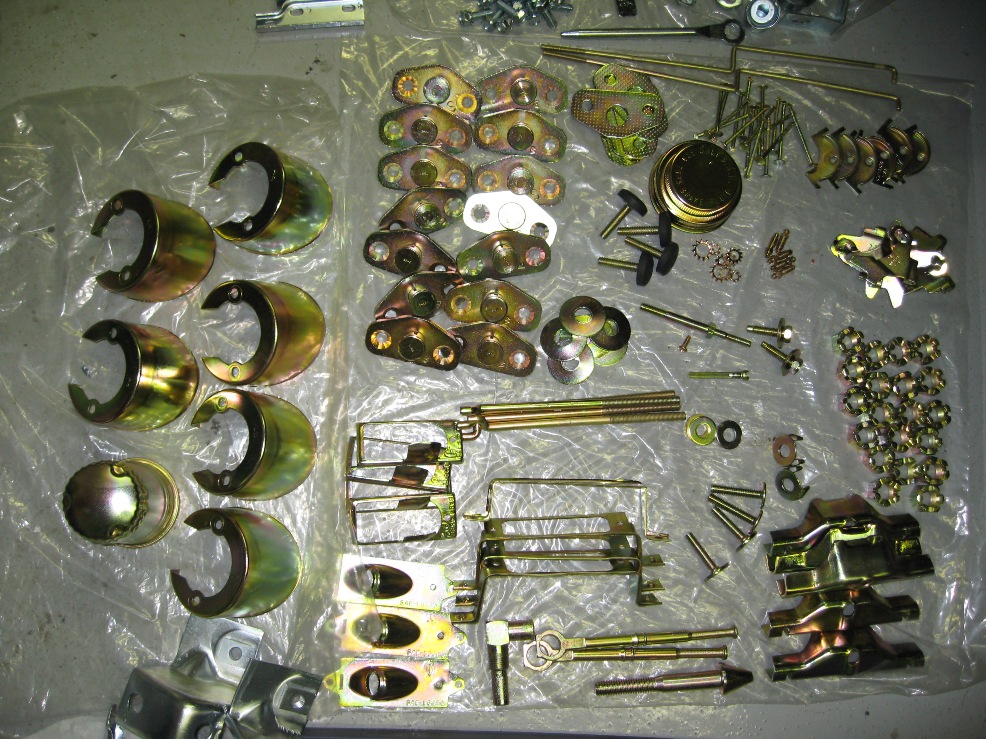
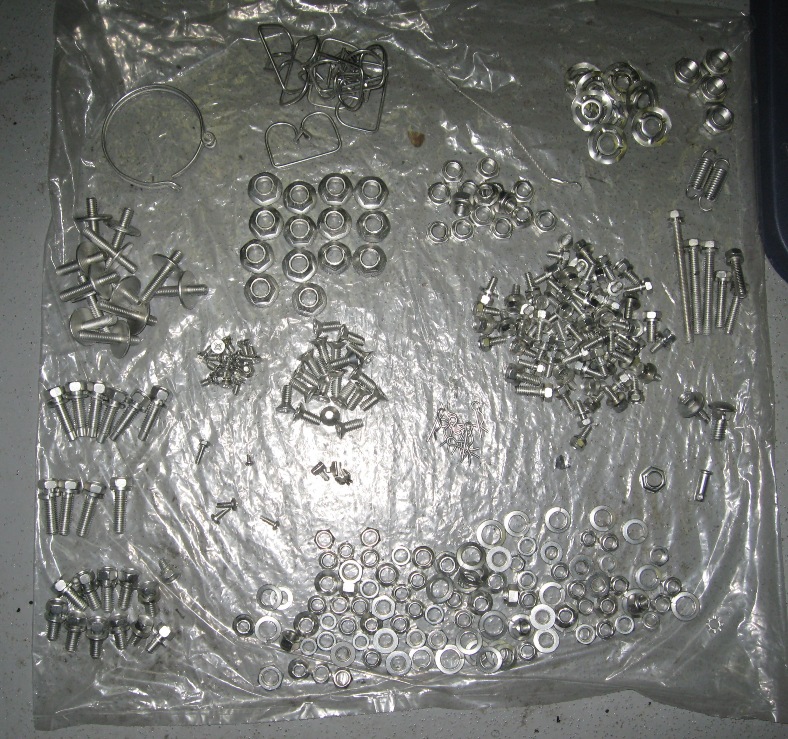
Finally! All the fastener phosphating is finished. As you can see in the pic below, this is a considerable amount of fasteners that were re-plated. I counted around 800 pieces. Basically, this is about 3 cars worth of phosphate finish fasteners. So far, I am very pleased with the results.


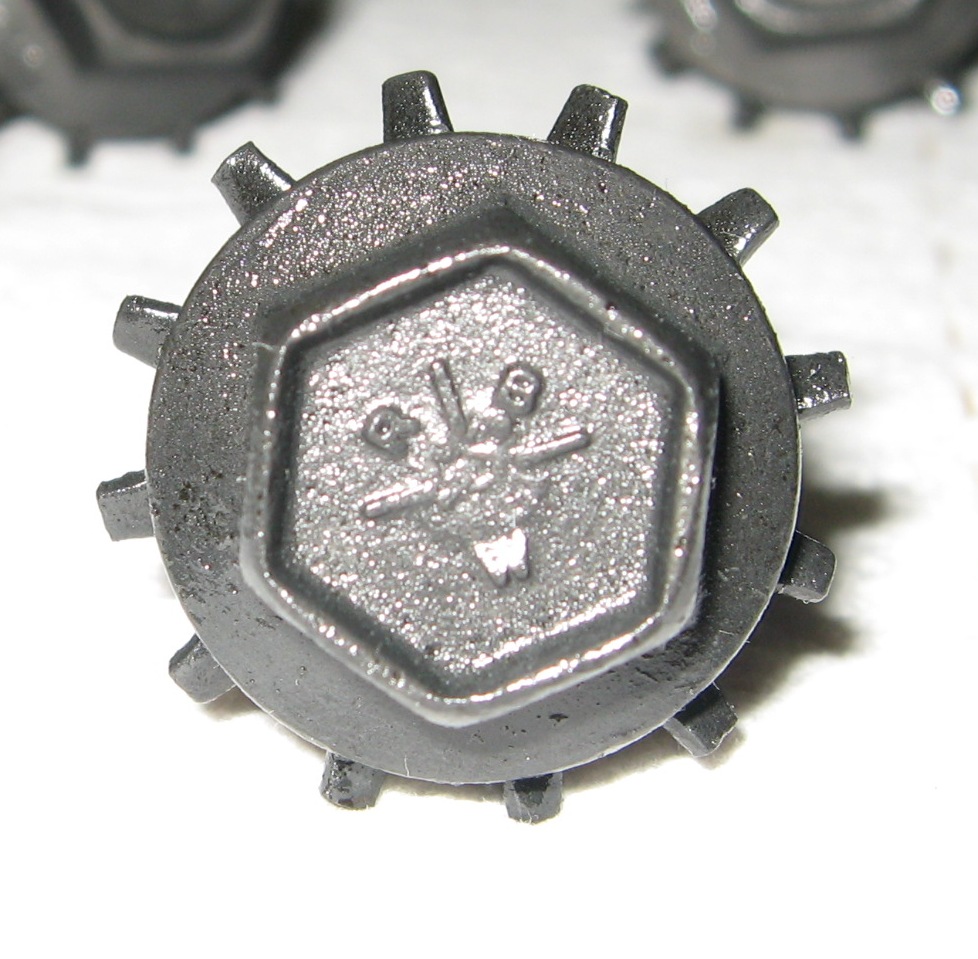
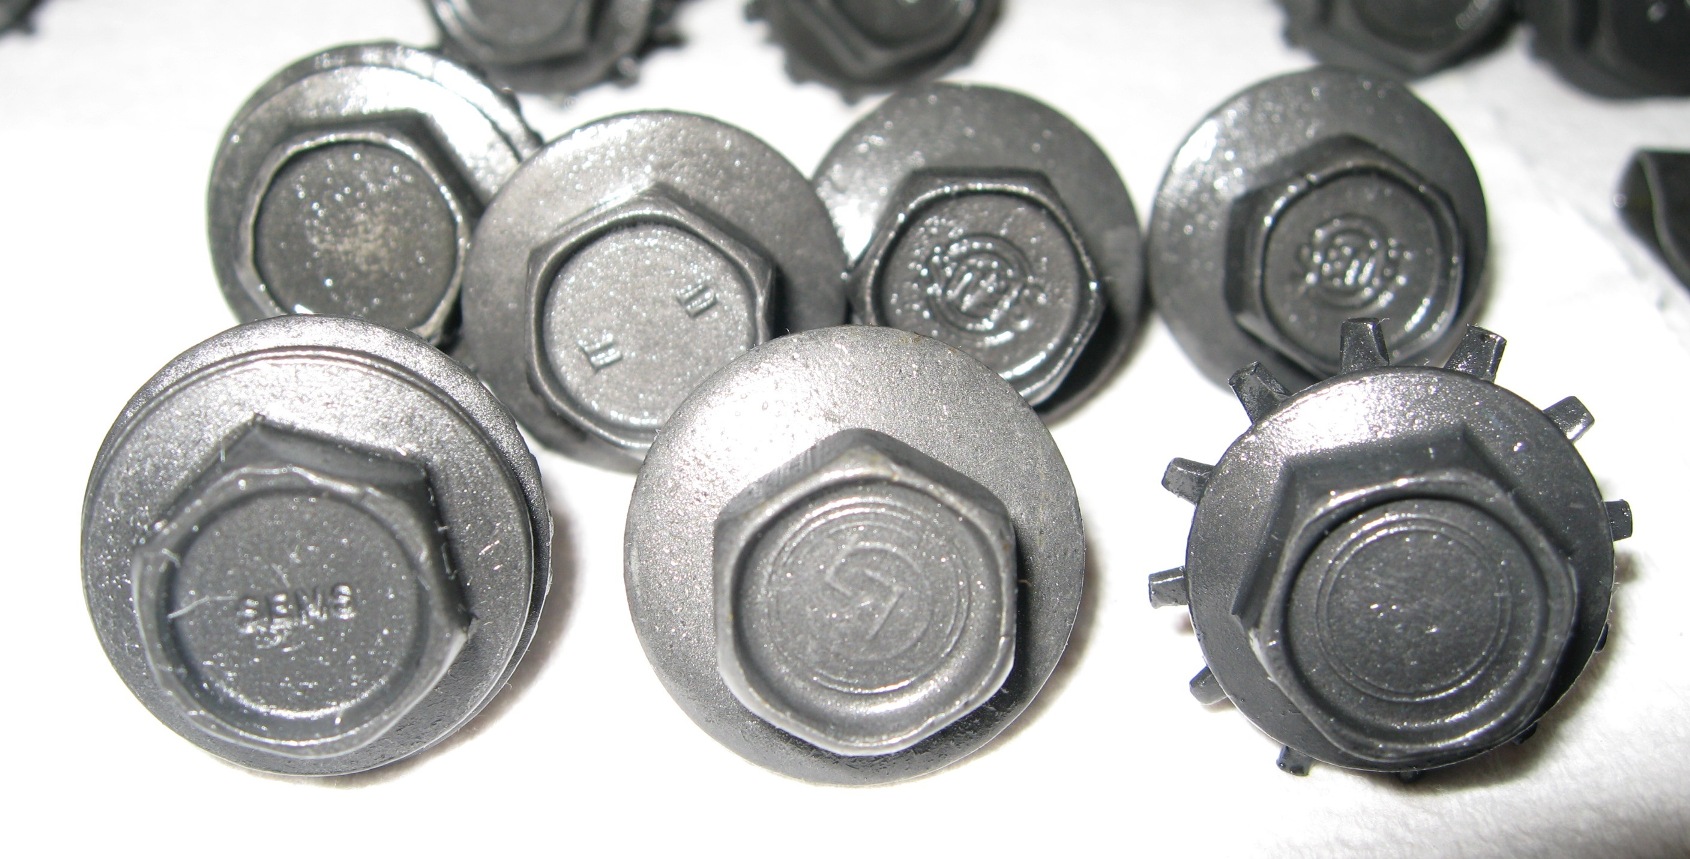
During the refinish process, it was easy to see some trends when it came to San Jose fasteners. The most predominant body fastener is the star HTS bolt. There are probably 50+ of those that were refinished. Next most common would be the double ticks. Finally, the next one would be the HTS star with concentric circles. For the small sheet metal screws, like that attach the splash shields, they were all the diamond marking. Most everything else was pretty consistent with other assembly plants. Refinishing these fasteners will yield an extremely accurate representation of what was used at San Jose around Feb. '65. There will be no reproduction fasteners on this car.

Here are a few of the odd-ball bolts. The first one is the RBW. There was only one of these in the mix. I actually don't know where it came from or which car. There was a slight bit of pitting on this bolt, so not sure I would use it on the K.


Next are a couple of other one-off bolts. There were just a handful of disc washer bolts used at this time in San Jose.


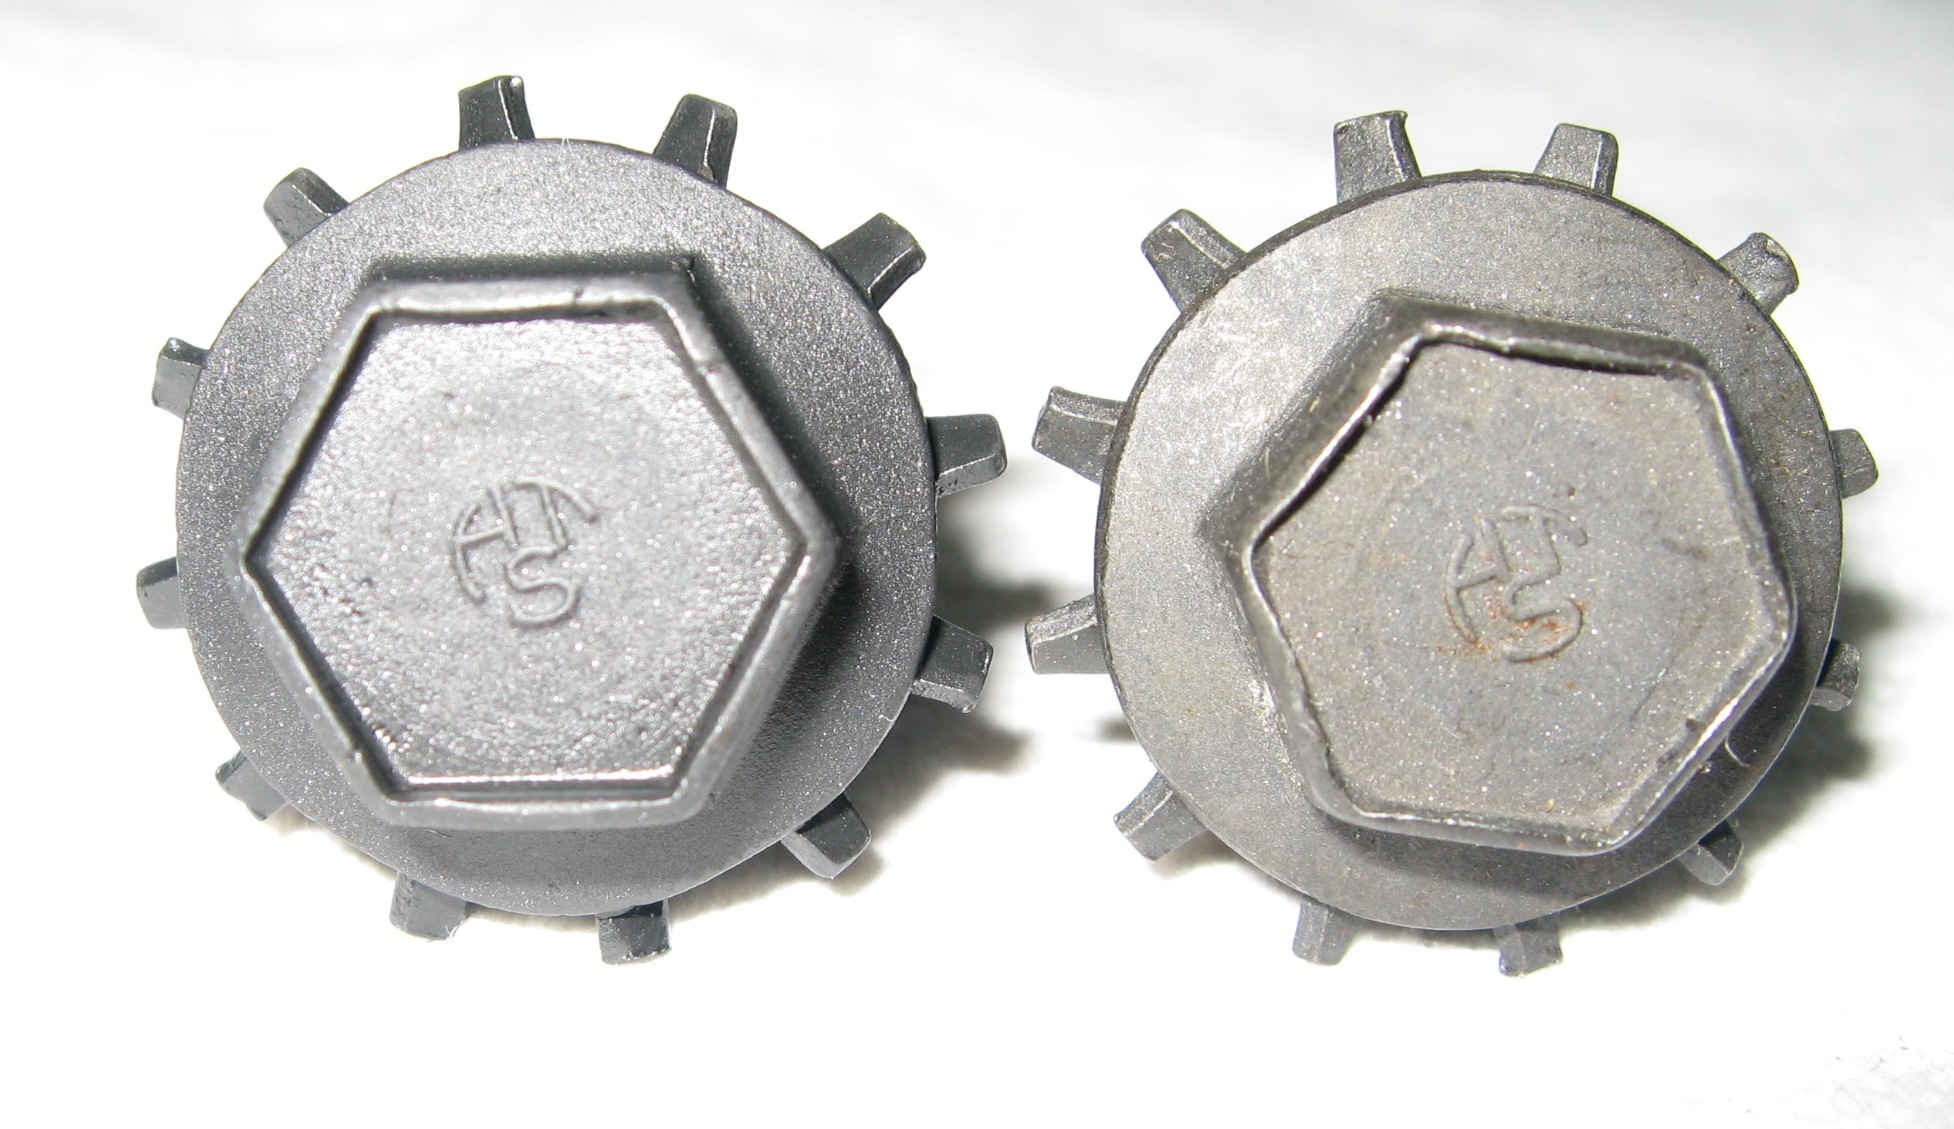
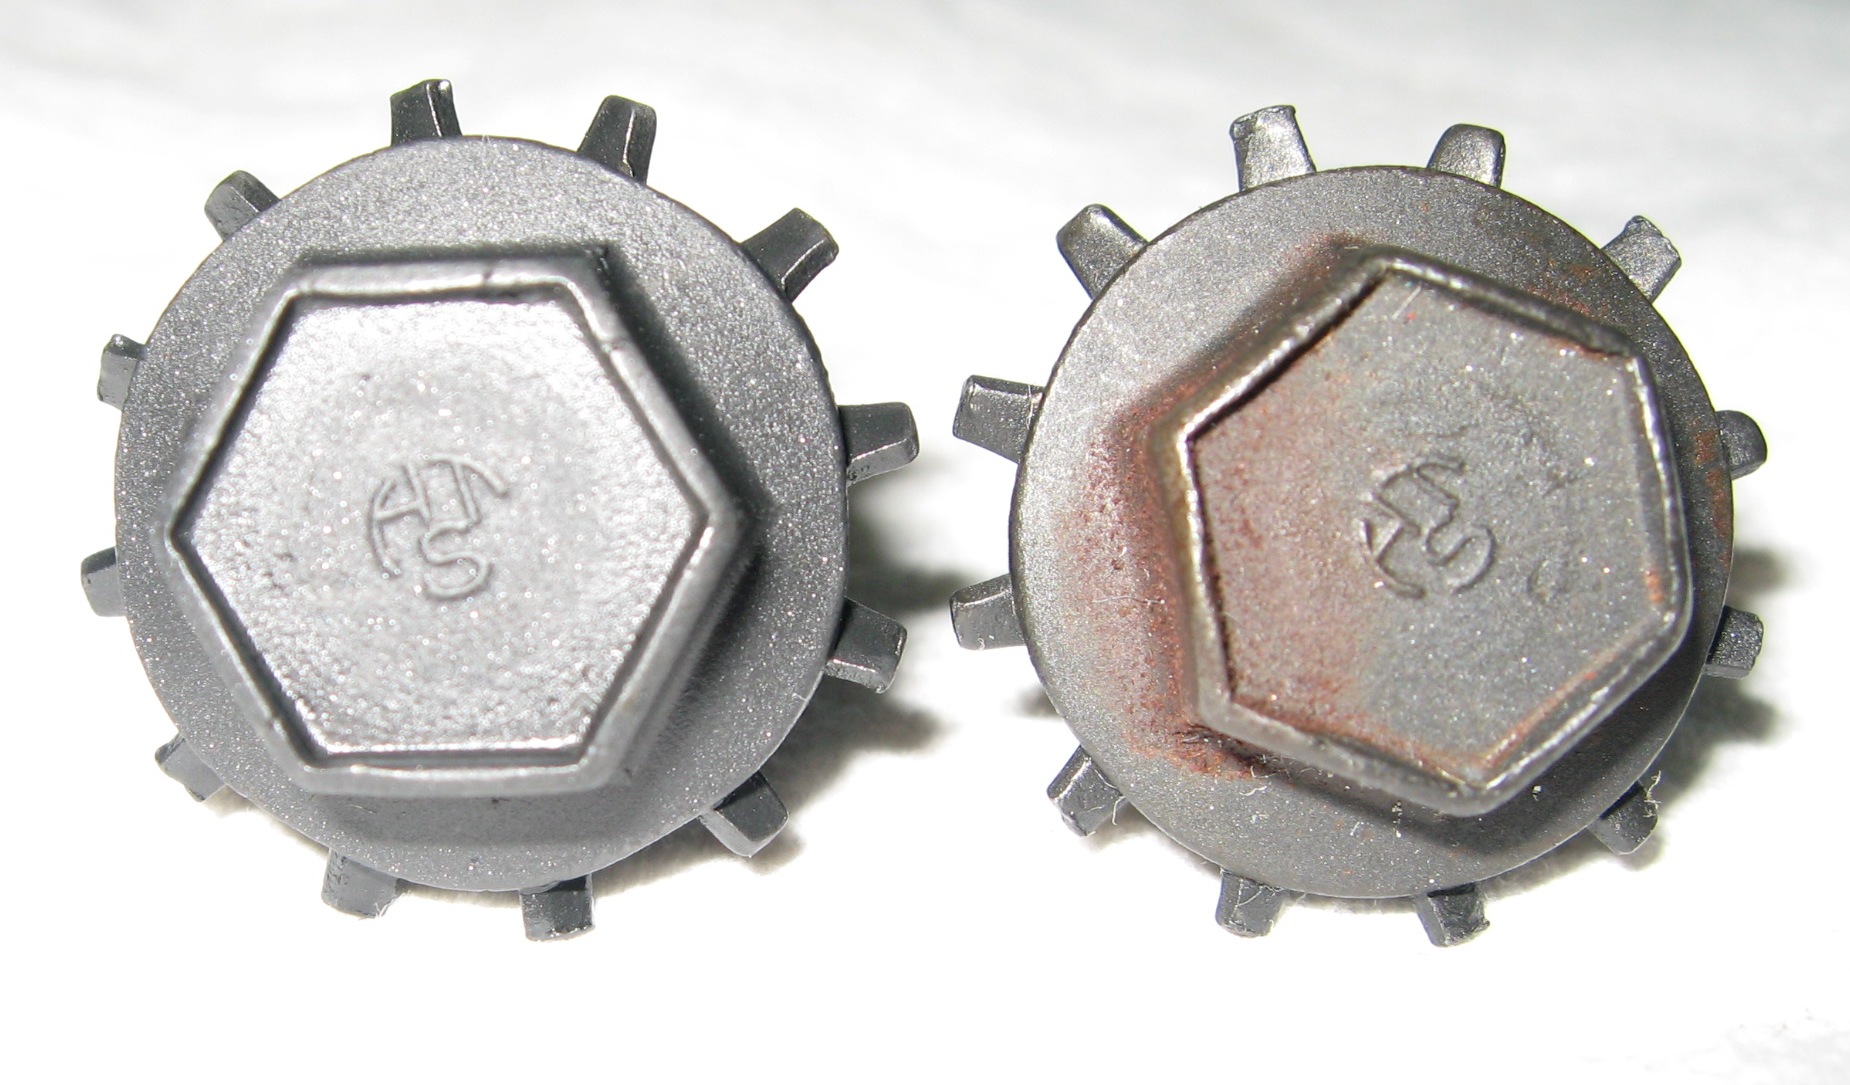
Now to something a little more interesting. Ever wondered how accurate the AMK bolts are? Here's one side by side with an original. The one on the left is a refinished original, one on the right is an AMK one. Of course, I have not made a large study of HTS star bolts to determine if there were variations in the logo. But, if you look closely, you can see there is a subtle difference in the 'S'.


Here's an original refinished bolt on the left compared to an excellent original on the right. The phosphate match is pretty much dead-on.


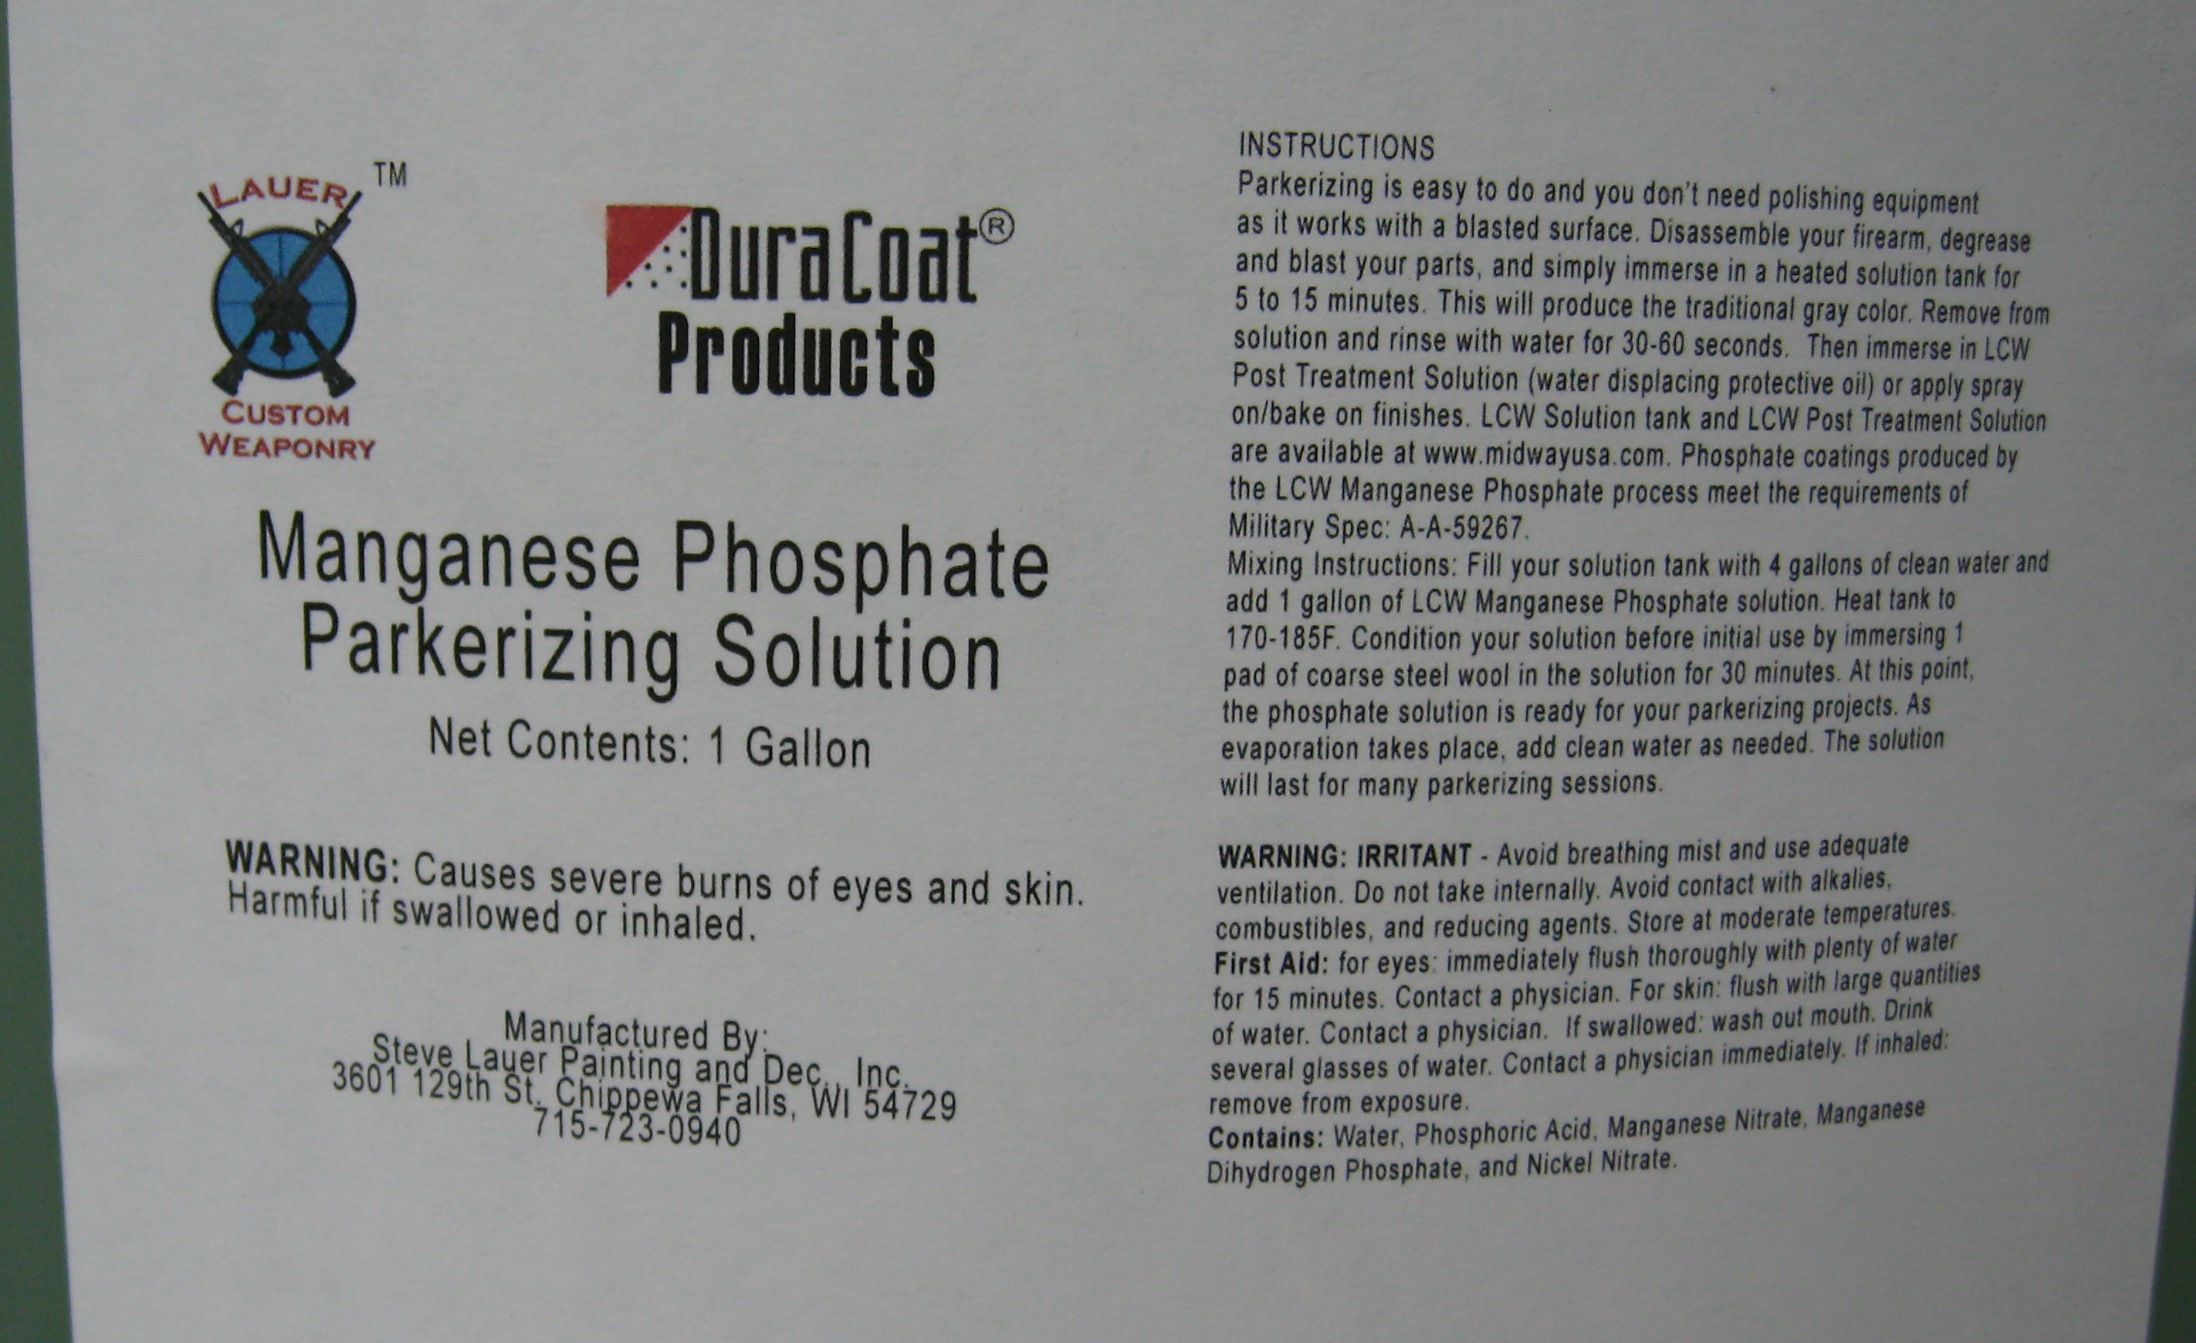
For those interested, here is the label of the solution I used:


Will be going to CA this week to the MCA National show. Hope to start doing some serious assembly work when I get back!

Tuesday, August 18, 2009

8/17/09

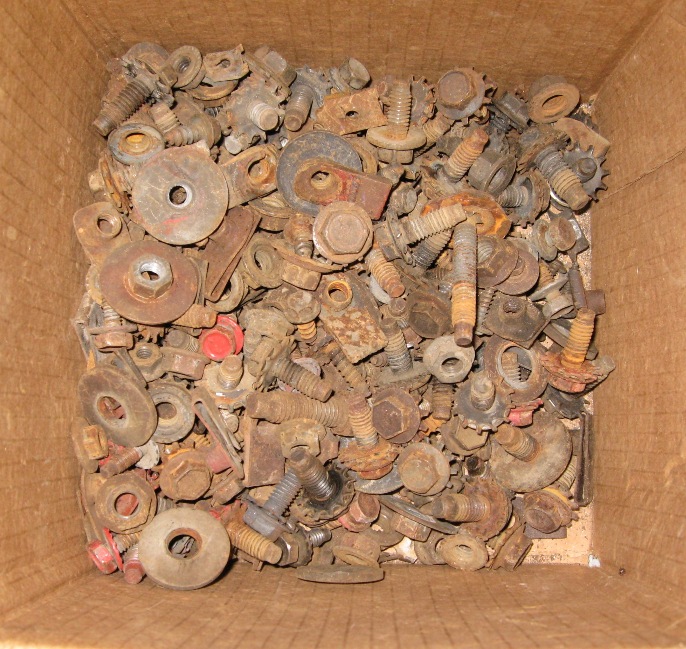
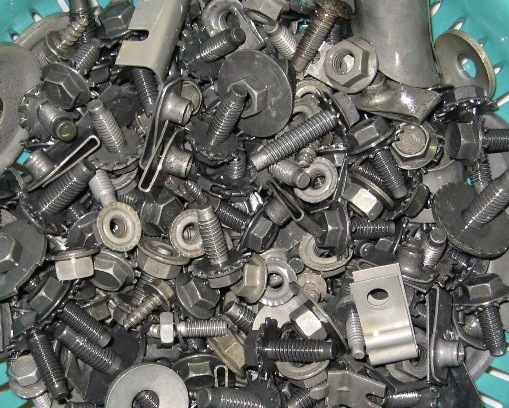
Here are the pics of some phosphated fasteners. The picture was taken with a flash, so keep in mind that the color is slightly darker in appearance. Also, notice that there are varying shades of color, which are a result of the type of steel and the forming process. The solution used was manganese phosphate, I have found that zinc phosphate is way too light. The solution was primed in a stainless steel pot with a pad of coarse steel wool for half-hour at 180-185F. After that, my fastener batches are left in the pot at this temperature for 15 minutes. Take everything out, rinse/brush off with water, dry off and then dump in oil for 24 hours. The pic of the finished fasteners is with some oil still on them. I'll let them drain another day or 2 before cleaning off the oil. Just as a reference, you can see what I started with!


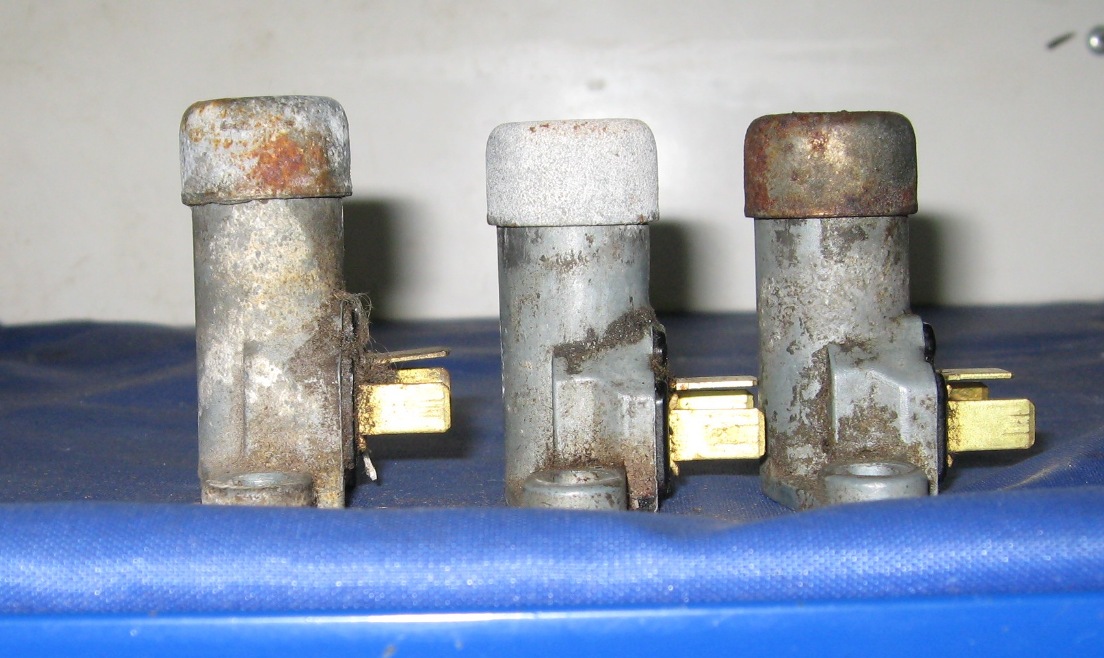
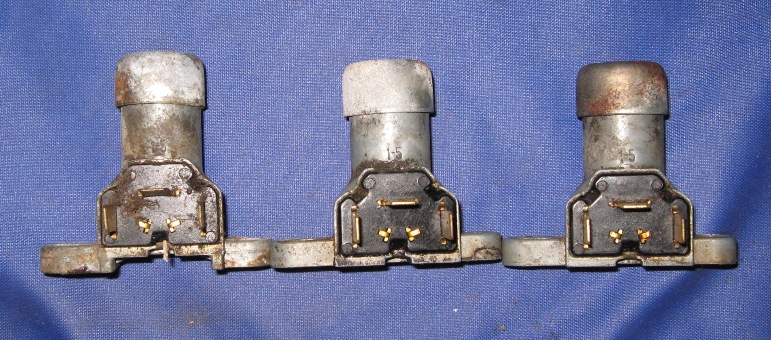
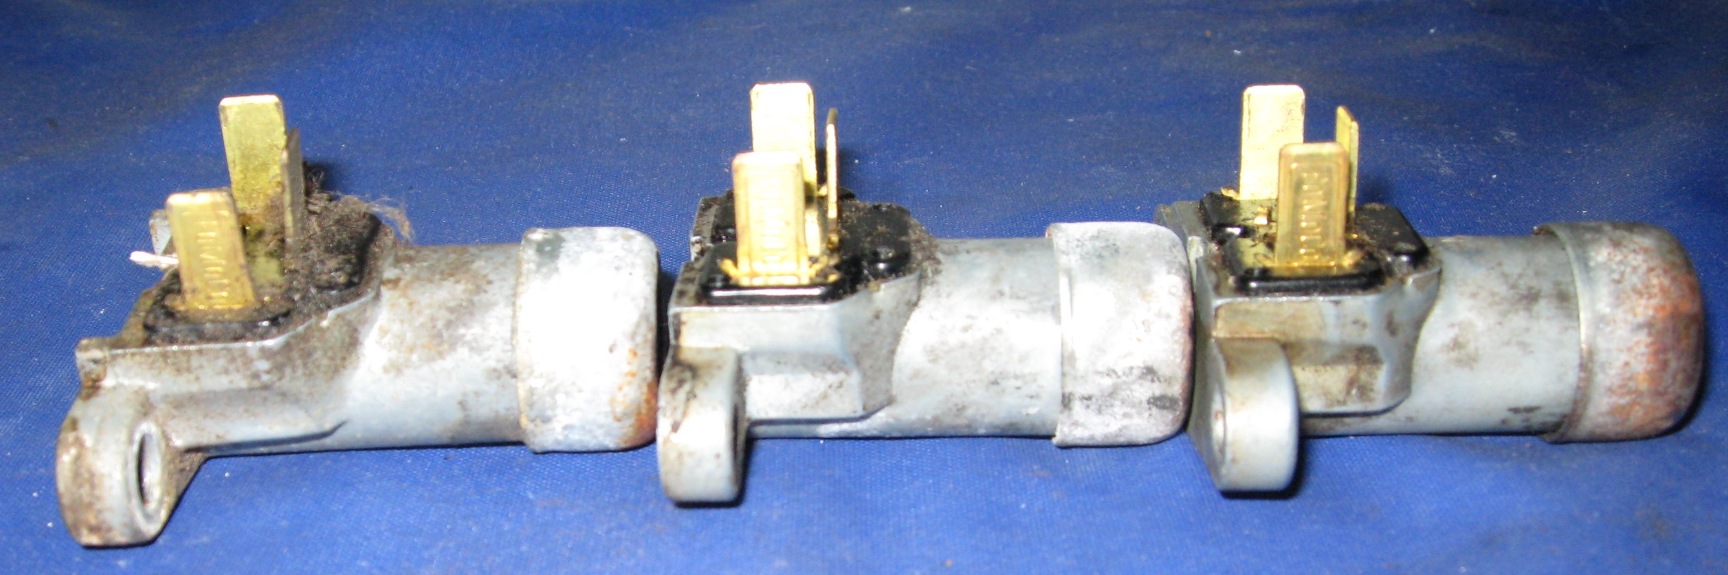
Next up, another obscure detail. Still not sure of the answer to this, but here goes! The San Jose headlight dimmer switches used at this time in production (Jan/Feb '65) had a round top head and somewhat short cap (in comparison to other versions.) I have 2 switches from the 2 coupes and 1 from the K convertible. Unfortunately, I never thought to measure these when they came out of each car. What I have found is that 1 measures about 2" in total height while the other 2 are 1.90". They are all of the same design. Have FoMoCo on one of the plug spades and "1-5" cast into the middle section of the switch body. Of course, my curiosity got the best of me, so I checked in the assembly manual, which states there is an A & B version, but does not indicate what the difference is. The 1965 assembly manual and also the 1968 have the same notation. Checking the single year 1965 master parts catalog, there is only one dimmer switch version that was serviced, which is the -A. Nonetheless, the service parts could be several varieties. I have not seen an NOS version of these San Jose switches. My initial guess is that the longer dimmer switch is for convertibles, but I need more information to make a better ascertainment. Here's a few pics to show my findings:


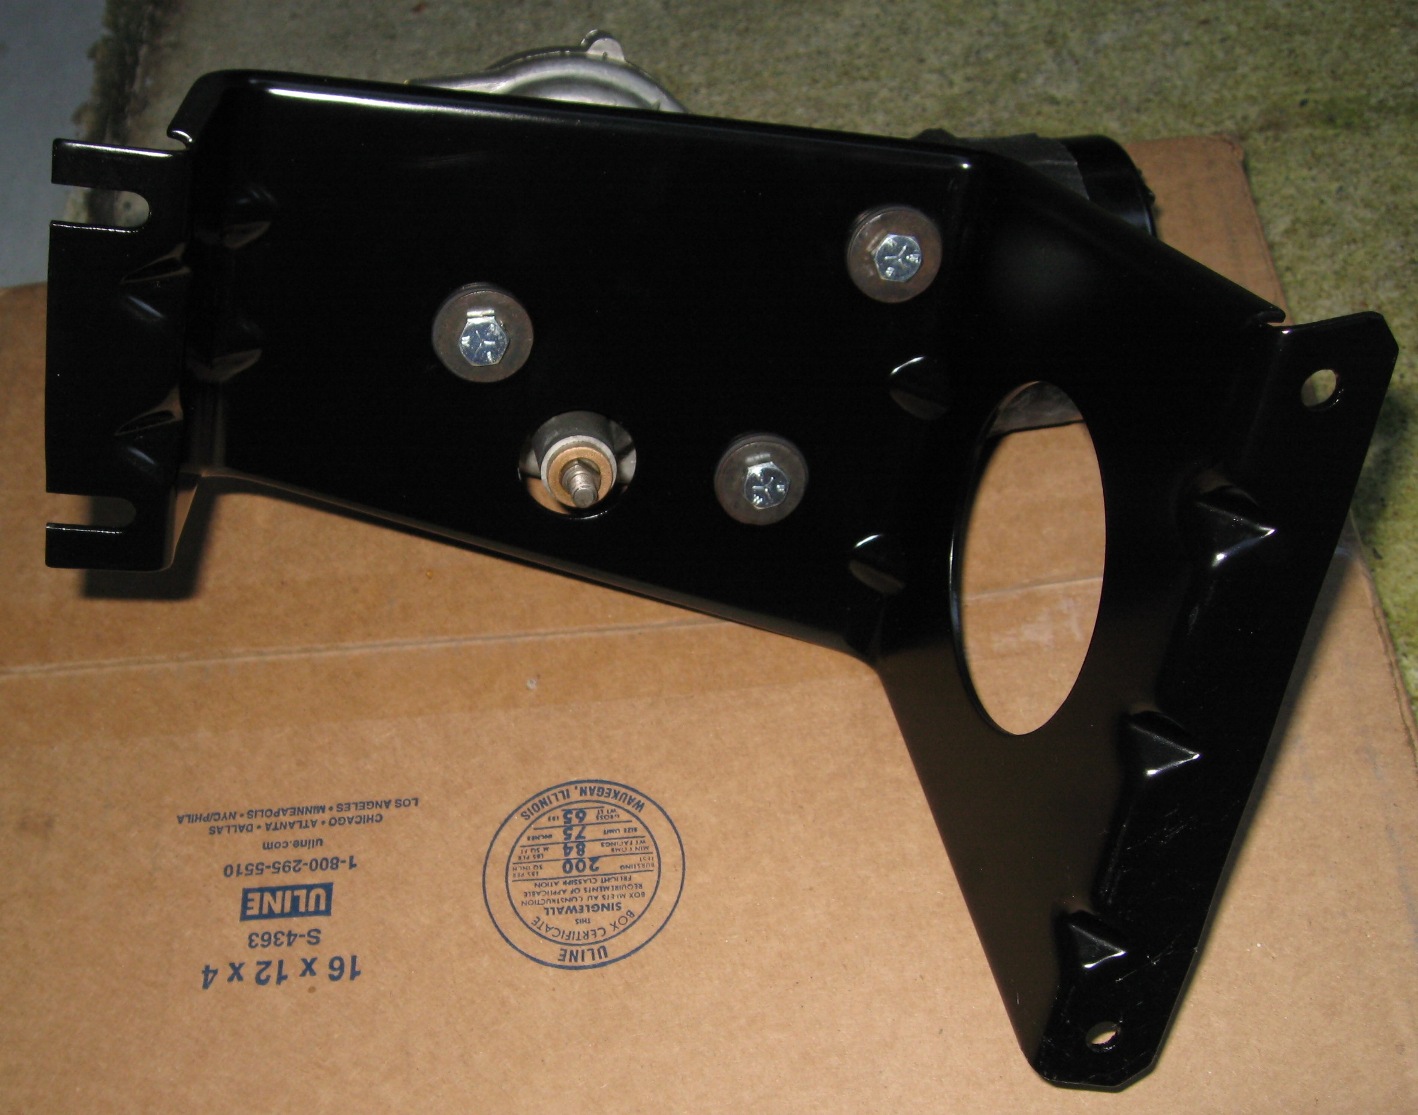
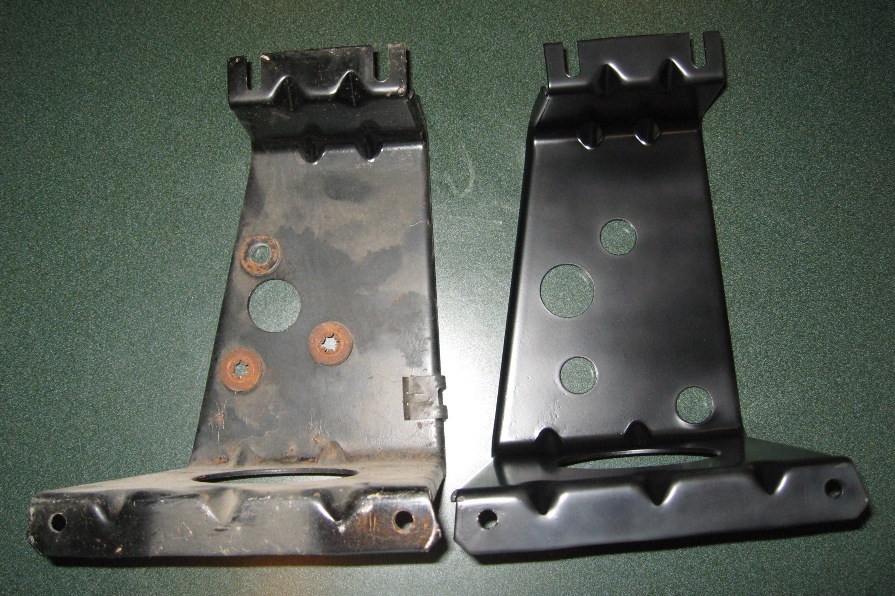
Last item to share is another obscure detail. We know that 2 speed wipers were optional equipment in 65-66. We also know that the wiper motors are different for each system, as is the wiring setup. But, did you know that the mounting bracket for the motor was unique for each motor!? I certainly had never discovered this until recently. Can't say it's much of an exciting find, but interesting to know for future reference. The bracket on the left is for single speed, the one on the right for two speed.

Monday, August 17, 2009

8/16/09

Under dash area is now being assembled. Spent some time over the past 6 weeks documenting the various shades of black painted parts throughout the car. This will take some of the guesswork out of painting parts when it comes time. Have also spent a considerable amount of time getting my phosphate/oil process down. Finally have settled on manganese phosphate. Will post a follow-up on that in the next few days after I complete all the fasteners.

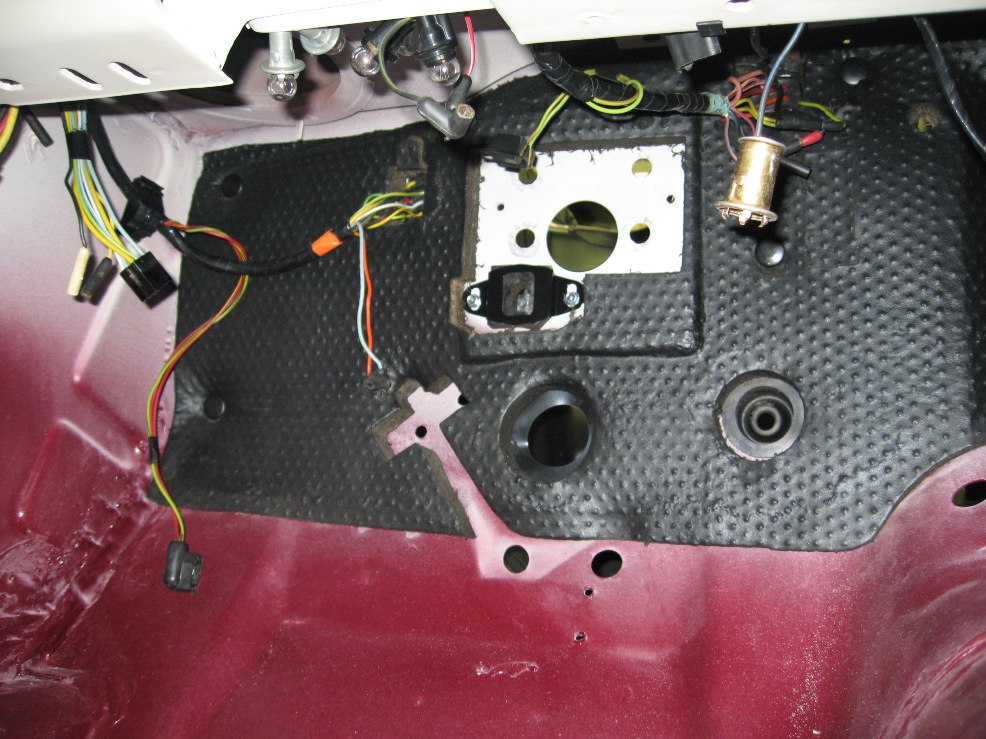
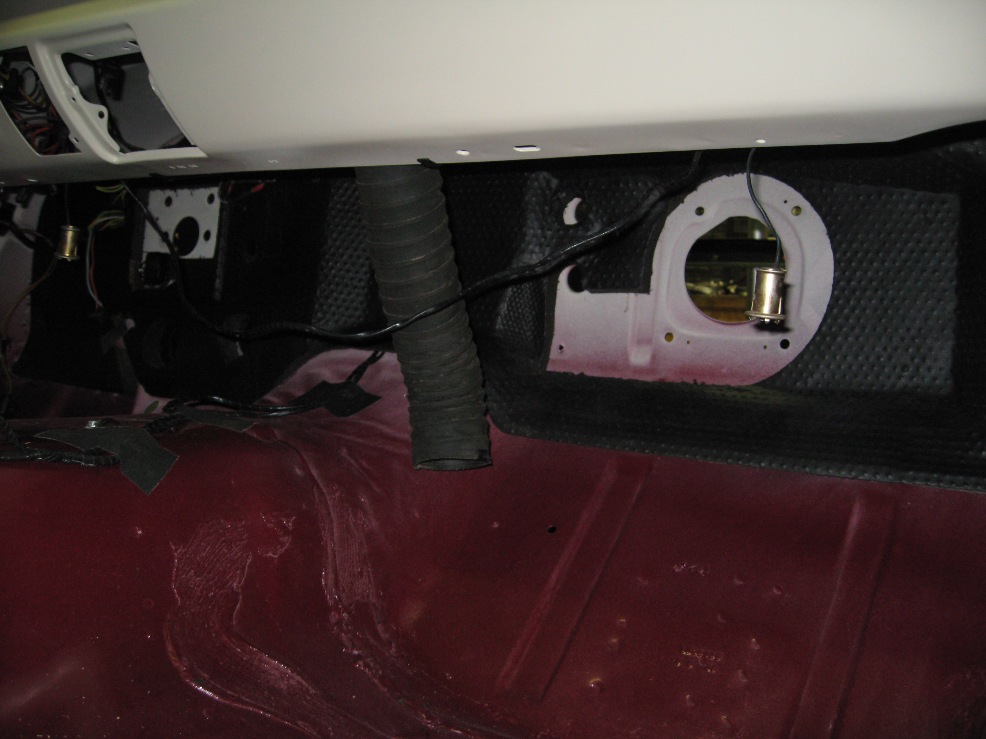
For now, here are a few pics from the under dash area. As you can see, the firewall pad is in gorgeous condition. It is the proper "dotted" San Jose variety. I highly recommend that anyone trying to do a high level restoration search out the correct firewall pad for your car. Reason I mention "correct" is that there were 4 versions of these through the '65 model year. The main differences are the dotted and textured firewall pads. But, the other difference has to do with the A/C hose location where it goes through the firewall. In early '65, there was not a knock-out plug on the firewall for the A/C hoses. Instead, 2 holes were drilled out and rubber grommets for each hose used. There is a punch-out on the firewall pad to reflect this location on a factory installed A/C car. On later cars, there is an oval knock-out, which has an accompanying oval punch-out on the later firewall pads. The change probably occurred sometime in March '65.

One unique detail that some may note is the felt shifter rod seal setup. The seal and retainer are the original ones from the K convertible. A unique piece that most associate with 64.5 cars, but like many of these "64.5" parts, they were used well into '65 production.

Another minor detail to mention is the firewall pad clips. The San Jose ones used at this time period simply had the 2 tabs near the head. No teeth locks.


Friday, June 19, 2009

6/19/09

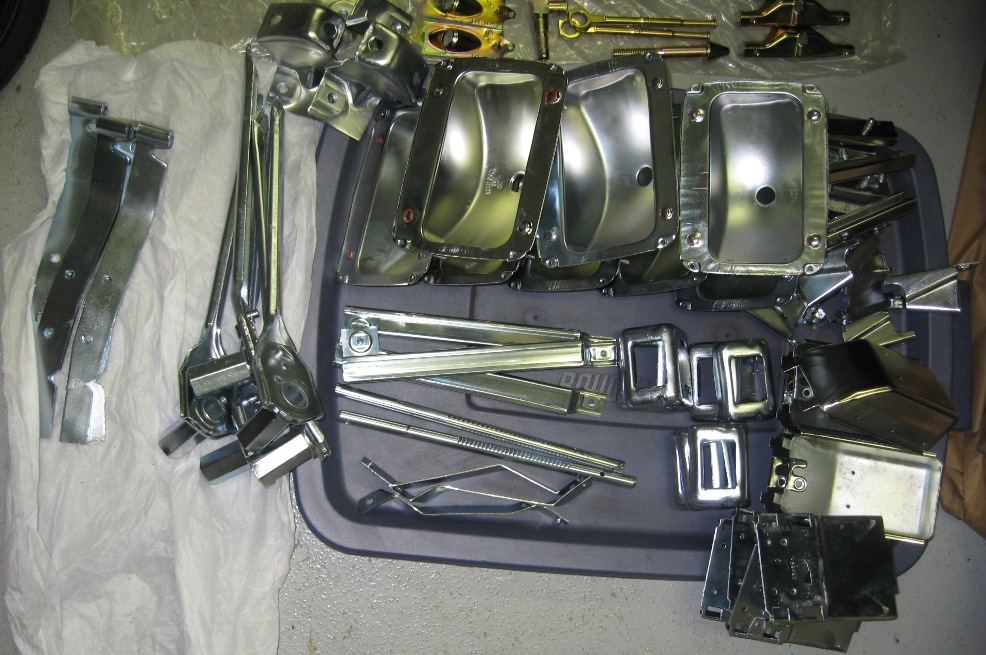
Fasteners! Picked up all the parts from the plating shop today. Everything is unwrapped and mostly sorted. The zinc dichromate turned out a little more "pinky" than I would like. I may end up having some of those parts re-done somewhere else. Otherwise, I thought the clear zinc and cadmium turned out really nice. Have to take back the door glass bottoms and quarter sliders, they mistakenly plated those zinc dichromate when they should have been clear zinc. I still need to do all the phosphate pieces. I'll most likely do those myself.

Clear zinc:


Zinc dichromate:


Cadmium:

Monday, June 1, 2009

5/31/09

Continuing to clean parts and fasteners. The fasteners will go to the plating shop this week, nearly everything has been cleaned/glass beaded.

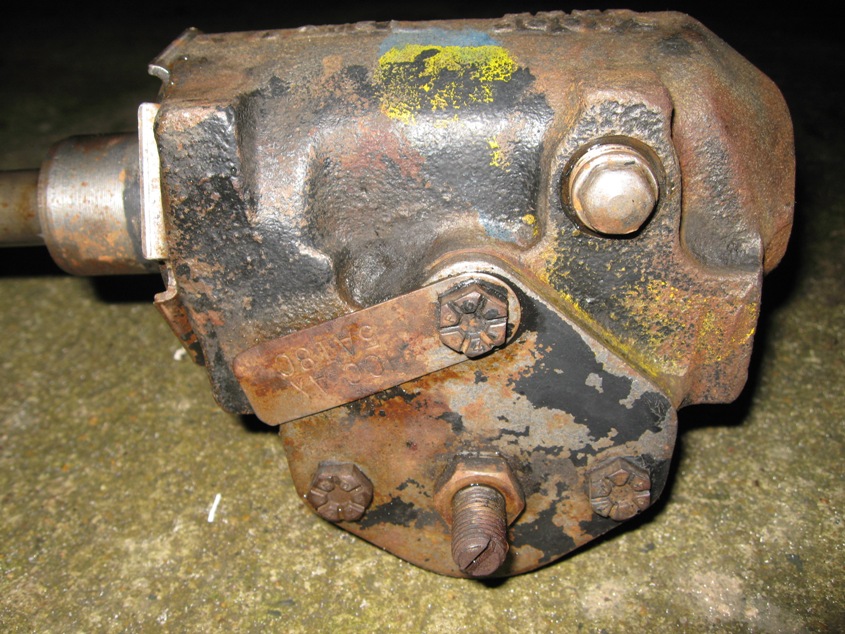
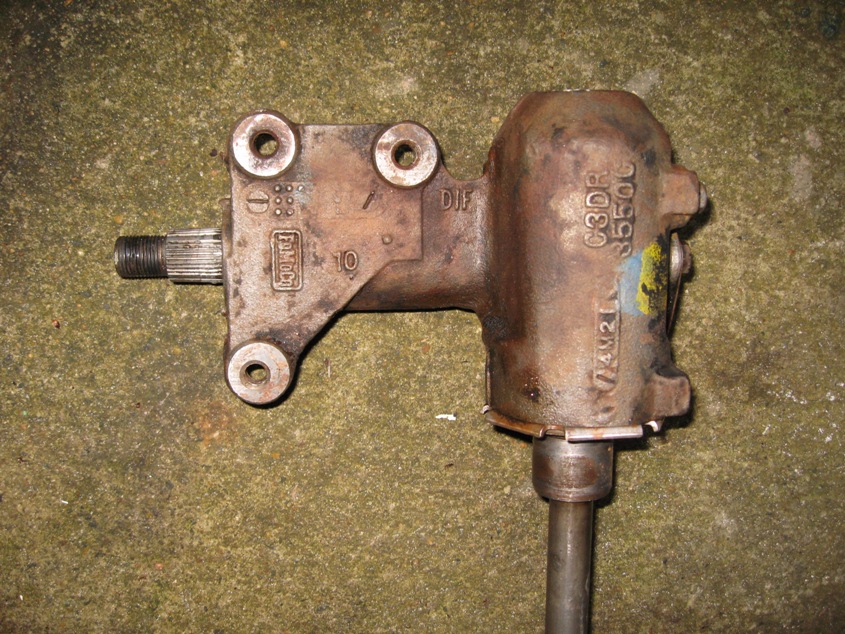
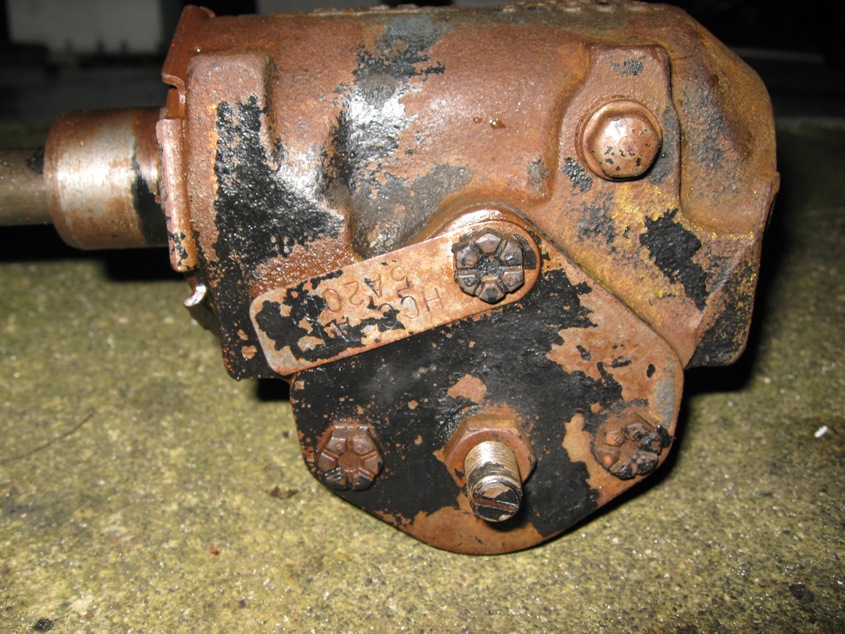
Cleaned up some of the suspension parts. First up is the steering box. This is the original HCC-AX box from the K code. 5A18C date on the tag, 4M21 casting date on the steering box body. Found a couple paint marks. A yellow swipe on the end of the shaft near where the steering wheel attaches and then a pink swipe in the middle of the shaft. On the box, there was a baby blue paint daub on top and then yellow over the top of it, but not obscuring the blue. Then there was what appears to be yellow sprayed on the top near the back/bottom edge. The top of the steering box was blacked out as I have found on other original steering boxes (from different assembly plants too.) This was done before the box went in the car as there is black over spray on the base of the shaft. I have included another steering box with a scheduled build date of 6 days before the K code at San Jose, it also has a blacked out steering box top.


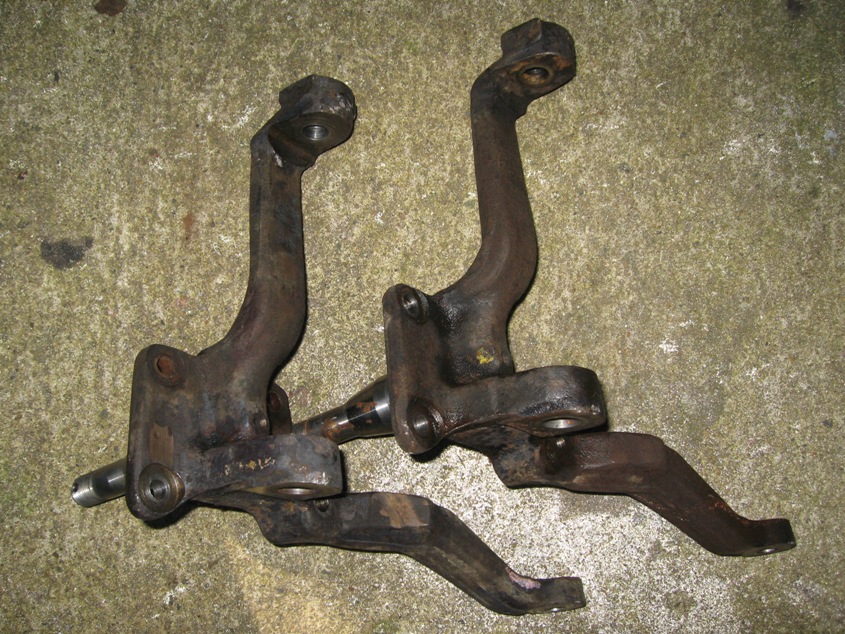
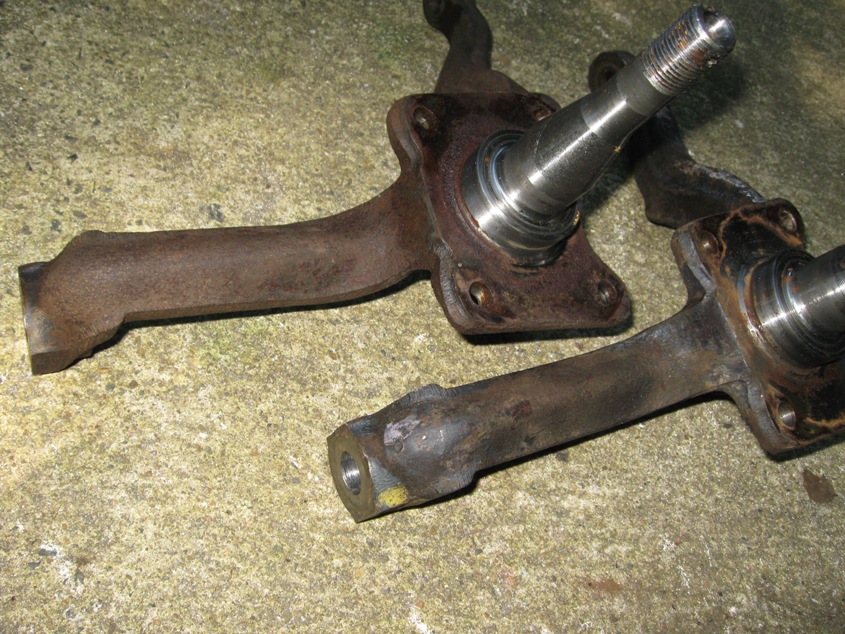
Next up are spindles. These are always interesting parts to clean. After you've cleaned a few, you start to expect certain patterns. The predominant markings on '65 spindles seems to have been pink and yellow. I believe the markings were a mix of inspection marks and identification. I have the original spindles from the K convertible, which were somewhat rusty, but still yielded a few markings. I also have the pair from the coupe with scheduled date 6 days before the K convertible. Those spindles were much nicer and more paint marks were exposed. The spindle markings were mostly consistent, only one variation. All of the spindles had pink paint splashes on the arm ends with yellow and/or pink daubs on the upper arm. I took pictures of the LH and RH in pairs. Also, the dark gray finish can be seen on the non-rusty spindles. There's a bunch of spindle detail pics here: http://www.early-mustang.com/charles/K_vert/5_31_09/


In a previous blog, date codes on lower control arms were discussed. Date codes were found on the uppers also. I have 4 original LCA's with date codes and 4 UCA's with date codes. Based on my observations, I believe they were dated by quarter. For instance, C4 would mean 3rd quarter of '64, D4 would be 4th quarter of '64. These are the 2 codes I have found on the 8 control arms.
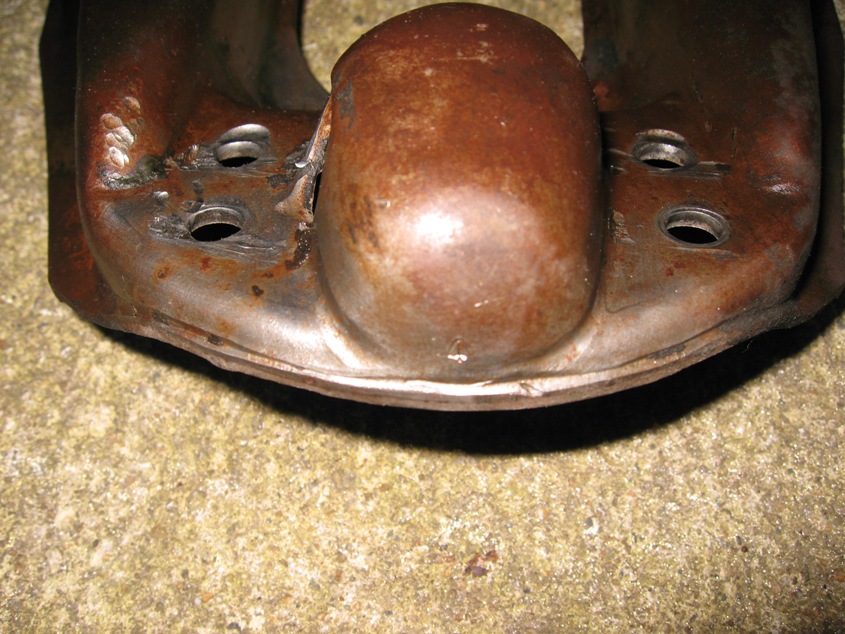


Here's a comparison of an NOS Ford service replacement lower control arm to an original assembly line control arm. Much to my discontent, there are glaring differences. To add fuel to the fire, there are multiple versions of NOS service control arms, with the last versions service not even having the dipped black ends. With some work, a service replacement control arm could probably be modified and look pretty close to a factory line part. The ball joint boot would have to be changed out at a minimum and then possibly change out the rivets to match the original. I'm sure there were variations in the rivets and style of compression, but at San Jose at the time the K convertible was built, there was no waffle pattern on the top of the LCA rivets. The other notable difference is the jacking tabs. The original tabs are about an inch further to the end than NOS. Also, the style of tab is different. The originals are a perfect square with square edges (the ones in the image below are damaged.) The NOS has a rounded appearance with tabs turned around the sides. Otherwise, the general shape of the control arms are the same, end bushings are similar.
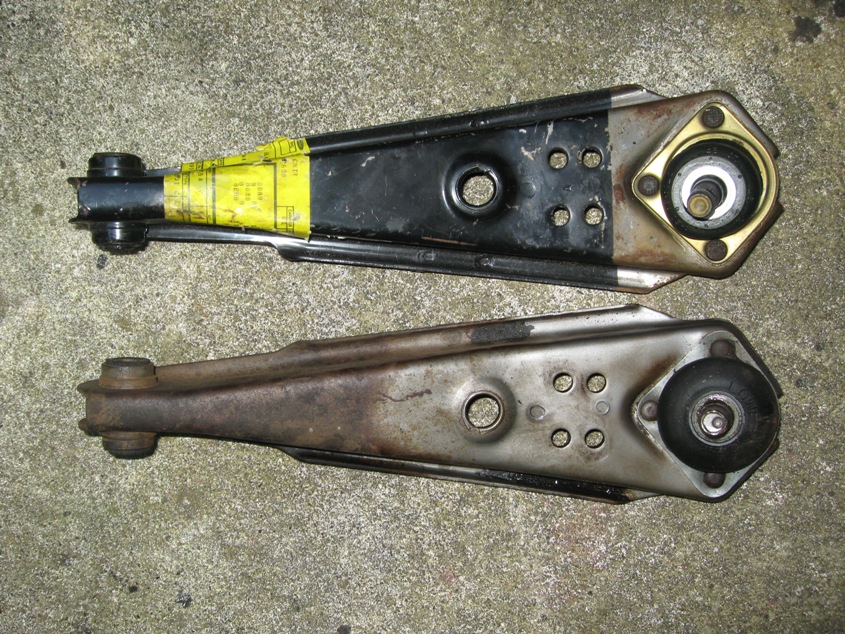
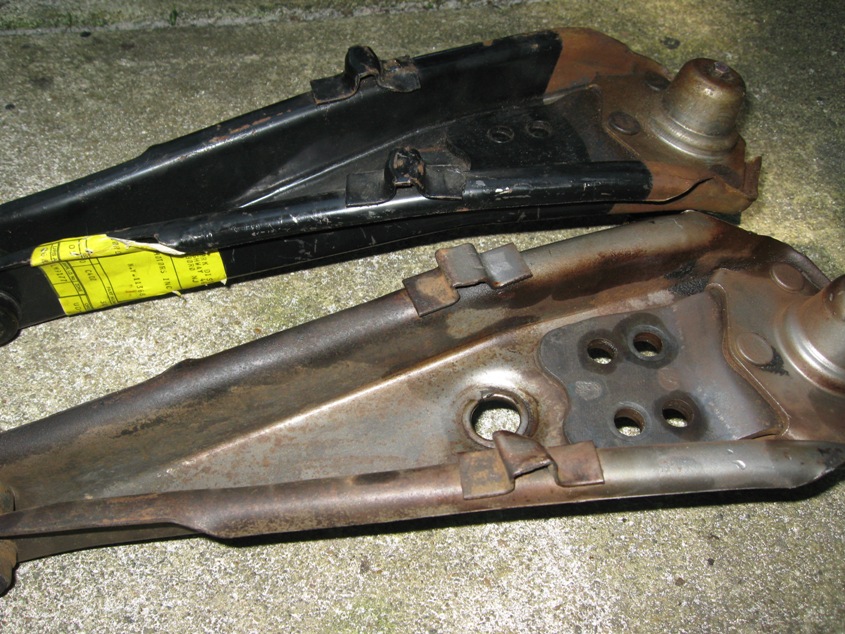


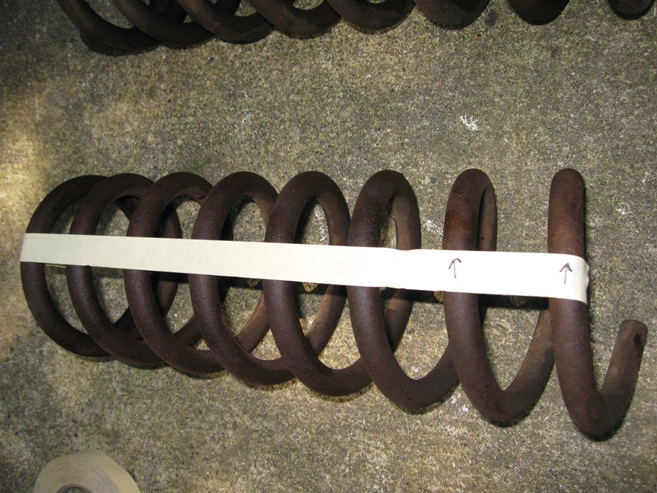
Moving on to coil springs. Ford documentation shows two spring paint marks for the Special Handling Package in '65. Coupes/fastbacks with P/S and/or A/C and all convertibles should have a brown stripe marking. Coupes/fastbacks without power steering and air conditioning have a red stripe marking. The red and brown are only for cars with the Special Handling Package, which was included with the K engine option or later with the GT option (also an option on all V8's.) Some springs have been found with white stripes, which indicates a variance from the spec. Finding a brown stripe on an original spring with surface rust is somewhat challenging. I was able to find where the stripes were, but hard to make out the exact brown. It appeared to be a chocolate color brown. I ran a piece of tape next to the stripe for documentation of the orientation of the stripe. Only other mention about coil springs is that after lightly glass beading these with low pressure, the original finish appears to be a dark heat treated finish. No black paint could be found.


Last item to share is the pedal assembly. I have a super nice original for the K convertible, just needs cleaning and re-apply the black on the pedals. The picture shows the different finishes on the assembly and an example of the dip lines at the top of the pedals. Note the dip lines do not match, which they shouldn't be expected to.