Sunday, July 25, 2010

7/2/10

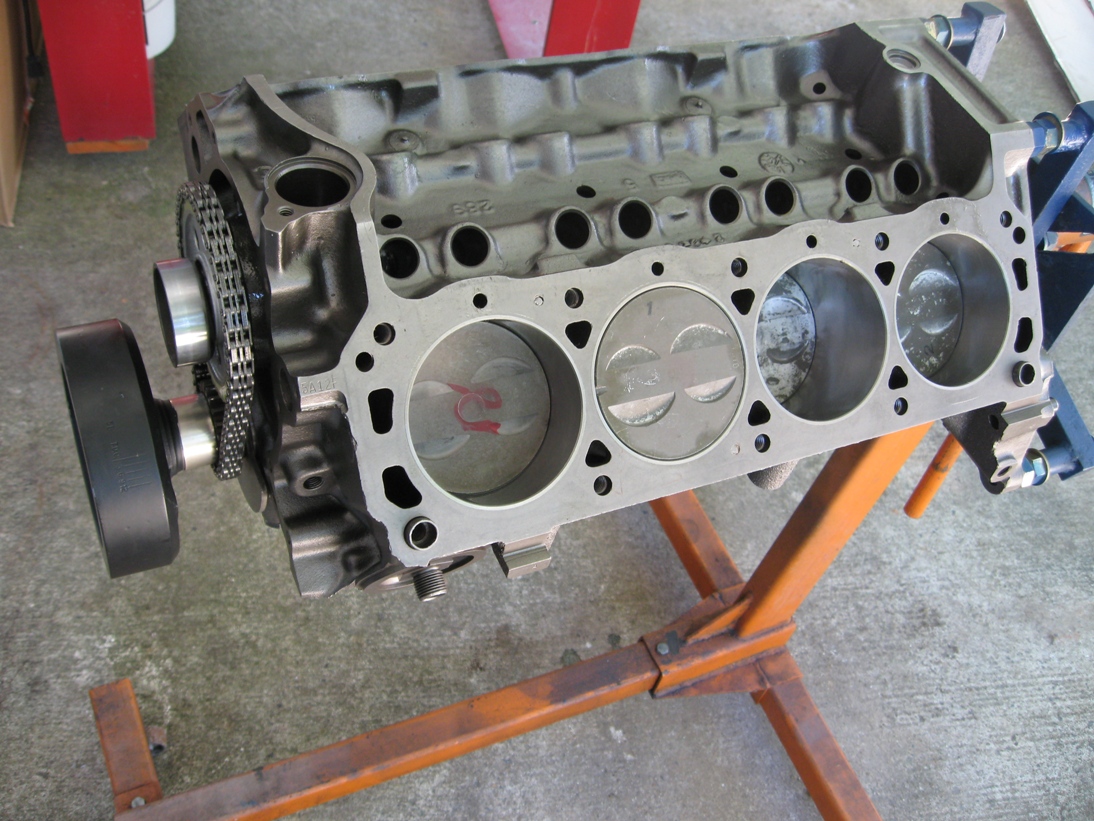
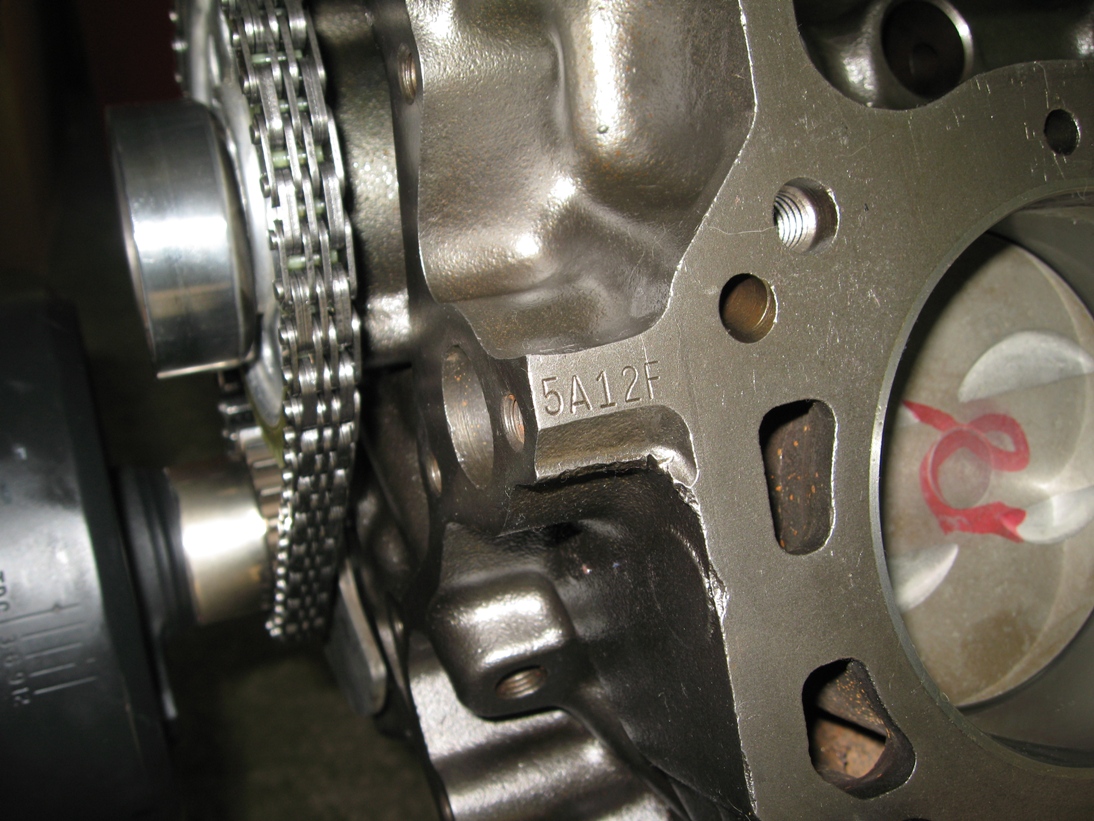
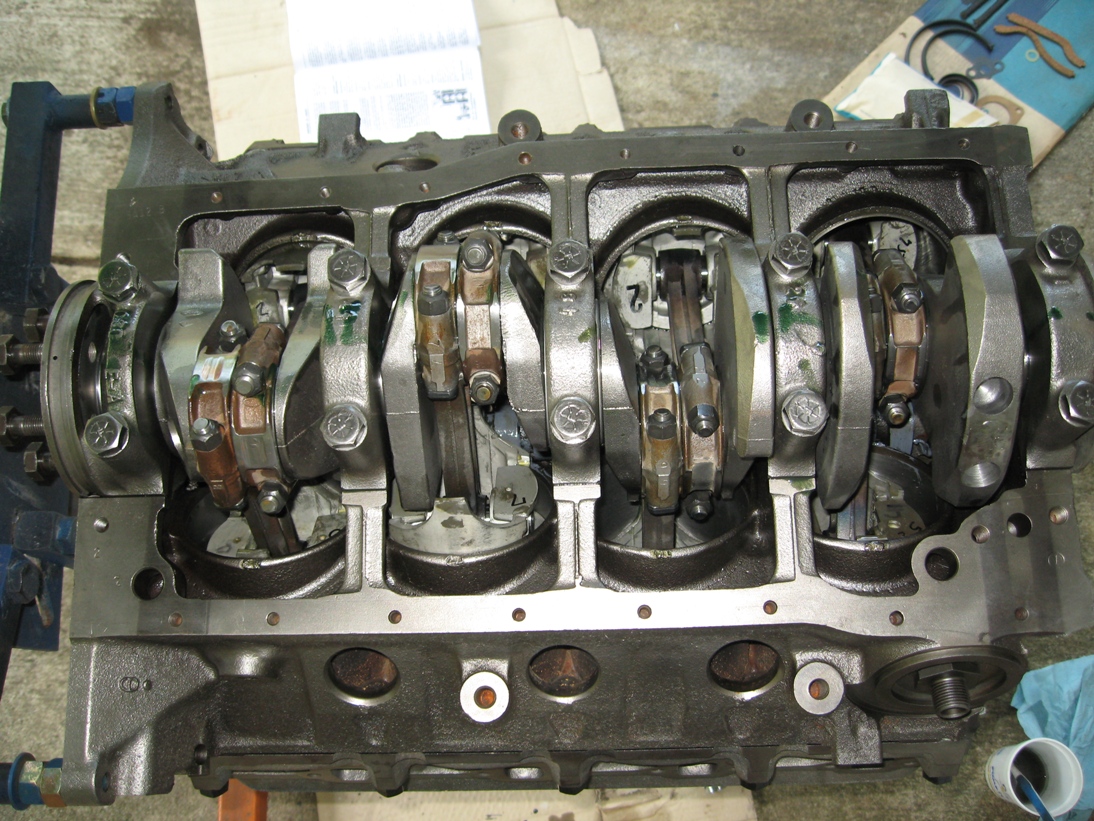
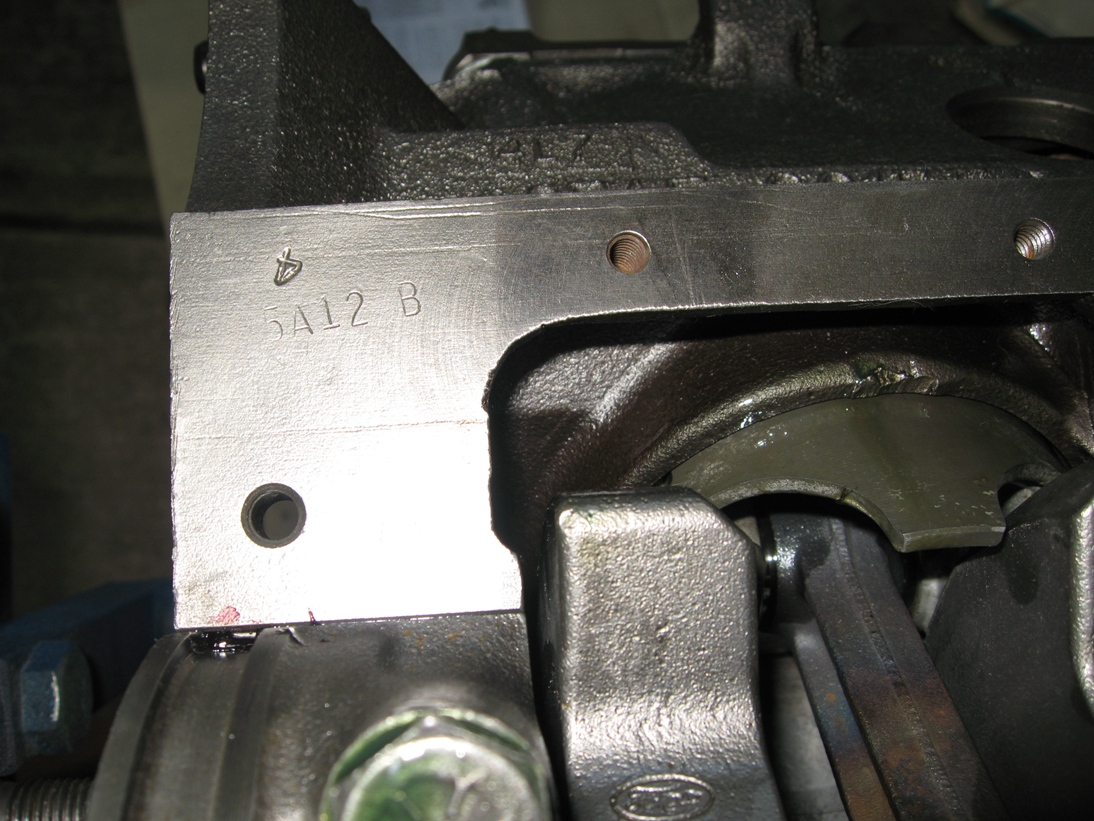
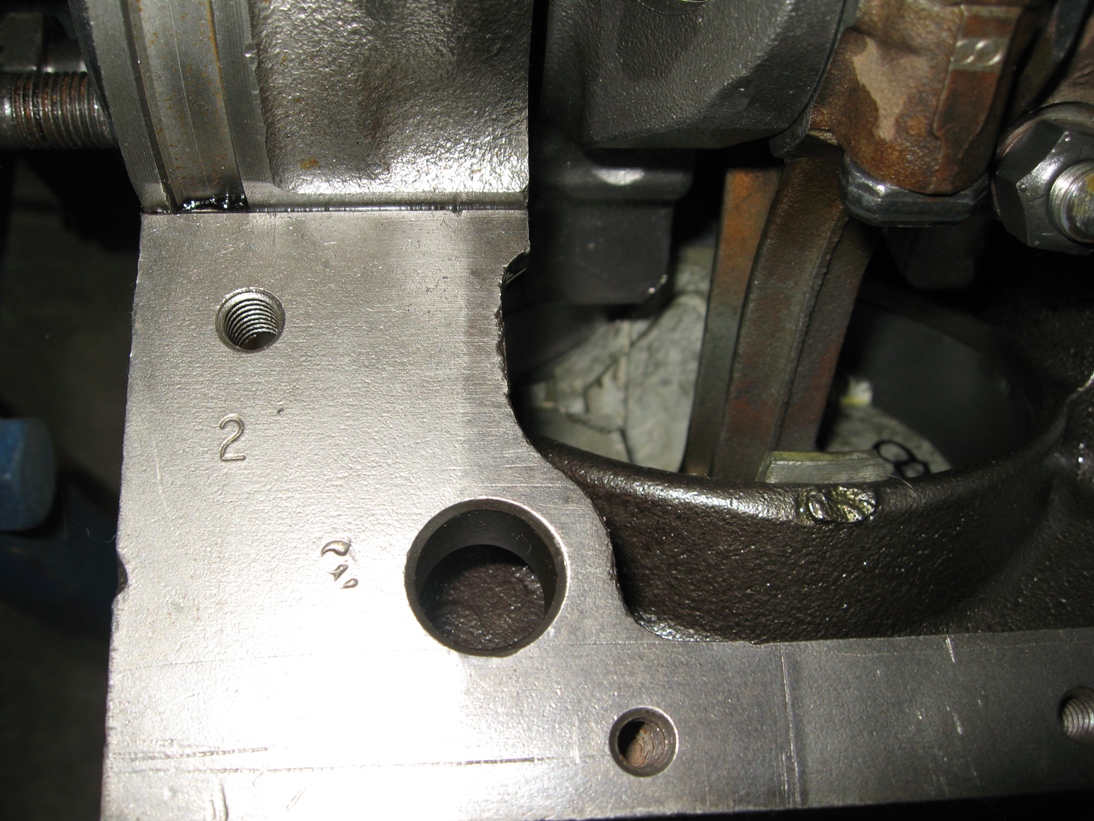
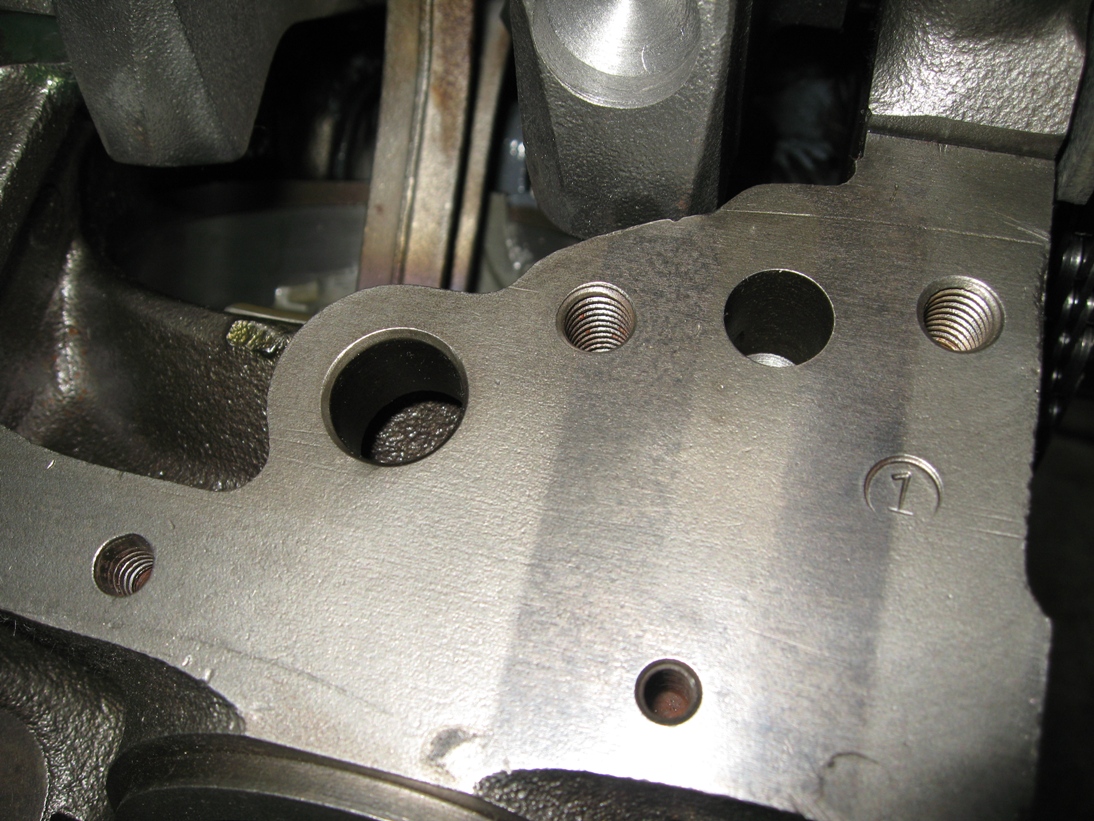
Got the engine back finally! Have already started to put parts on it, but here are some pictures when I got it back from the machine shop. This is the original matching numbers K engine from the convertible. When received with the car, the engine had been bored .060, which is probably a little more than typical. Decided to have the cylinders sleeved back to standard bore. Acquired an NOS set of hi-po pistons and had everything balanced. The block is balanced to 1.5g, which I thought was great. I'll be posting progress of the engine assembly as I go.


Wednesday, June 30, 2010

6/29/10

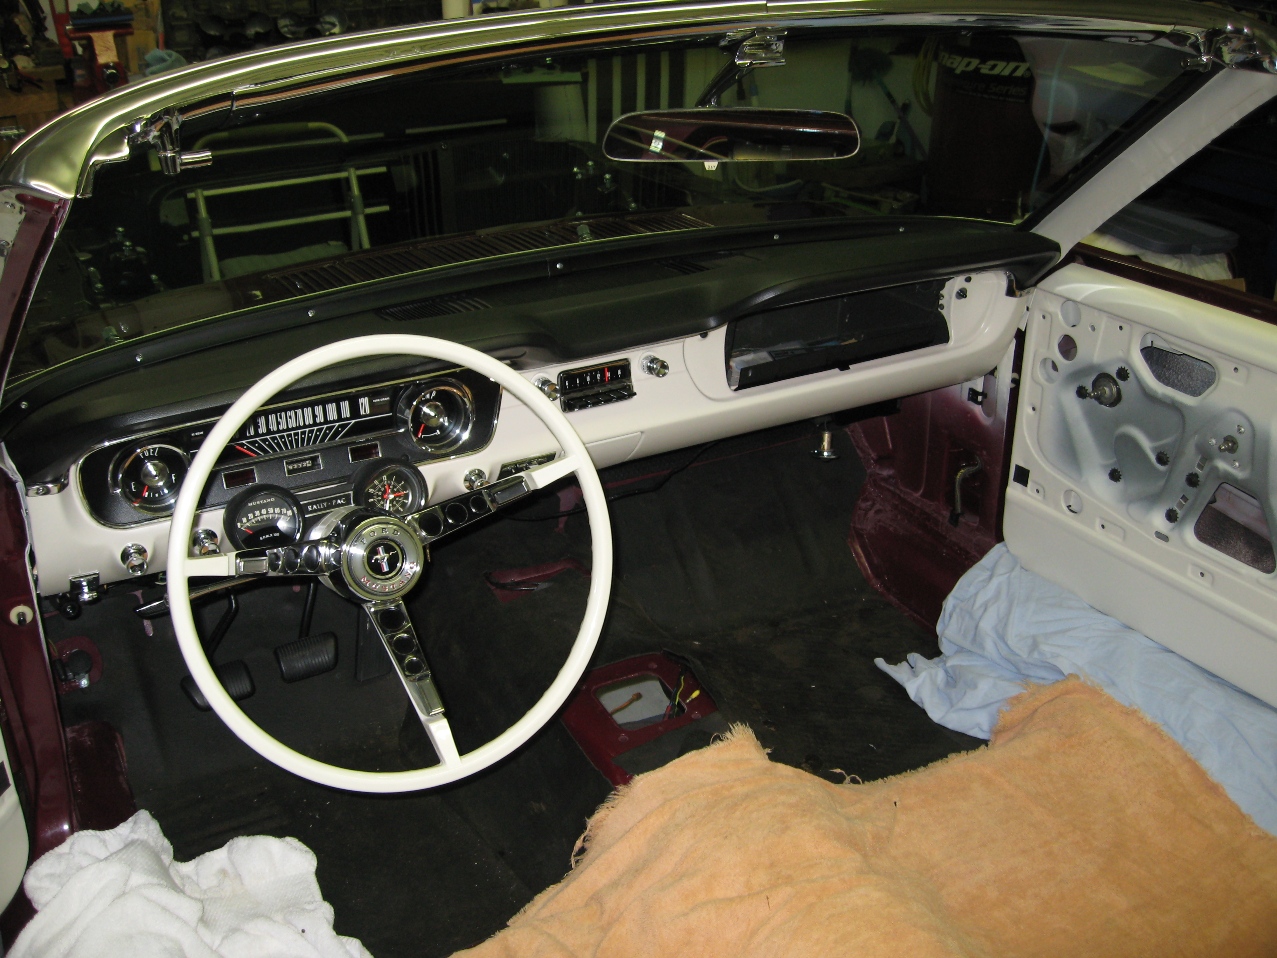
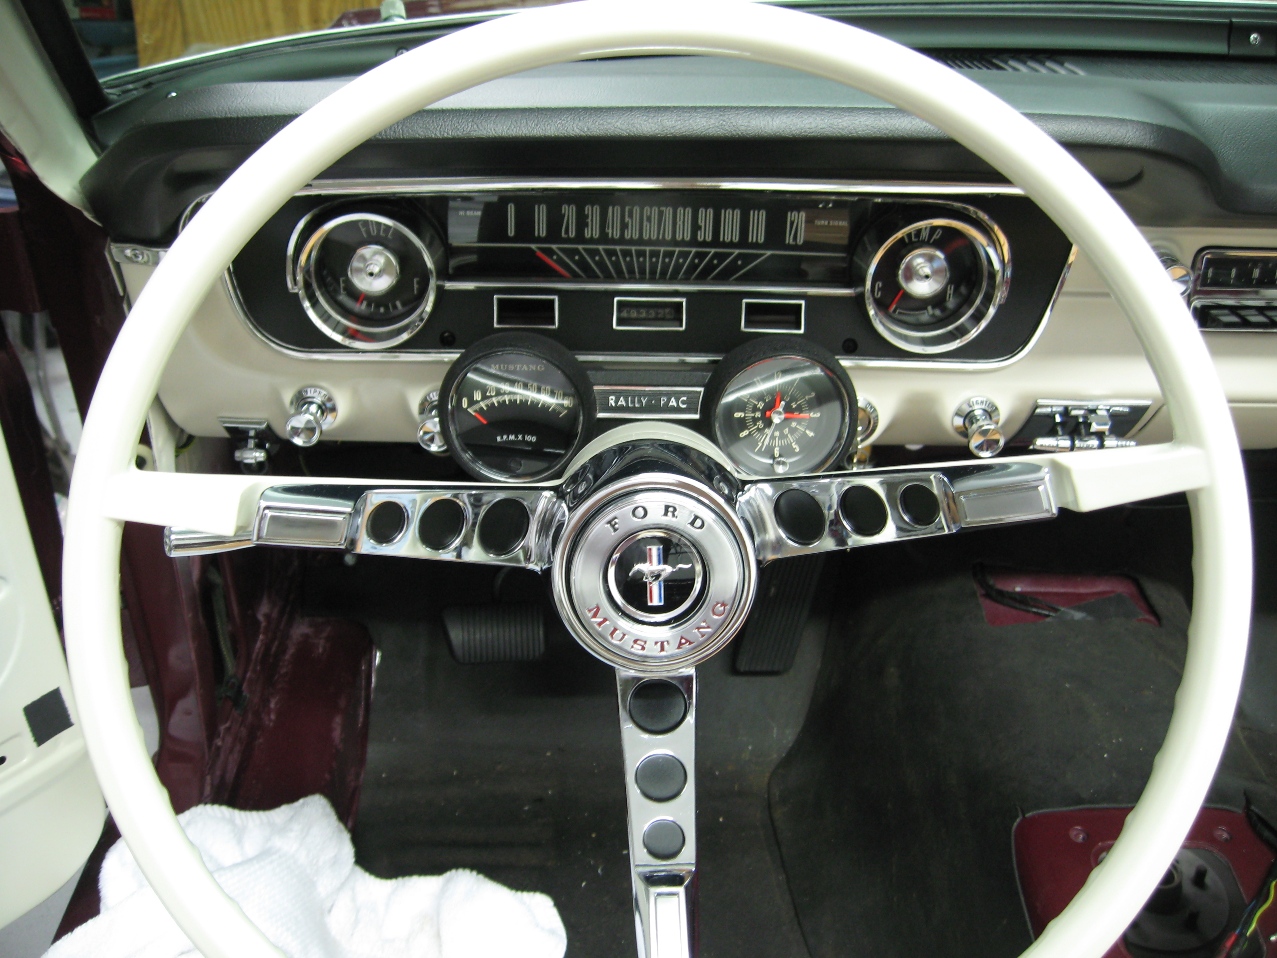
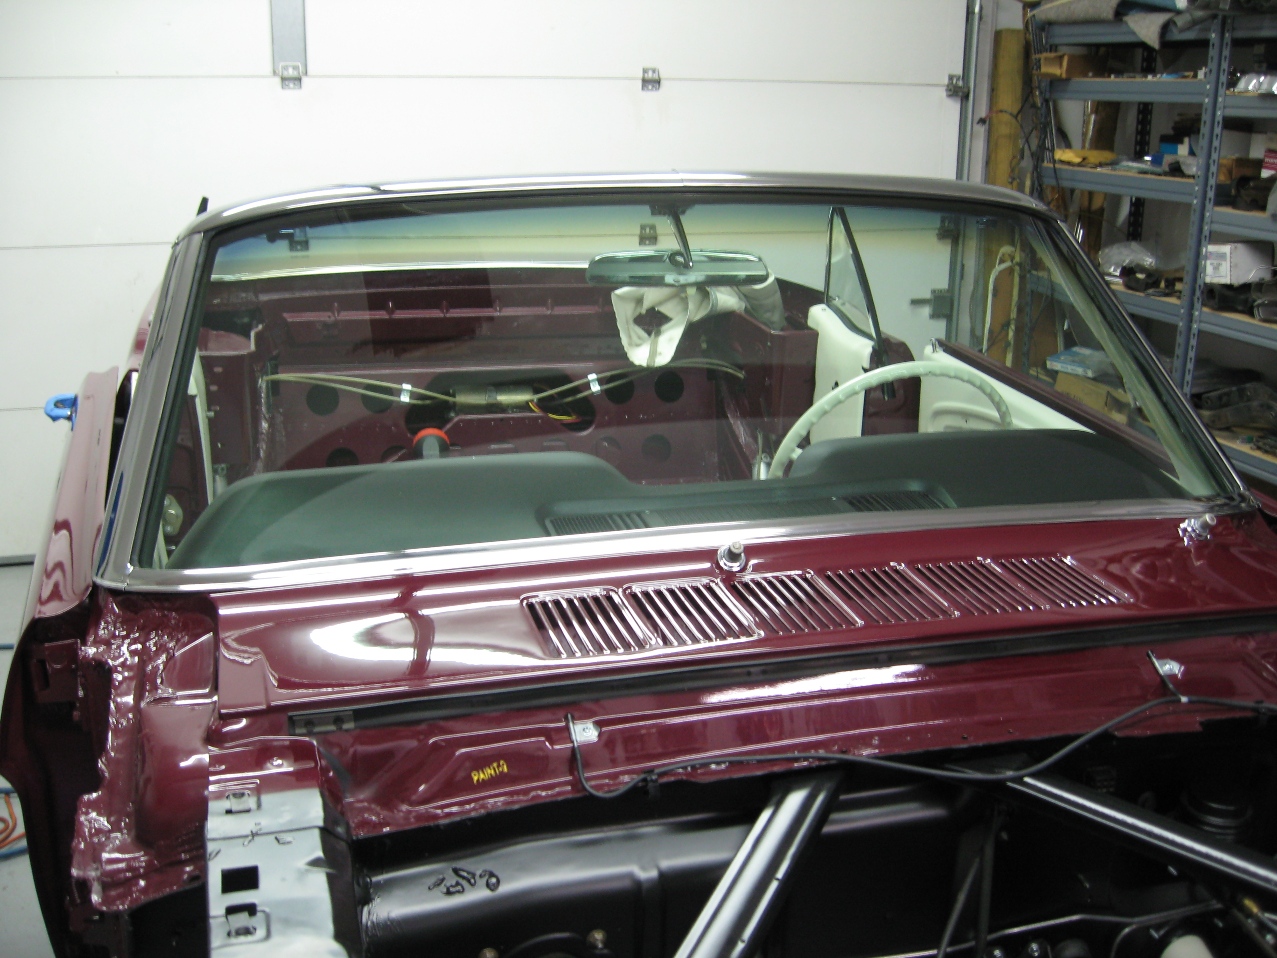
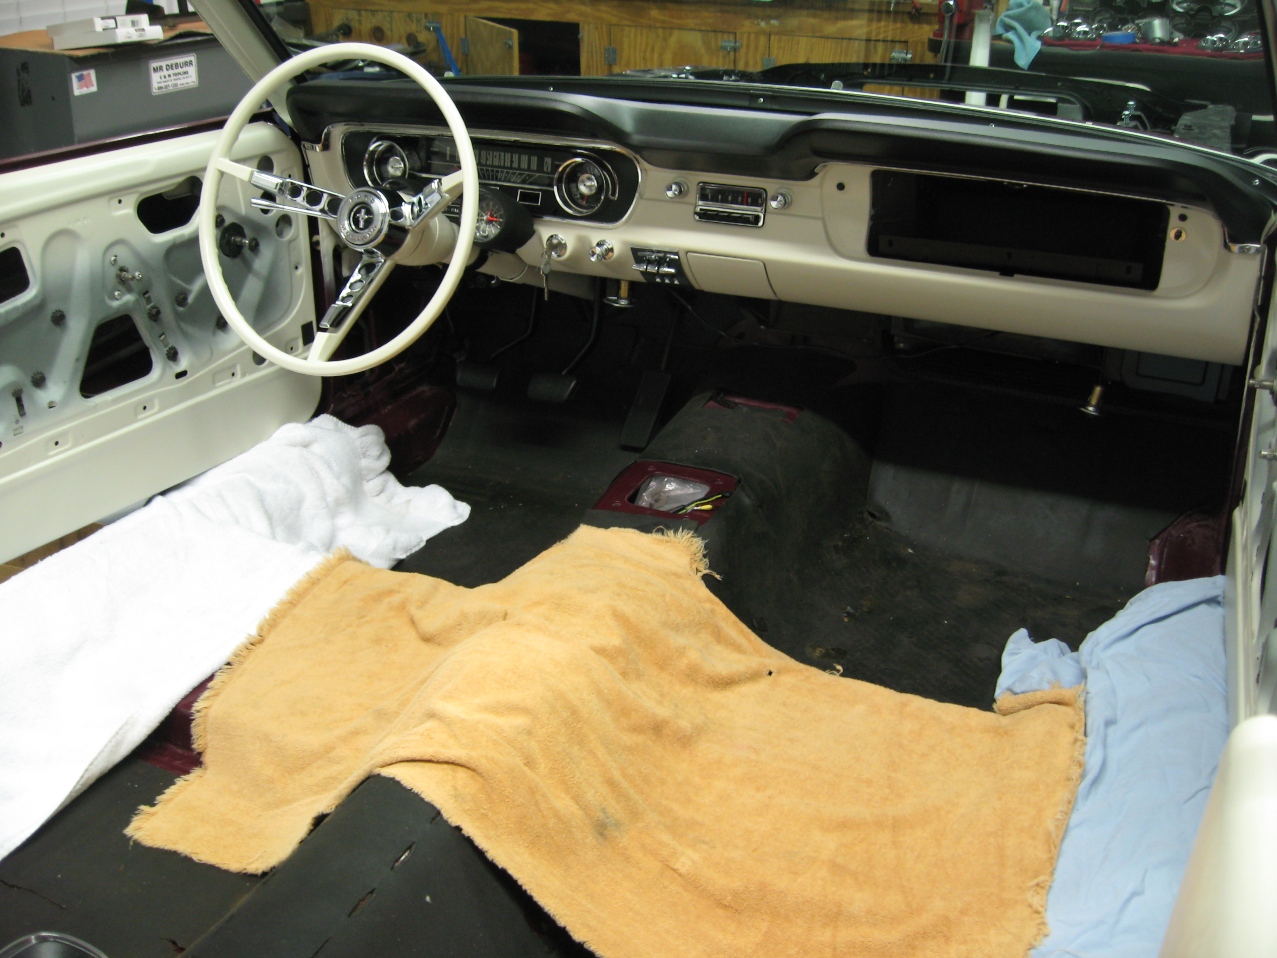
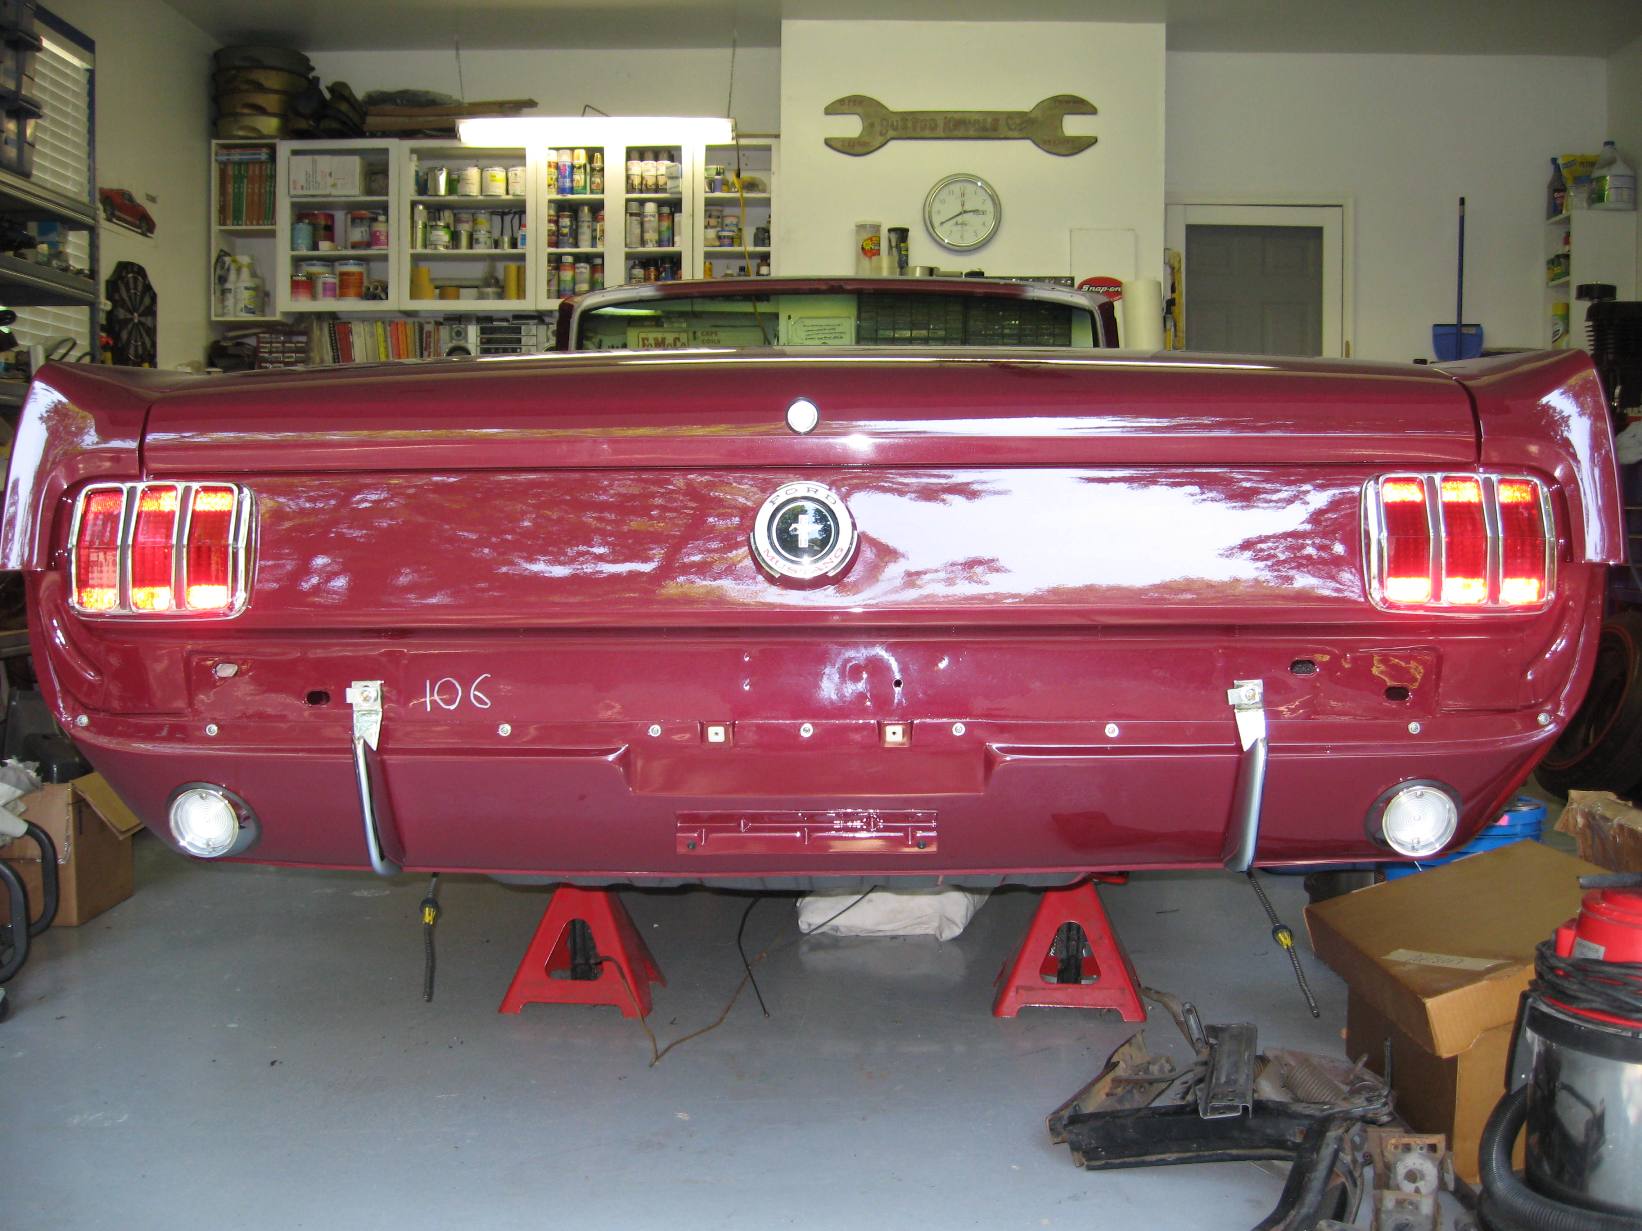
Clicking along on trim installation... As mentioned, all original stainless was buffed professionally by Qual Krom in Erie, PA (www.qualkrom.com). Windshield stainless is all installed now, fits like a glove. NOS visor brackets and original re-chromed center trim installed. Rear view mirror and bracket installed. Steering column had to be re-painted, which is done and installed. NOS steering wheel and horn ring installed. NOS 8k rally-pac installed. Rear boot trim chrome and stainless trim installed, NOS snaps used, yes they can be found! Quarter glass assemblies installed, rear quarter metal trim painted. Not much left to the dash, just some buttoning up of the wiring underneath, install the brace and glove box door.

Engine shop is still working on the motor, was hoping to have it by now. Still more work to do on the suspension. Brakes are going to be a challenge. Slowly getting all the parts culled together for that.

Here's some pics taken this evening:


Sunday, June 20, 2010

6/19/10

Well, things are actually starting to move forward now. All of the stainless has been received and it is absolutely beautiful. The rear quarter glass pieces were assembled and look great. Will move on to the windshield and related trim soon.

The engine machine work has been completed. It was sleeved back to standard bore and an NOS set of FoMoCo pistons/rings were acquired. The engine is now at a different shop getting the rotating assembly balanced. They will also assemble the short block for me. I have an NOS gasket kit with the correct head gaskets and other misc. pieces, so I will install the heads and assemble the rest of the block. I can't wait to actually clear some parts off the shelves!

The same shop doing the engine is also going to setup the NOS ring/pinion I have, so should be getting that back soon also. Trans is also in the works to be rebuilt. If all goes as planned, should be getting a drive train back in the car soon.

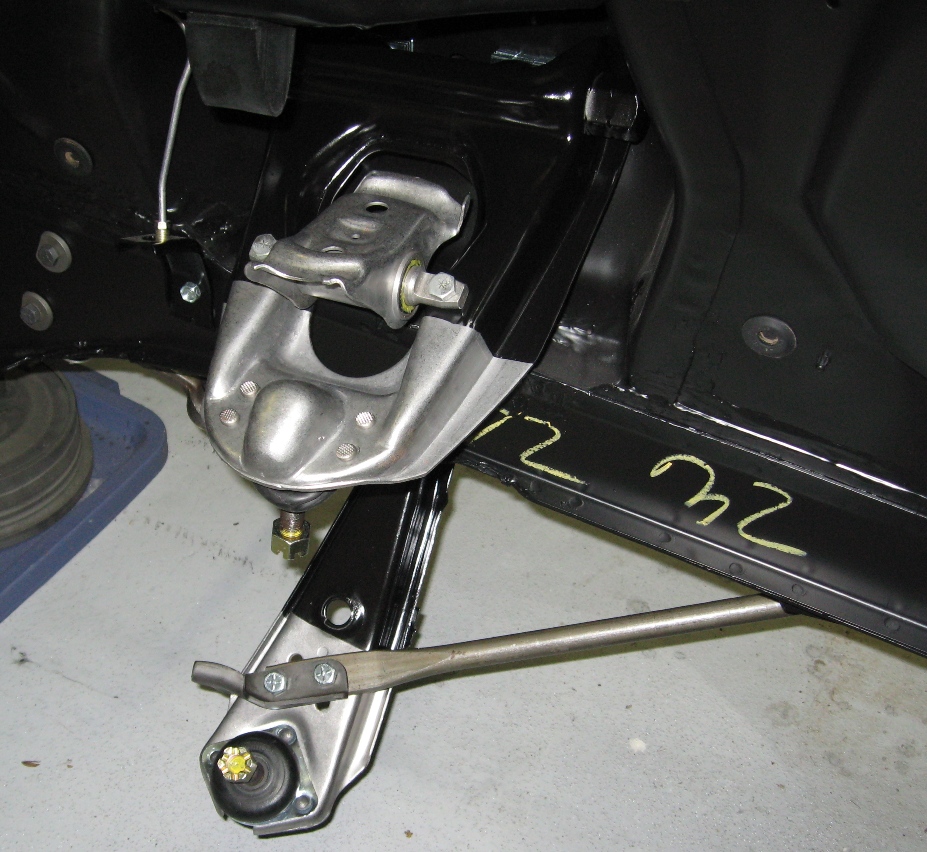
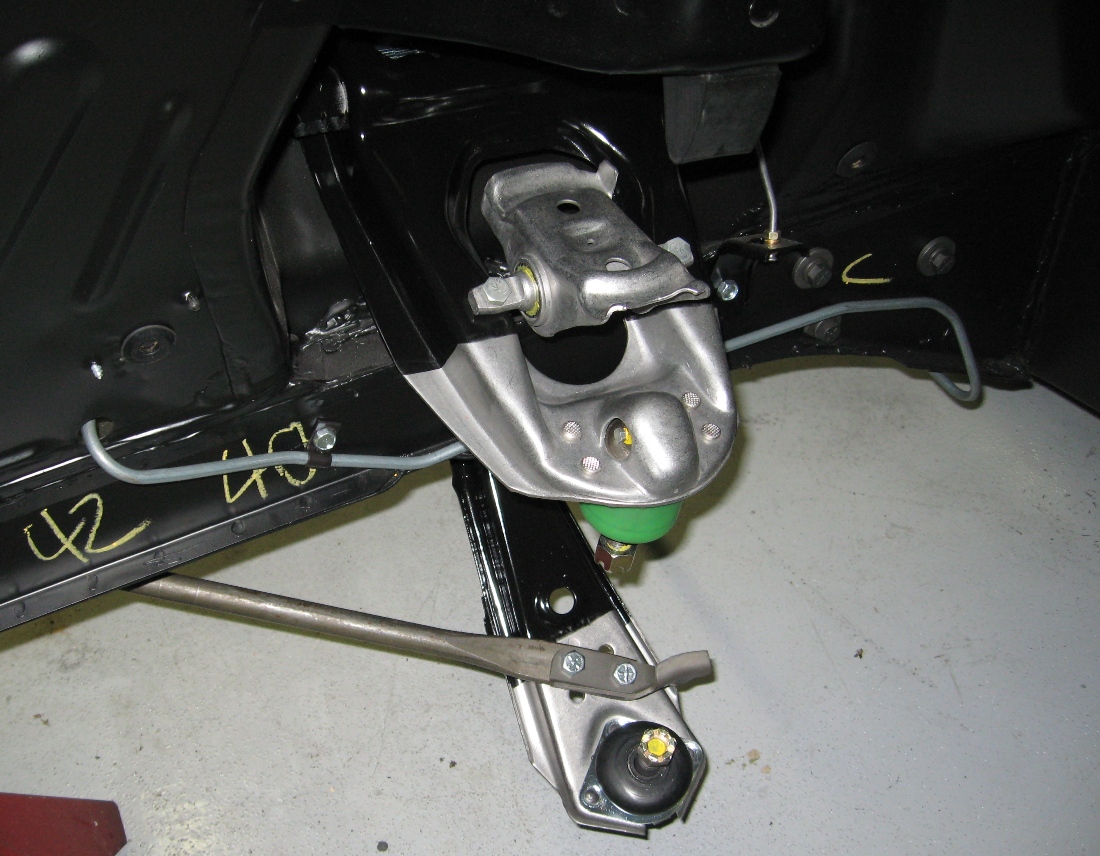
Drive train won't be much good without a suspension. I've actually made considerable progress on that front. After some experimentation with floating paint on water, I threw in the towel and ordered several gallons of black acrylic enamel. Did proper dipping and the upper and lower control arms came out fantastic. I had to go ahead and install them in the car along with the strut rods, so here's some pics of that. The upper and lower control arms are original parts that have been disassembled and restored. Not a job for the faint of heart! Hope to have more frequent updates in the coming weeks.


Tuesday, June 1, 2010

5/31/10

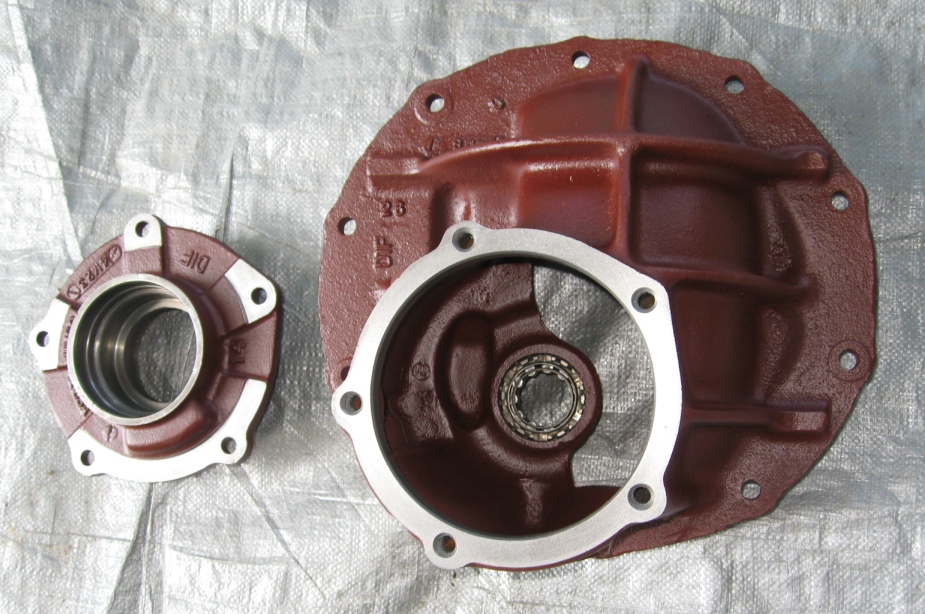
Making progress little by little. Steering column has been painted and steering wheel installed. Will have pics soon. Pic to share today is of the rear pumpkin pieces that have been refinished. Thought they came out real nice. Original machined surfaces were not pitted, just needed to be cleaned and polished. Have an NOS ring and pinion set that will be installed, along with all NOS bearings.

Sunday, May 16, 2010

5/15/10

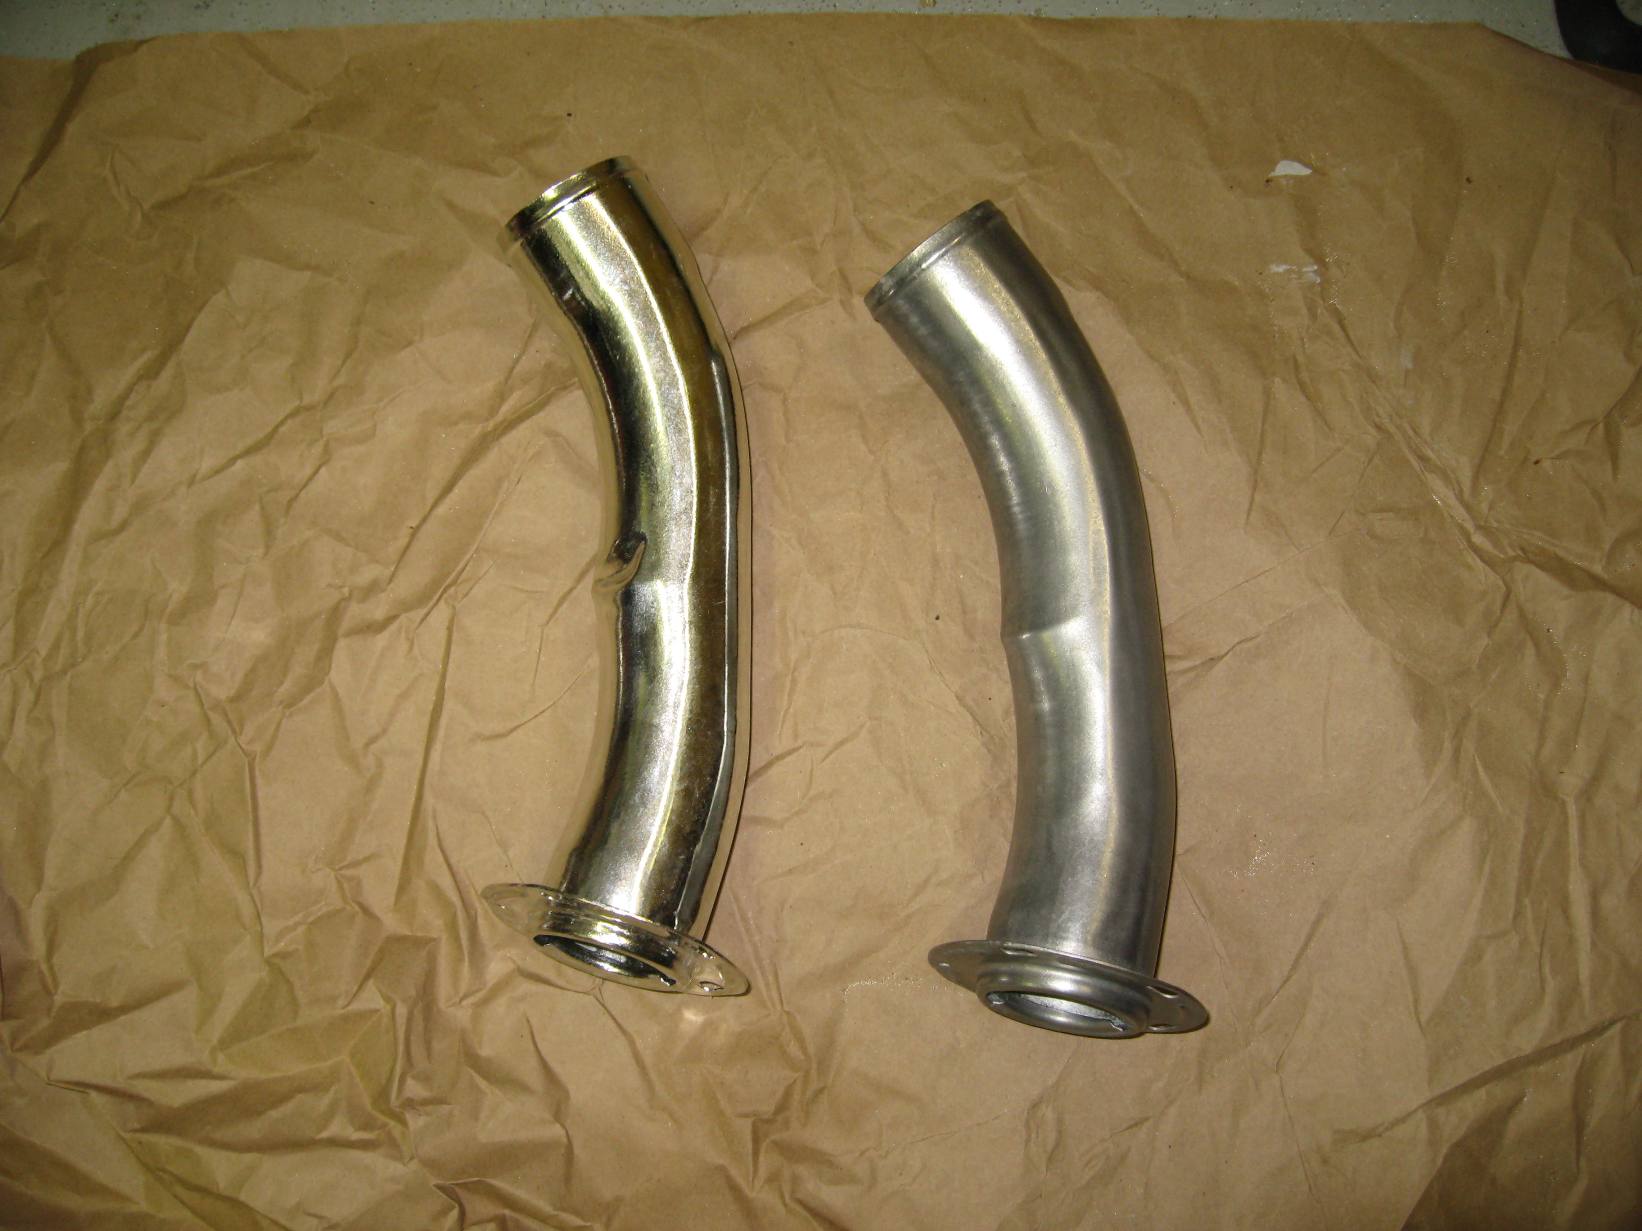
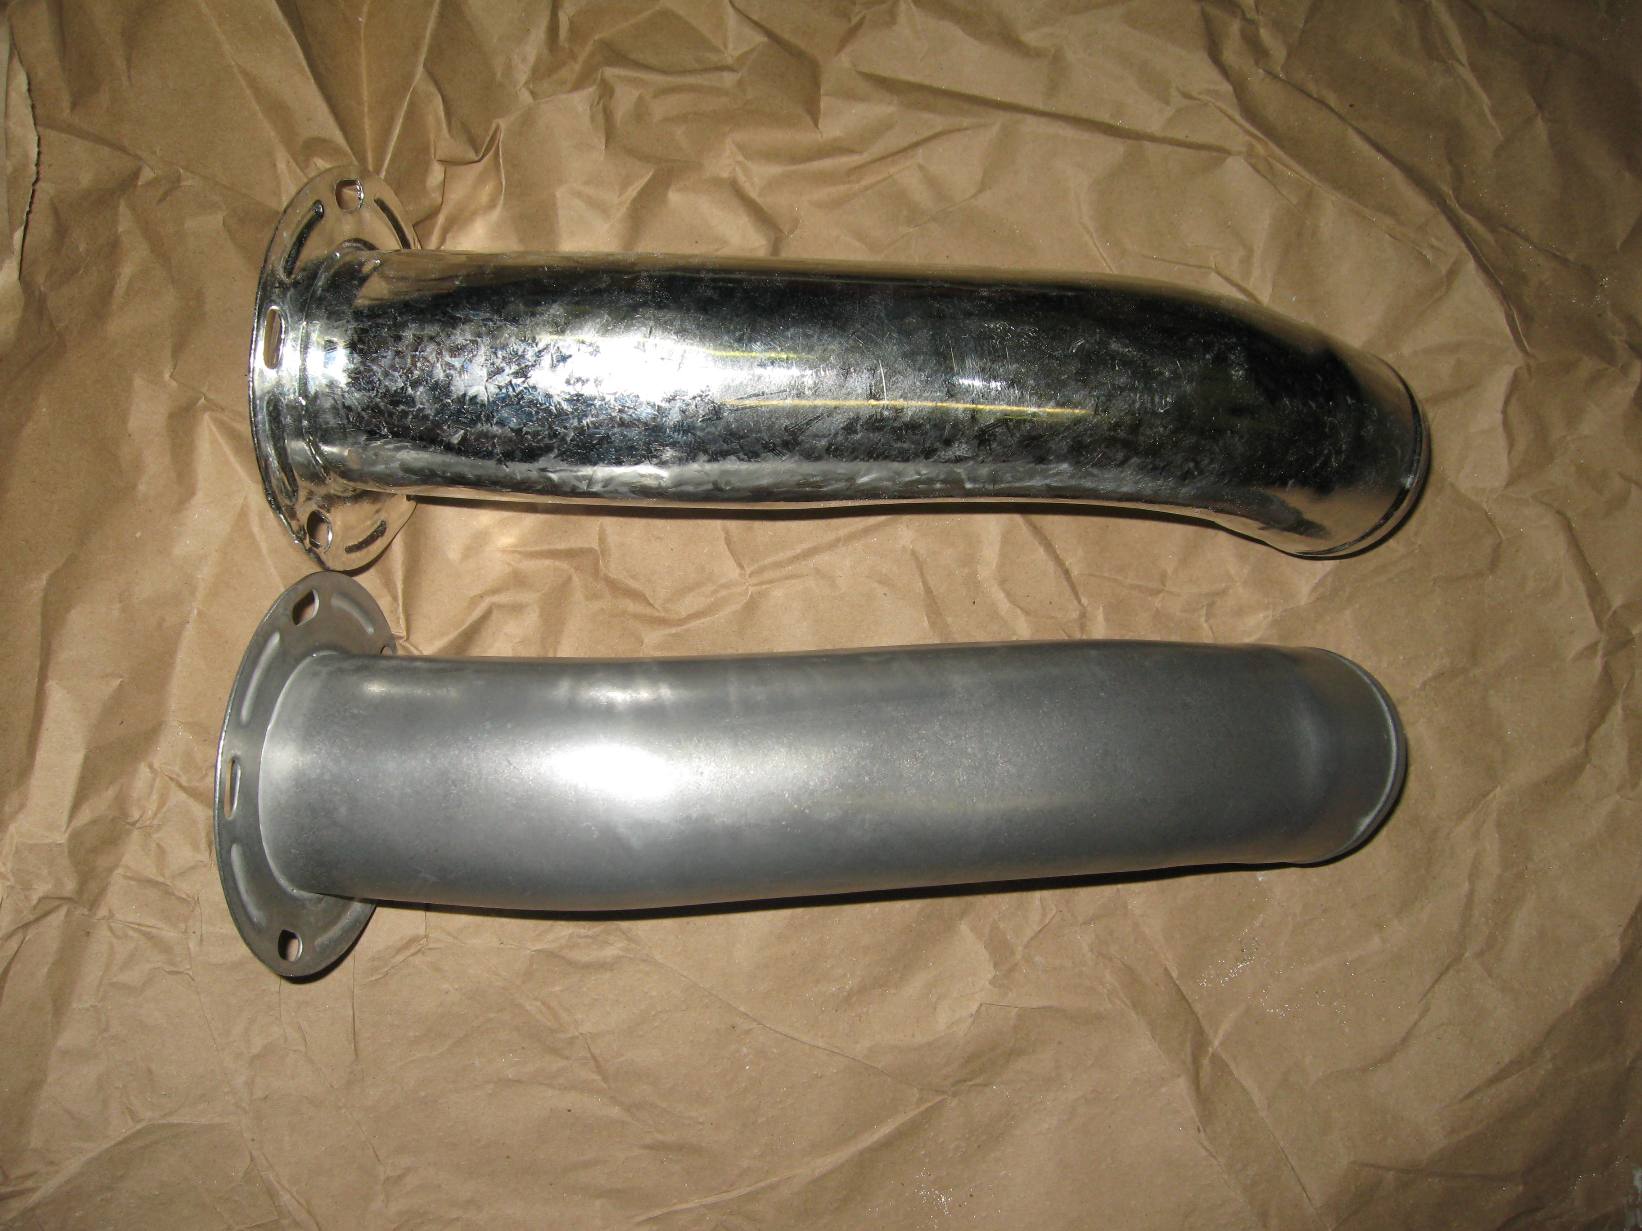
Few more items to share. First up is the filler neck. This is a somewhat difficult item to restore properly. While Ford did service these, there is a minor difference in the service part and the original, which has to do with the "wrinkle" on the tube. The originals have a much more obvious metal wrinkle that does not appear on the service replacements. To get this part right requires restoring an original piece. It's not that easy though as finding one without dings/dents is kind of tough. Once a nice piece is found, they can be hot tin dipped. After receiving back, they will look almost like chrome. To get the correct finish requires being creative, but as can be seen in the pics, it can be done. Here's a couple comparisons of how they come back from the plating shop and the results of my finishing process:


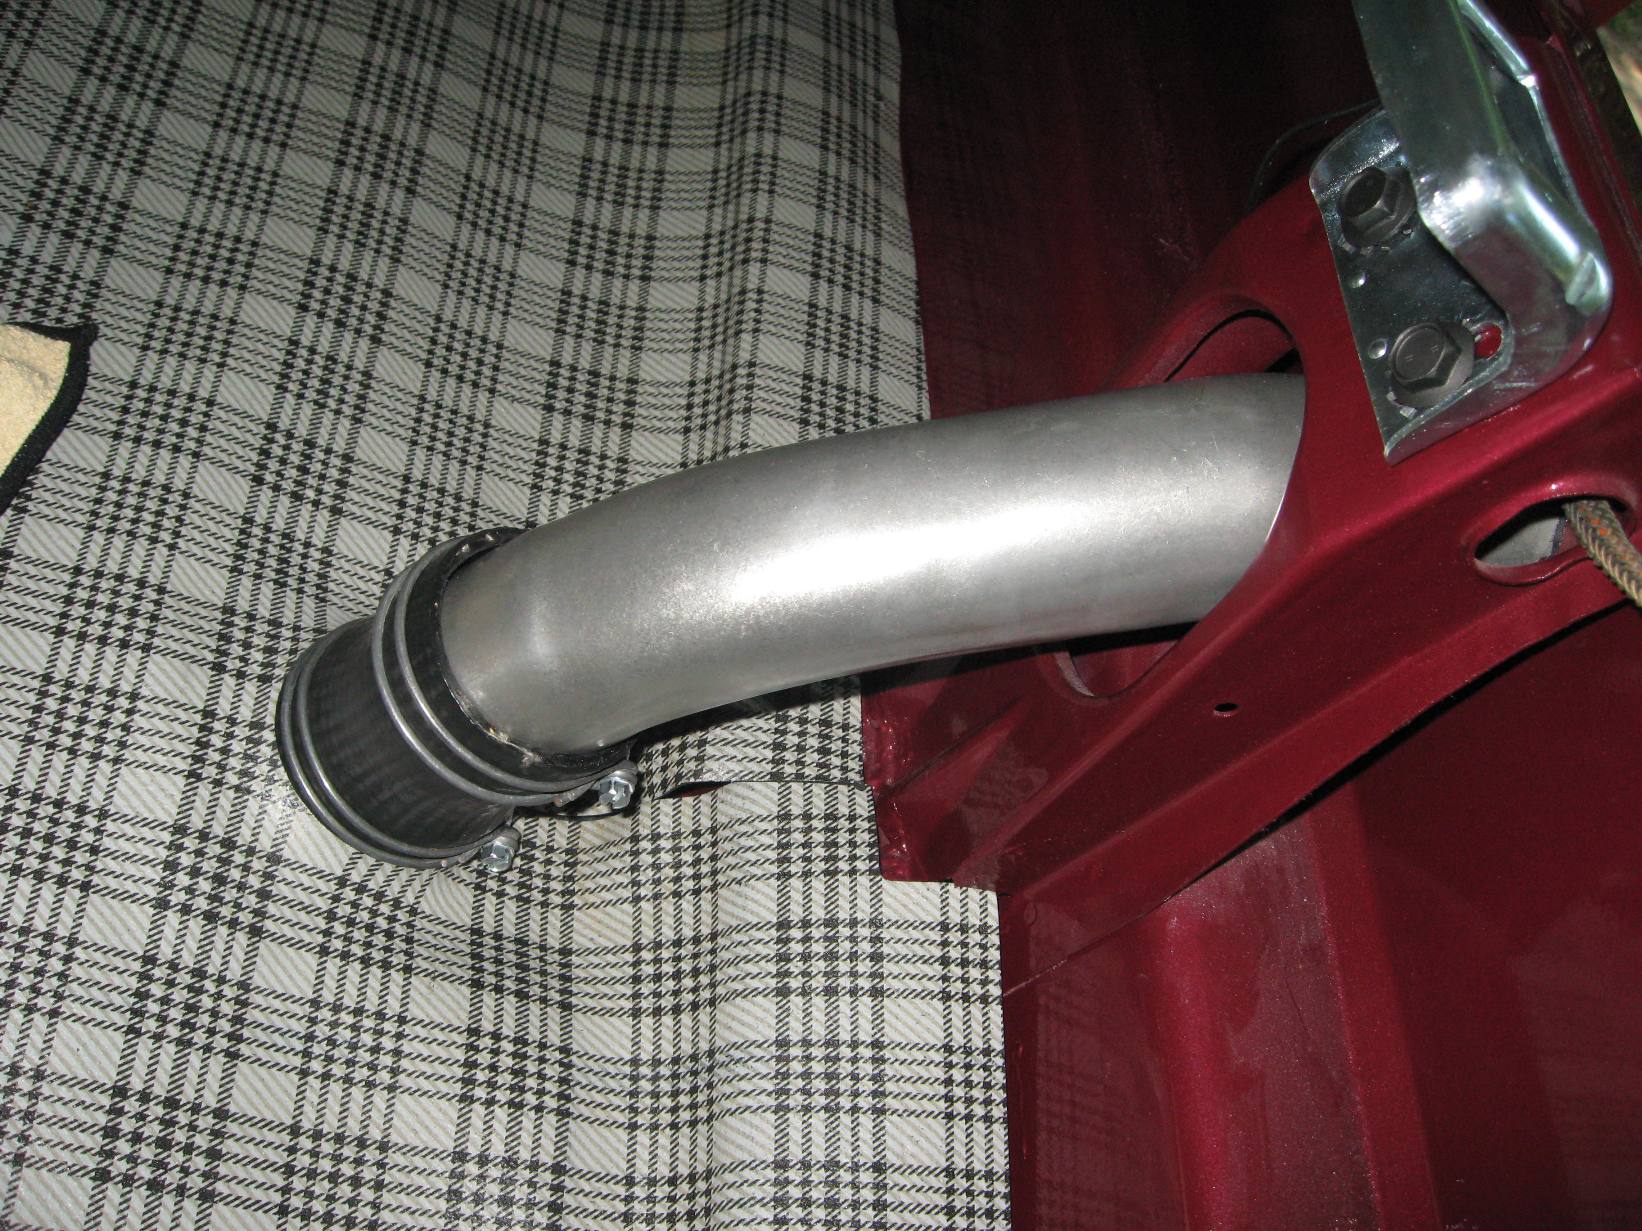
Installed in the car with an original hose and original clamps:


Nice to see the gas cap installed on the car, it is obviously an NOS FoMoCo piece.


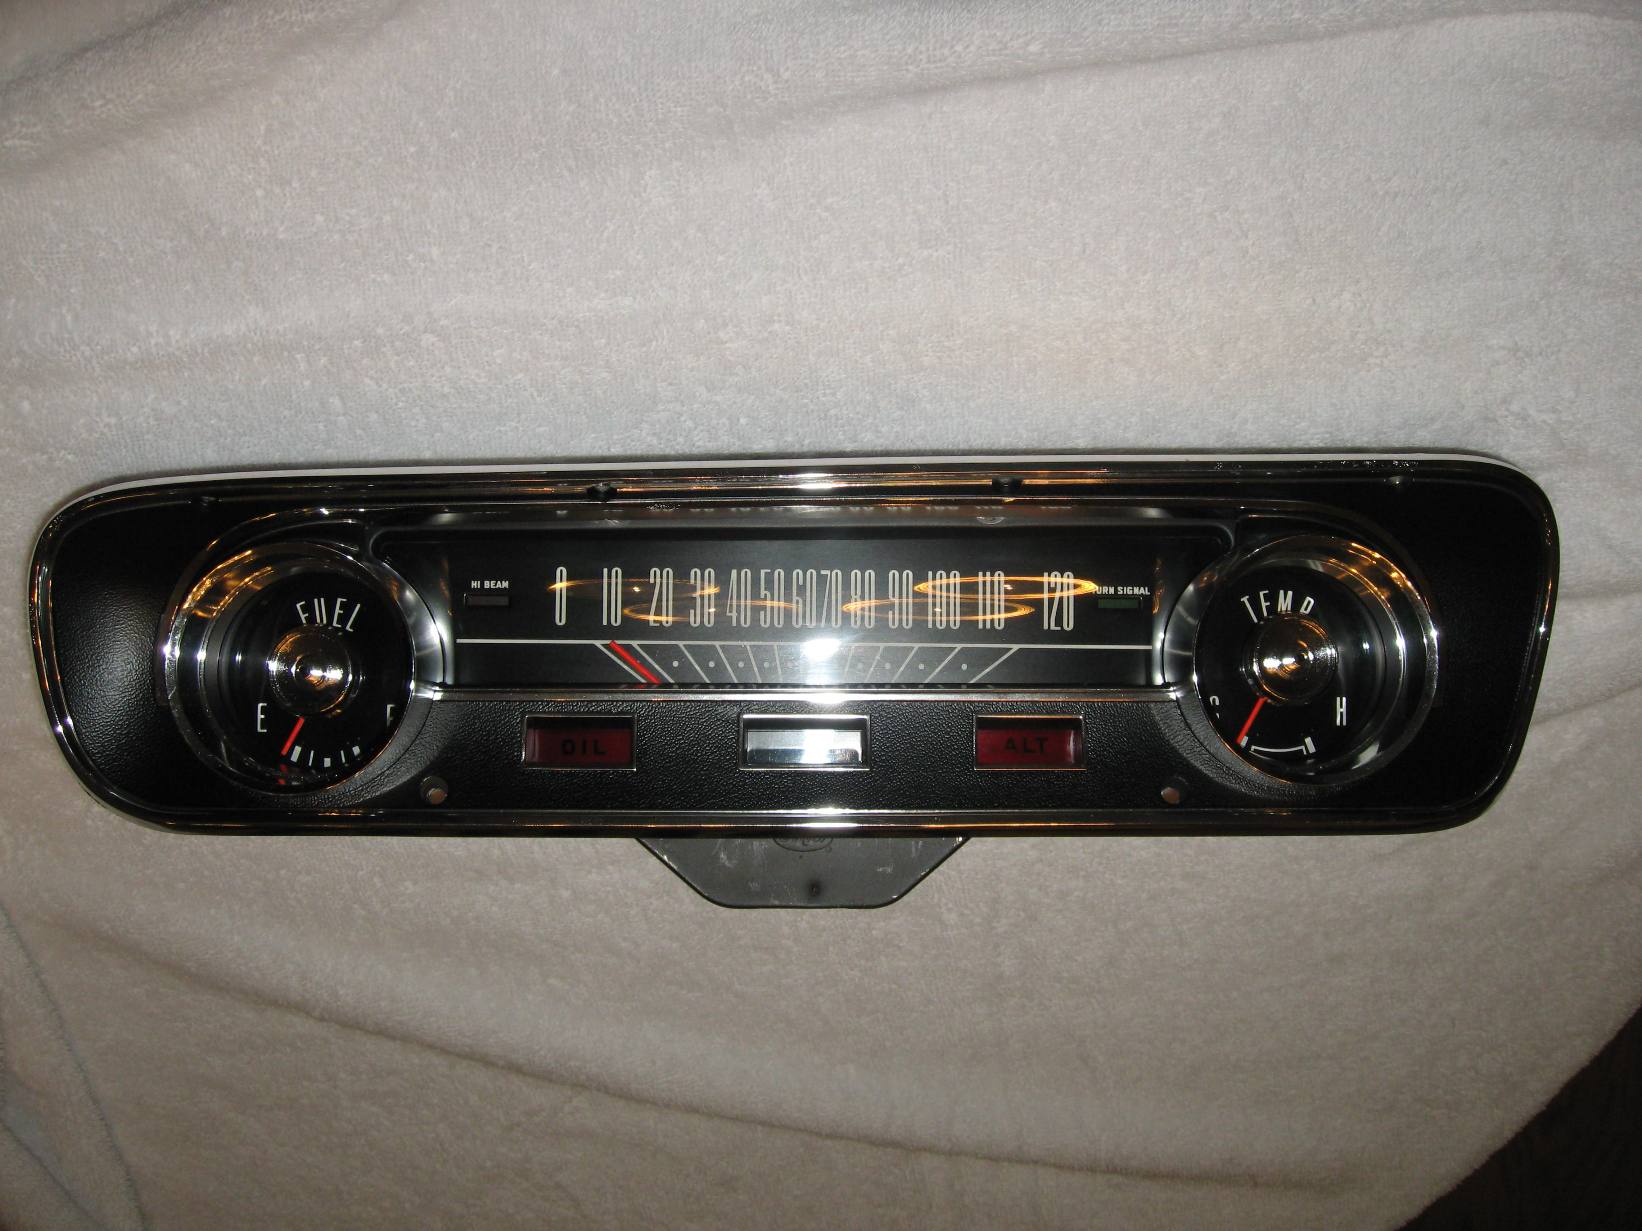
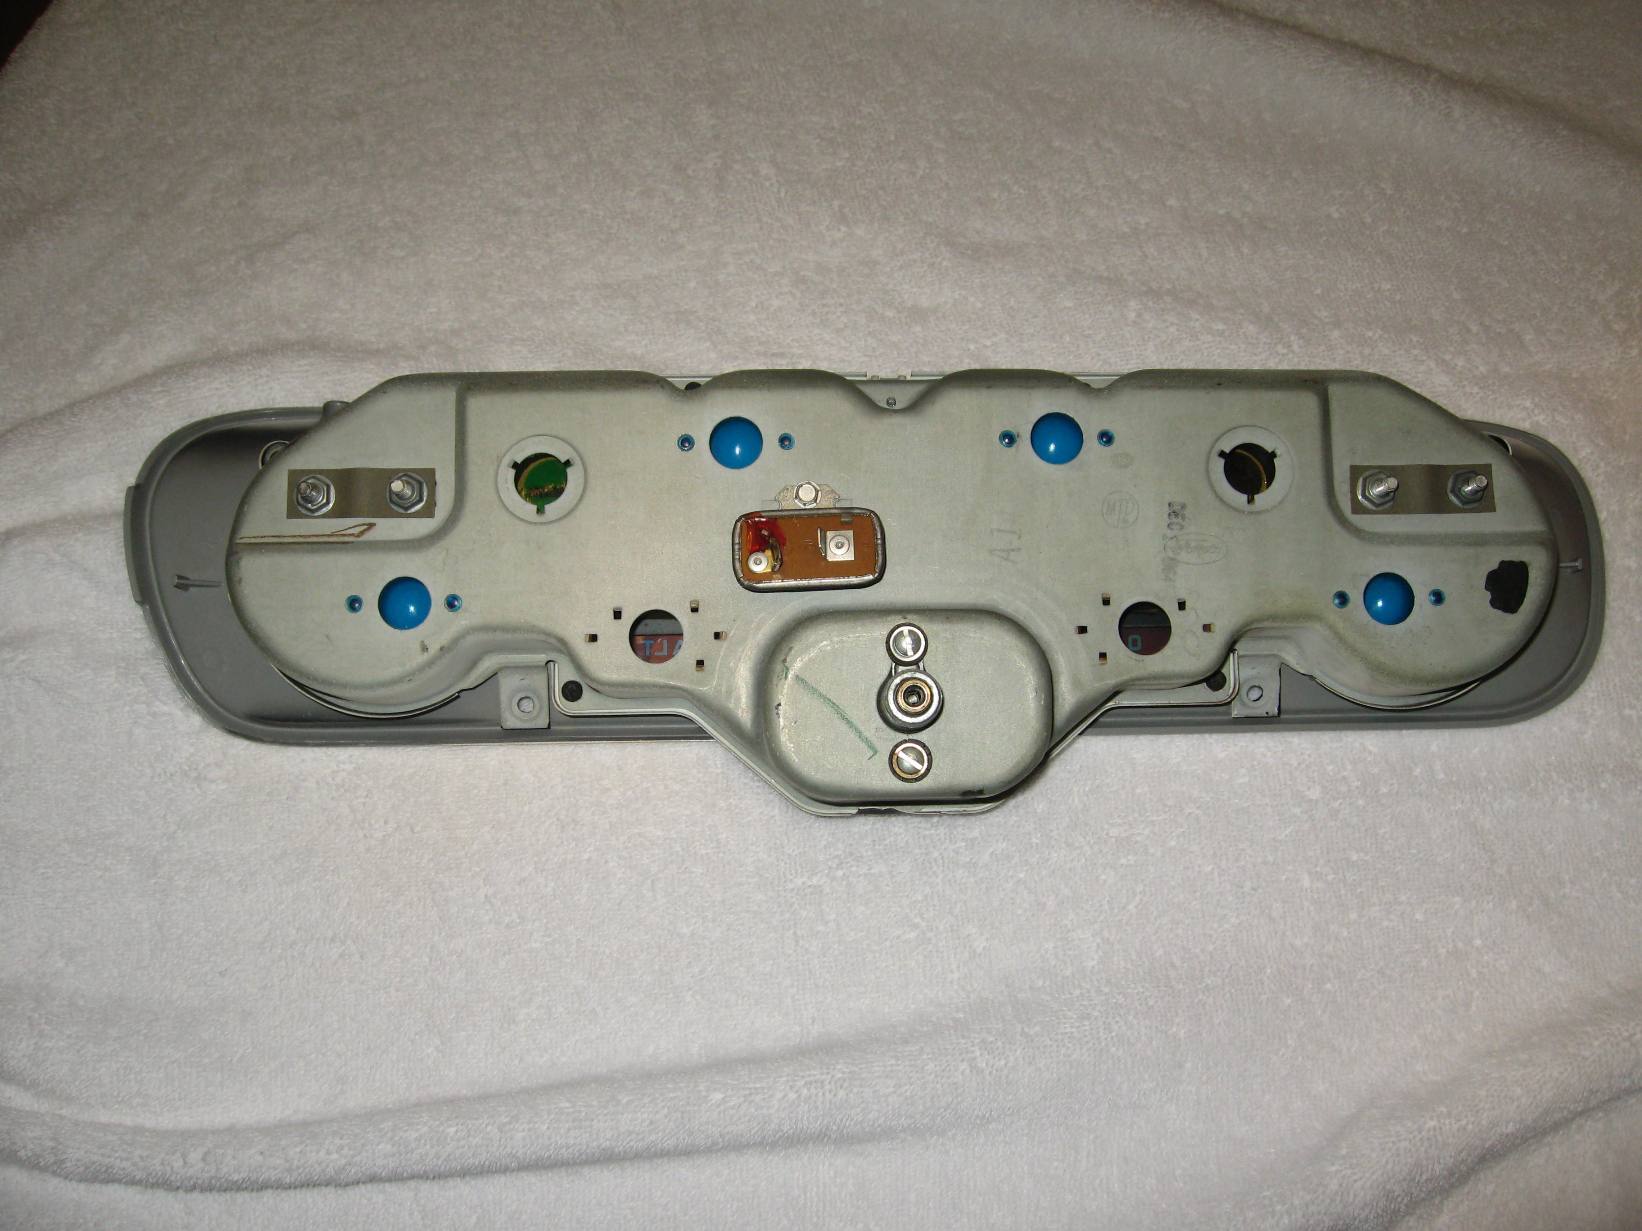
Last item to share today is the restoration of the speedometer cluster. This was done with all Ford parts. An original lens was polished, it came out great! The 2 chrome plastic bezels were re-chromed and an NOS instrument cluster bezel was used to finish it out. Original instruments were mint condition, just needed a light touch-up of the needles. Unfortunately, I found the black on the NOS cluster bezel to be too shiny, so I had to tape up and re-paint to get the right look. It was a lot of taping! The back of the cluster is dated December, 1964.


5/3/10

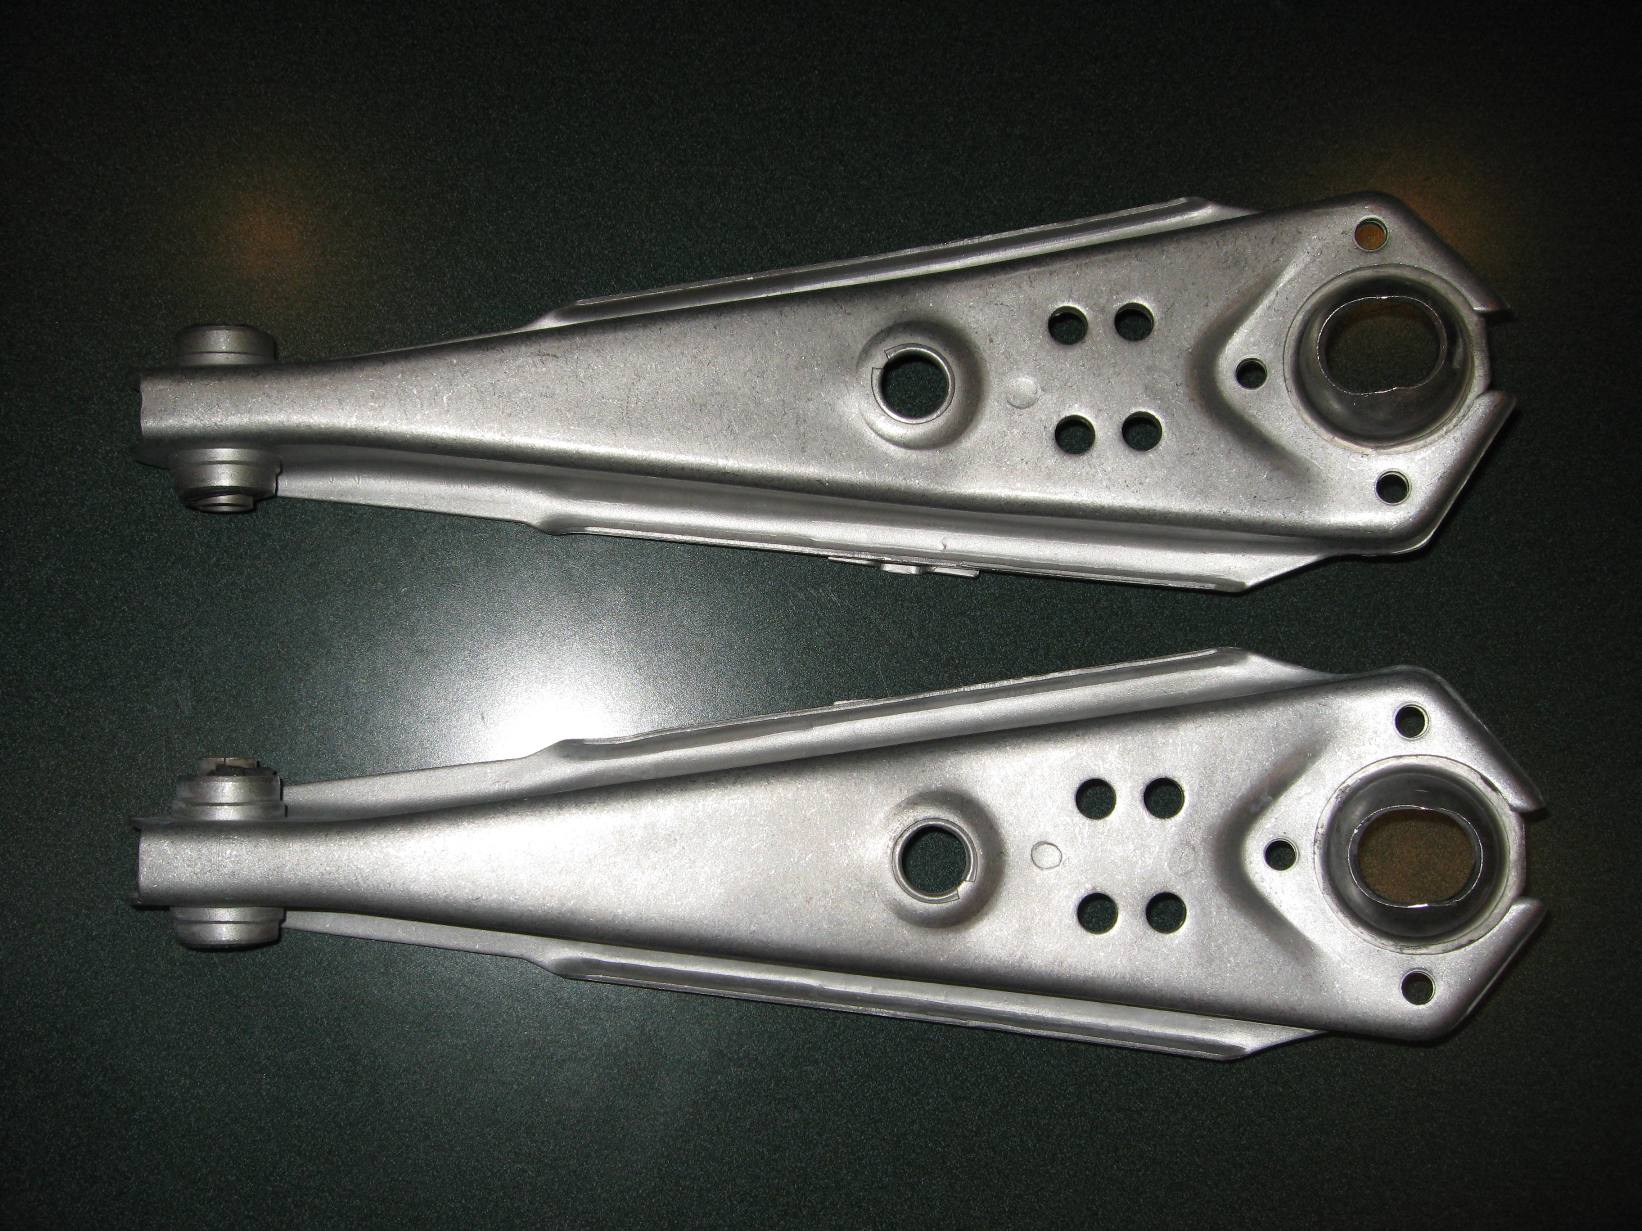
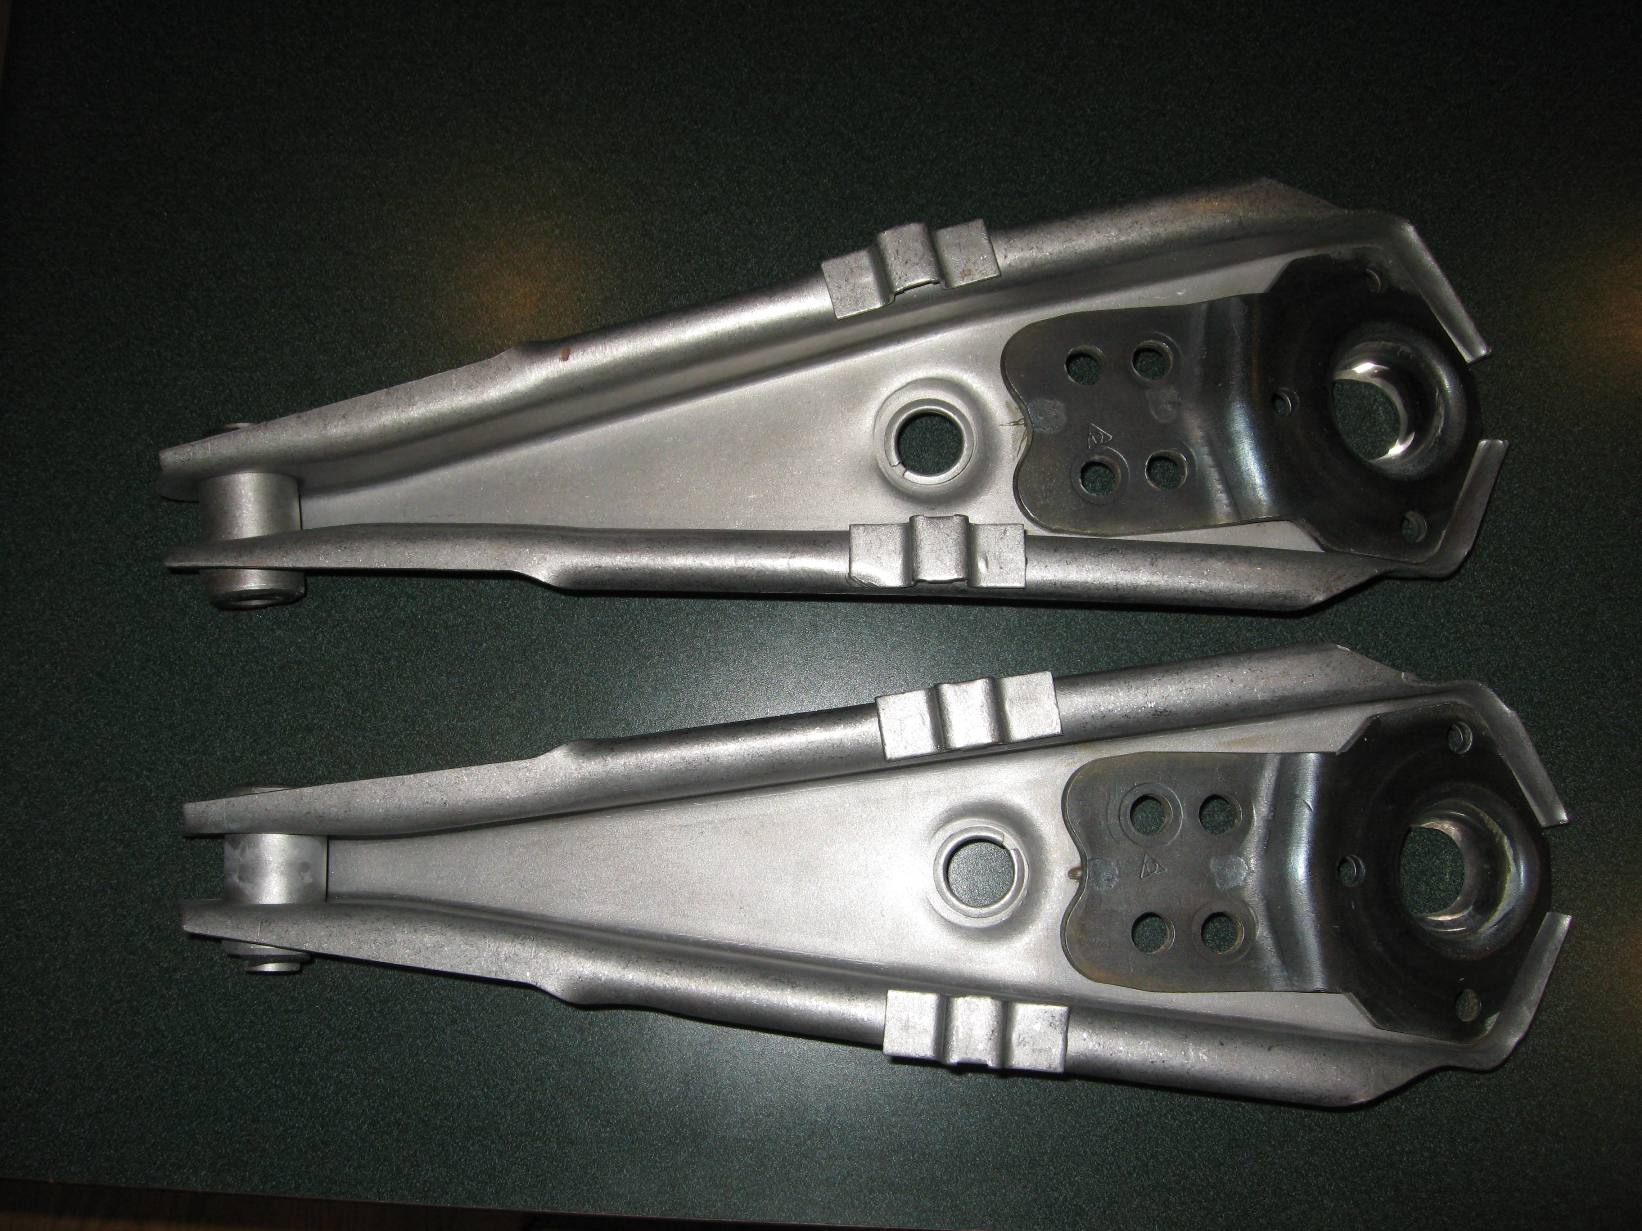
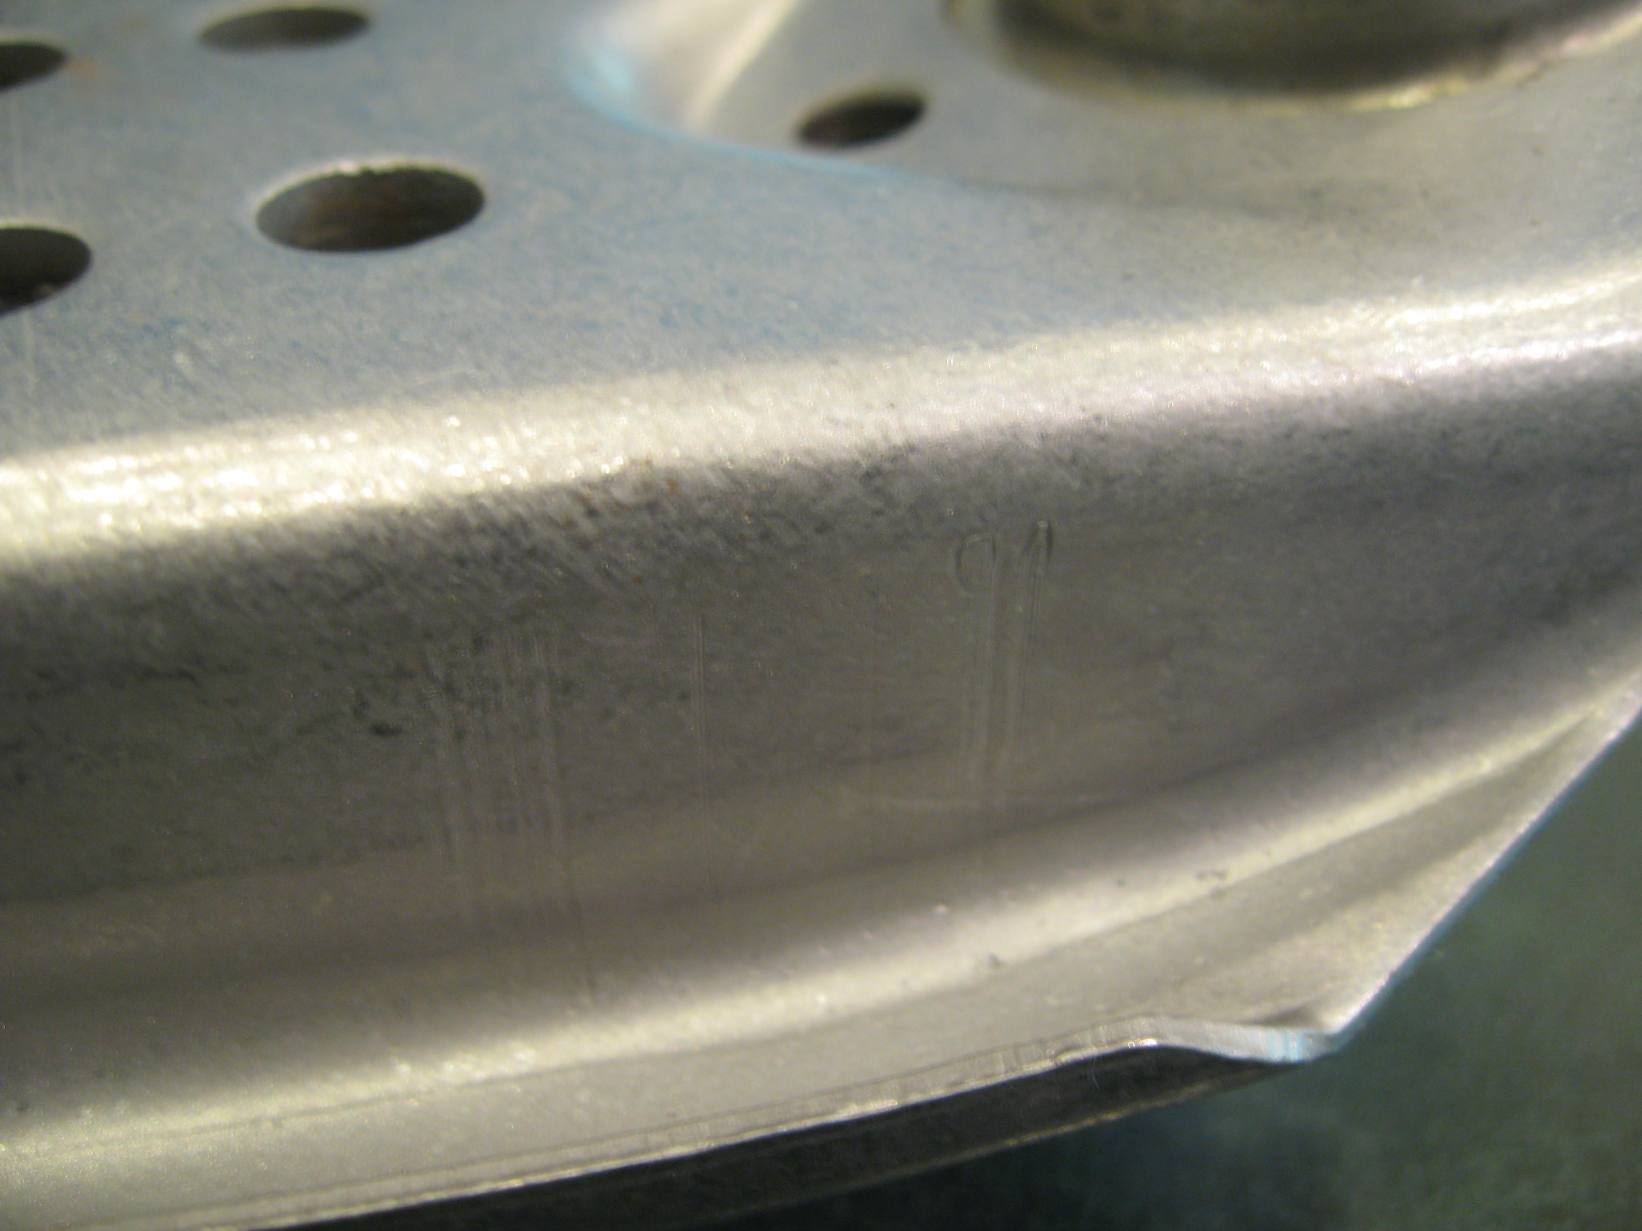
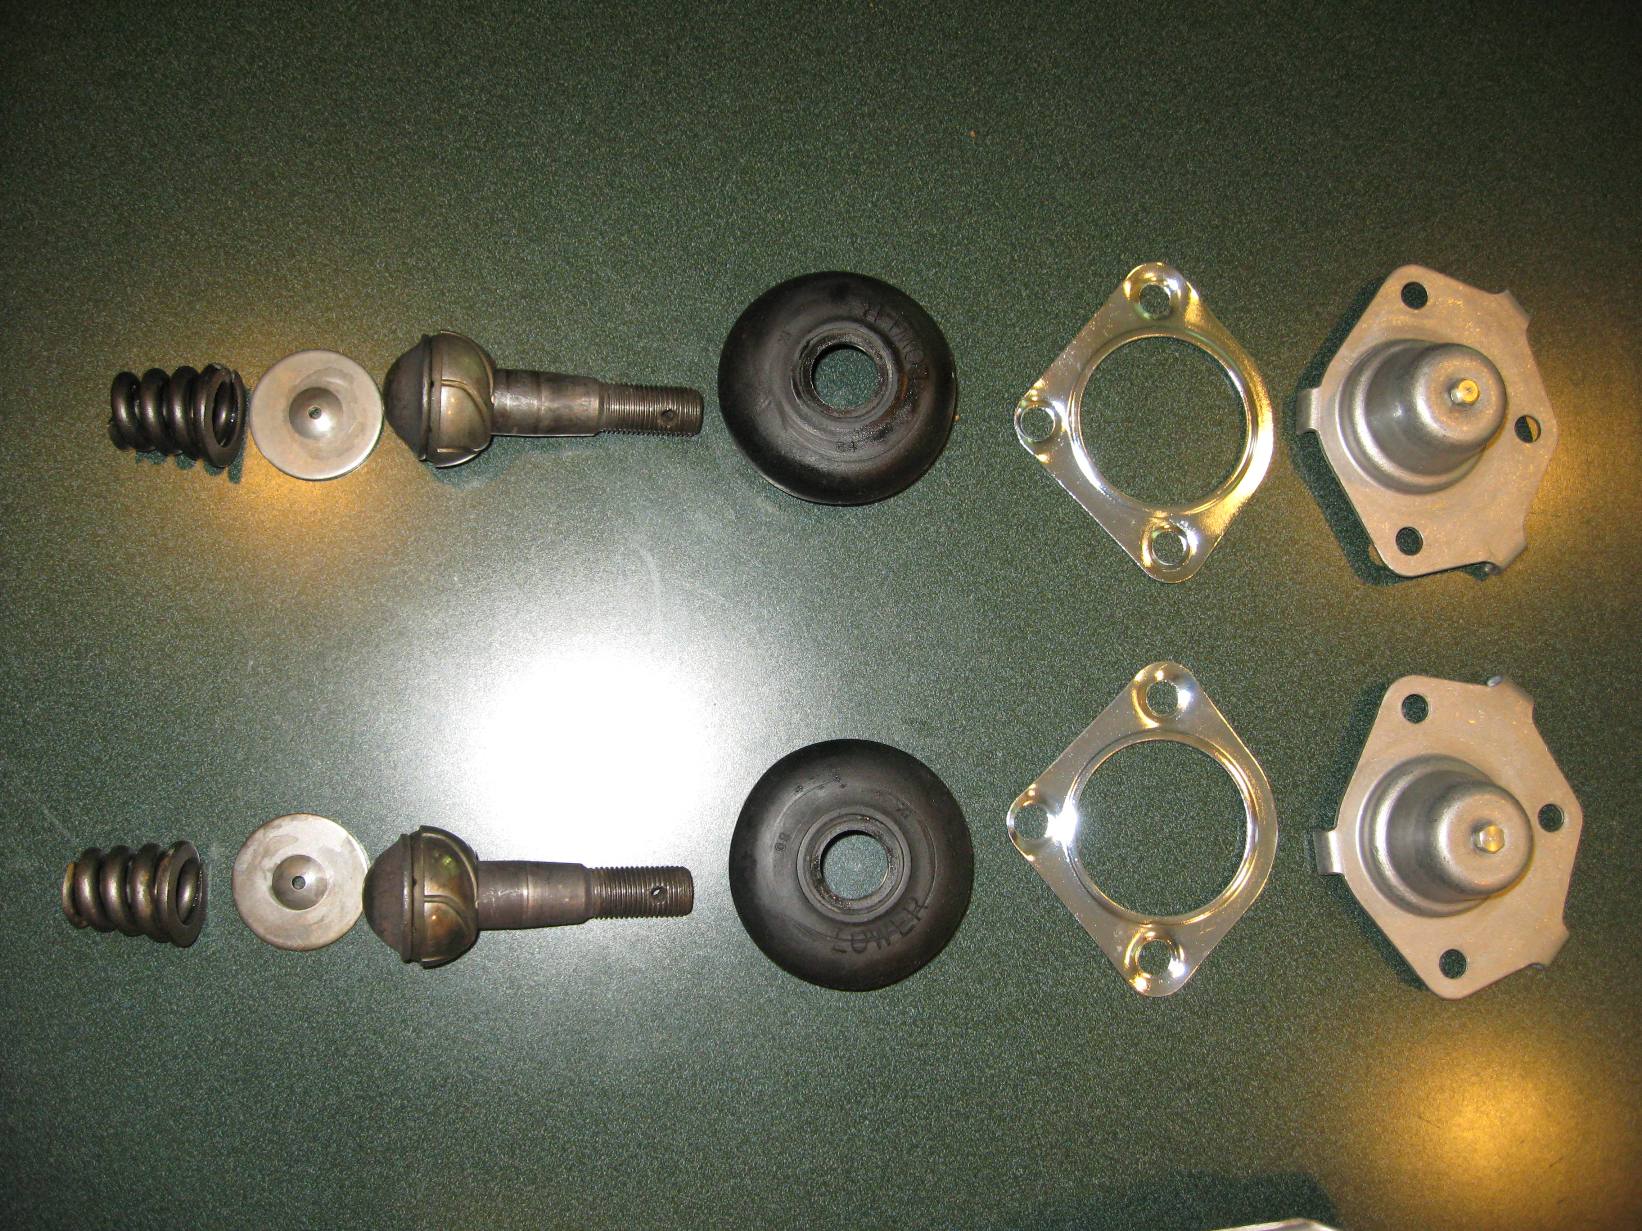
Well, has been several months since the last update. Have gotten a lot of things accomplished, which mainly have to do with getting other folks to restore/rebuild parts. The upper and lower control arms fall into this category. I've put a tremendous amount of effort into restoring an original set of these. In an earlier blog entry, I noted some of the differences in the lower control arms, compared to 2 versions of Ford replacements. What I found was that I would have to restore an original set to get the most authentic results. Thankfully, I had nice original arms that could be restored.

For the uppers, some work had to be done as there were chisel marks/gouges around the ball joint rivet holes. Evidently, this was how someone removed the ball joints a long time ago. The marks had to be welded and ground to get them back looking new. NOS upper ball joints were used with proper C4OA boots. The arms have had the ball joints put on with the correct style rivets. Should have them back soon.

On the lowers, it was a little more challenging as there really are no replacement ball joints that are correct. Furthermore, there are no accurate reproductions or even service replacements of the rubber boots. Thankfully, I was able to salvage 2 pretty nice original boots. I had the original rivets drilled out and ended up re-plating the boot retainers and detailed the arms without the ball joints attached. There are quite a few parts to a lower control arm! The arms were blasted and tumbled, they came out perfect. I'll have NOS end bushings pressed in to complete the parts restoration. Then all that will be left is doing the black dip on the uppers and lowers. The lower control arms should be back soon also. Here's some pics:


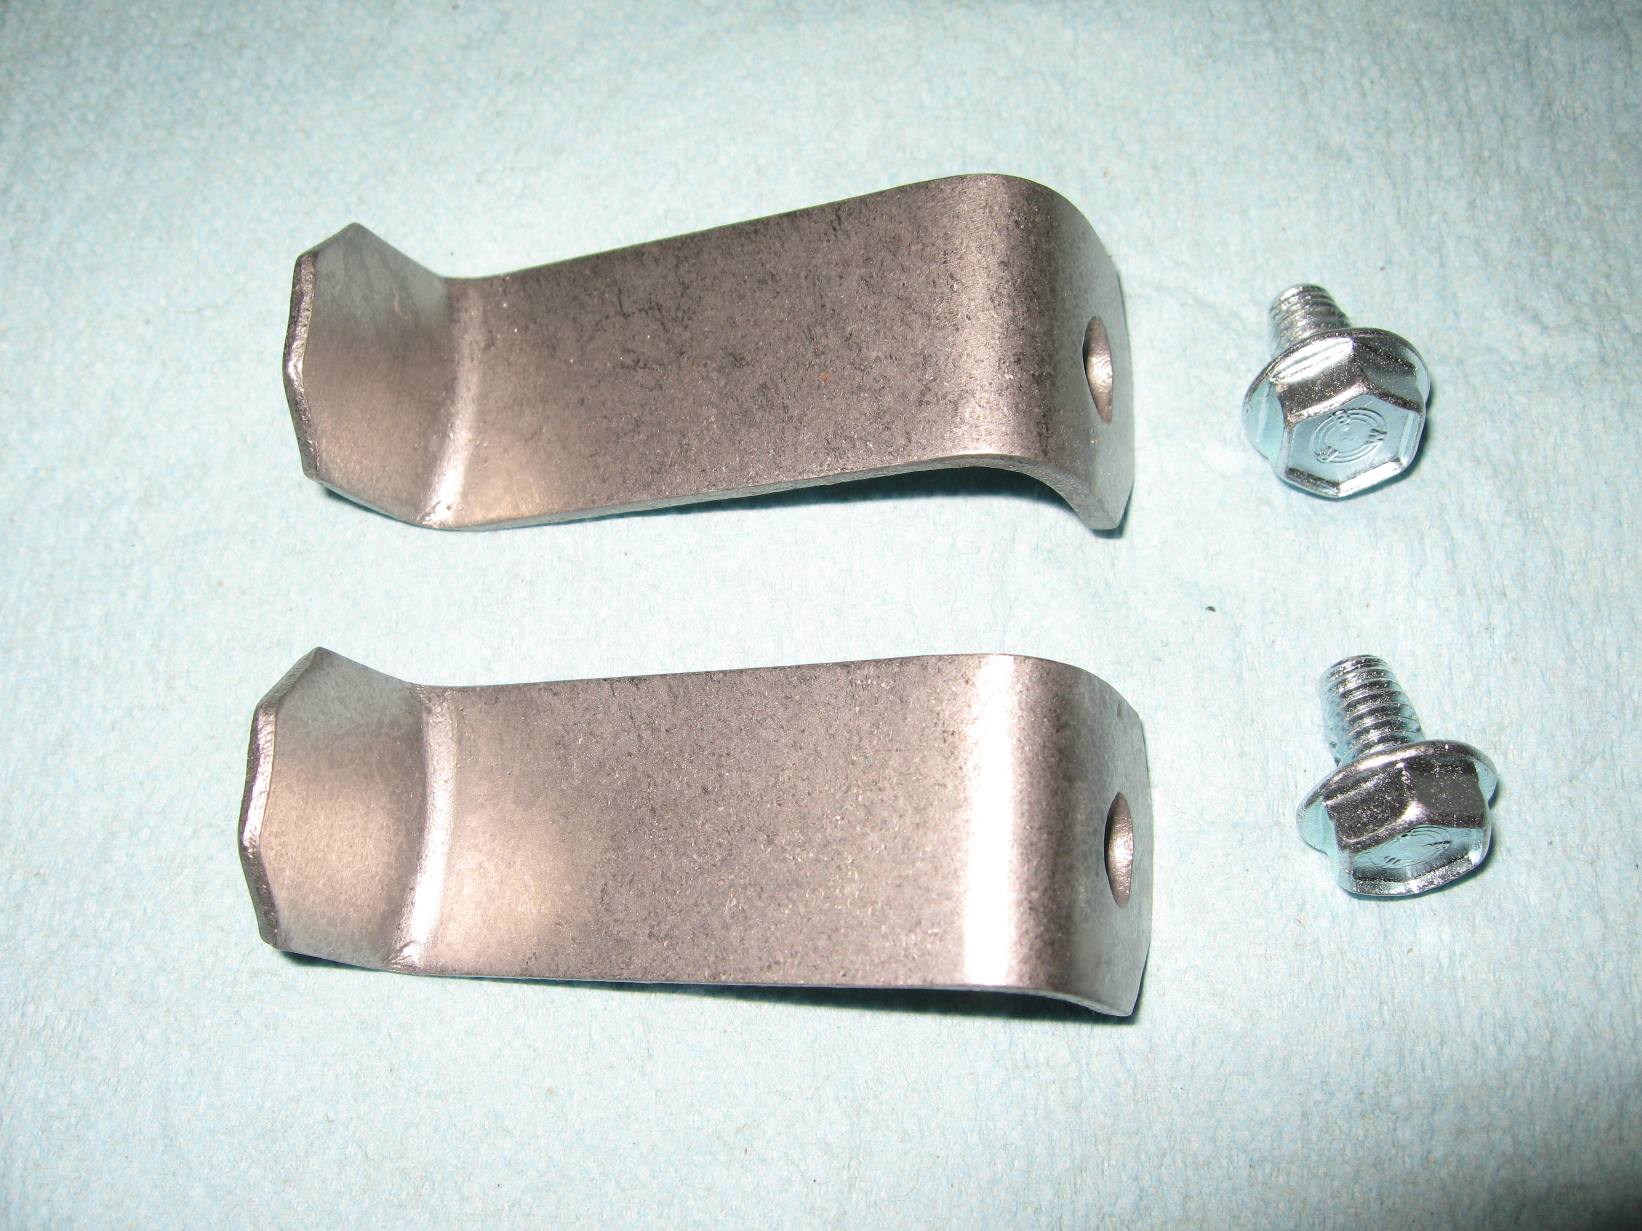
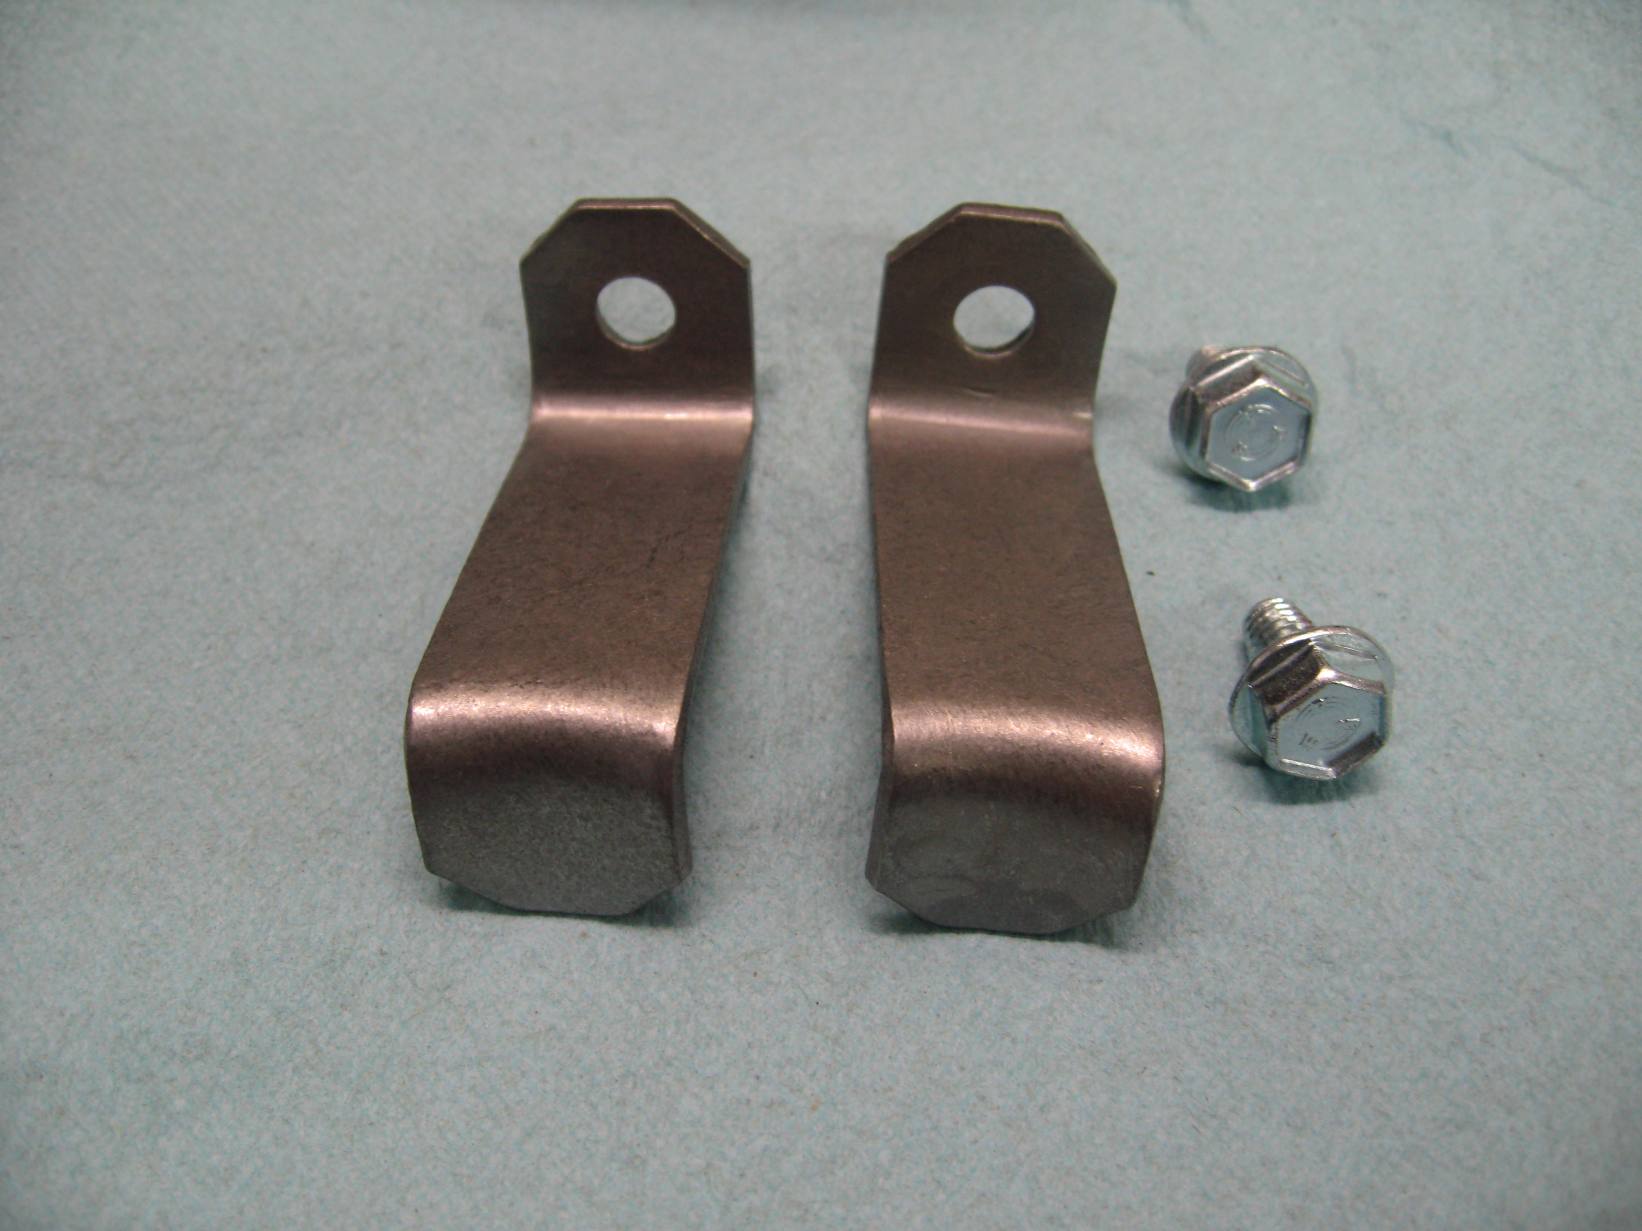
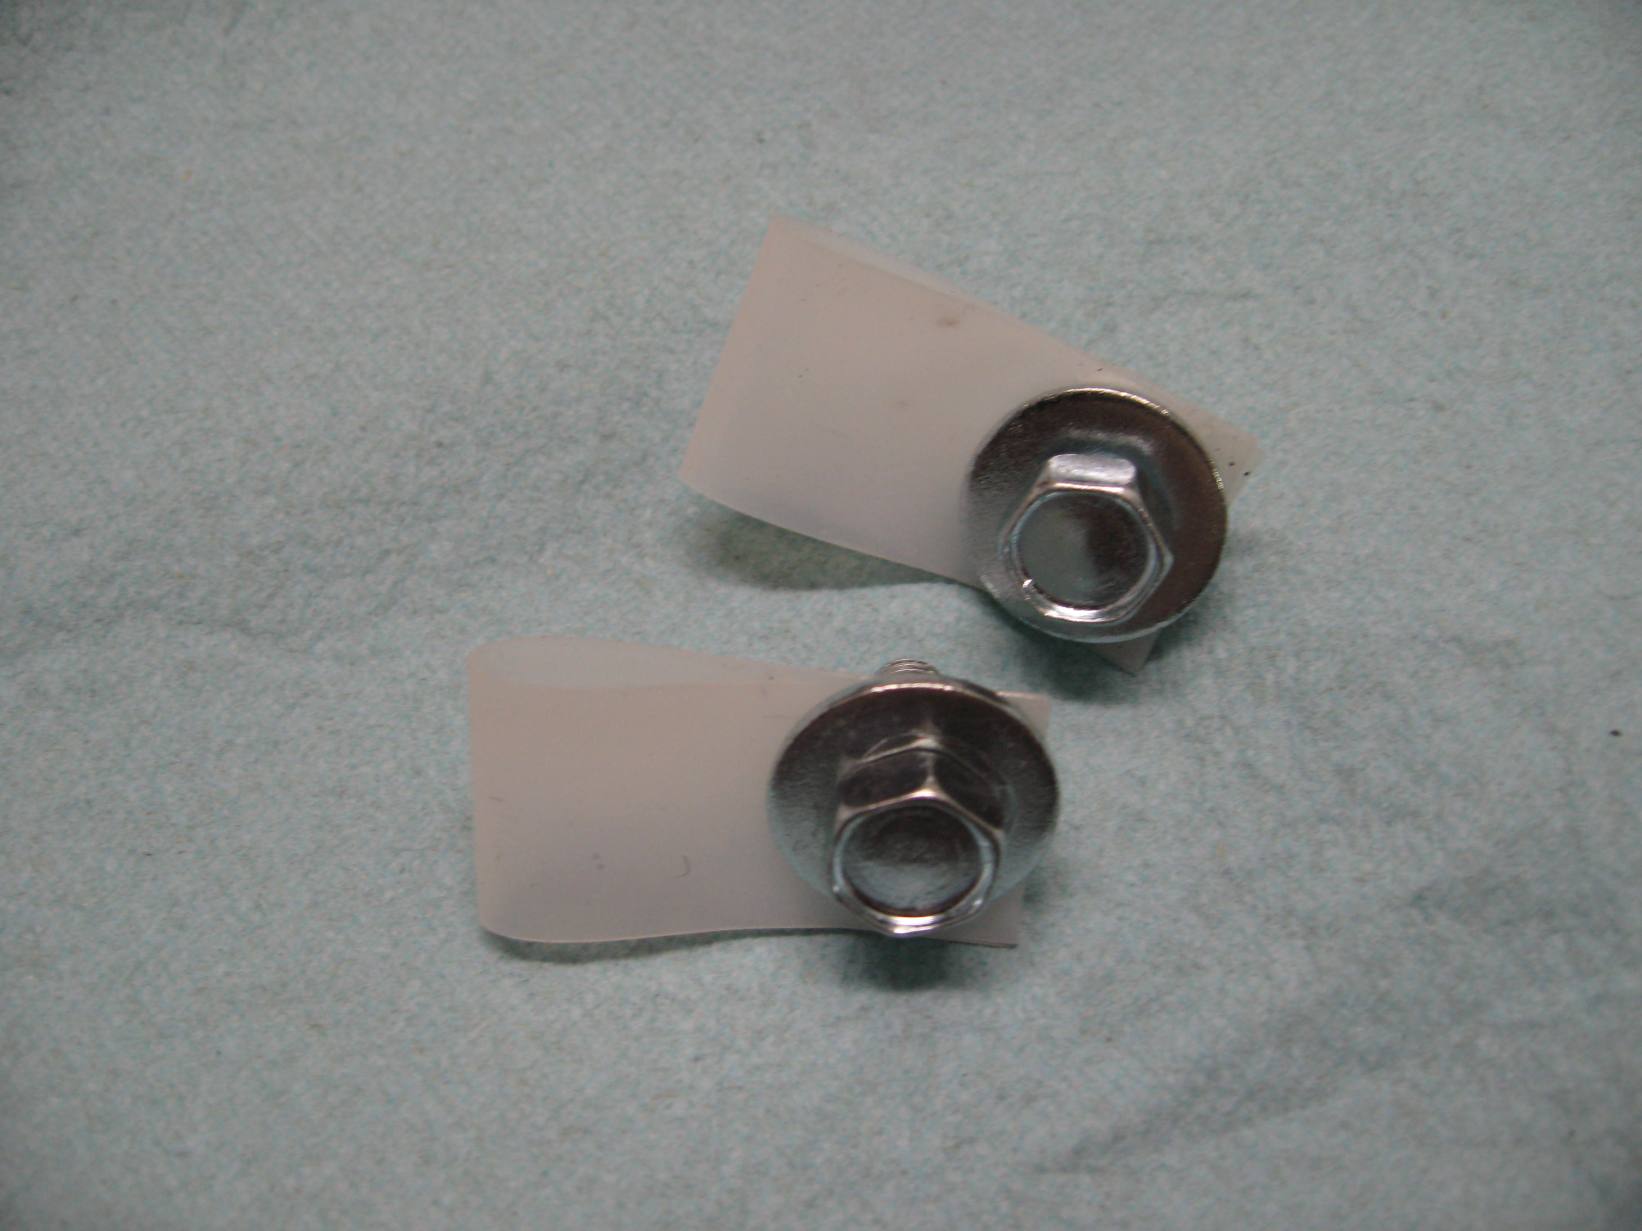
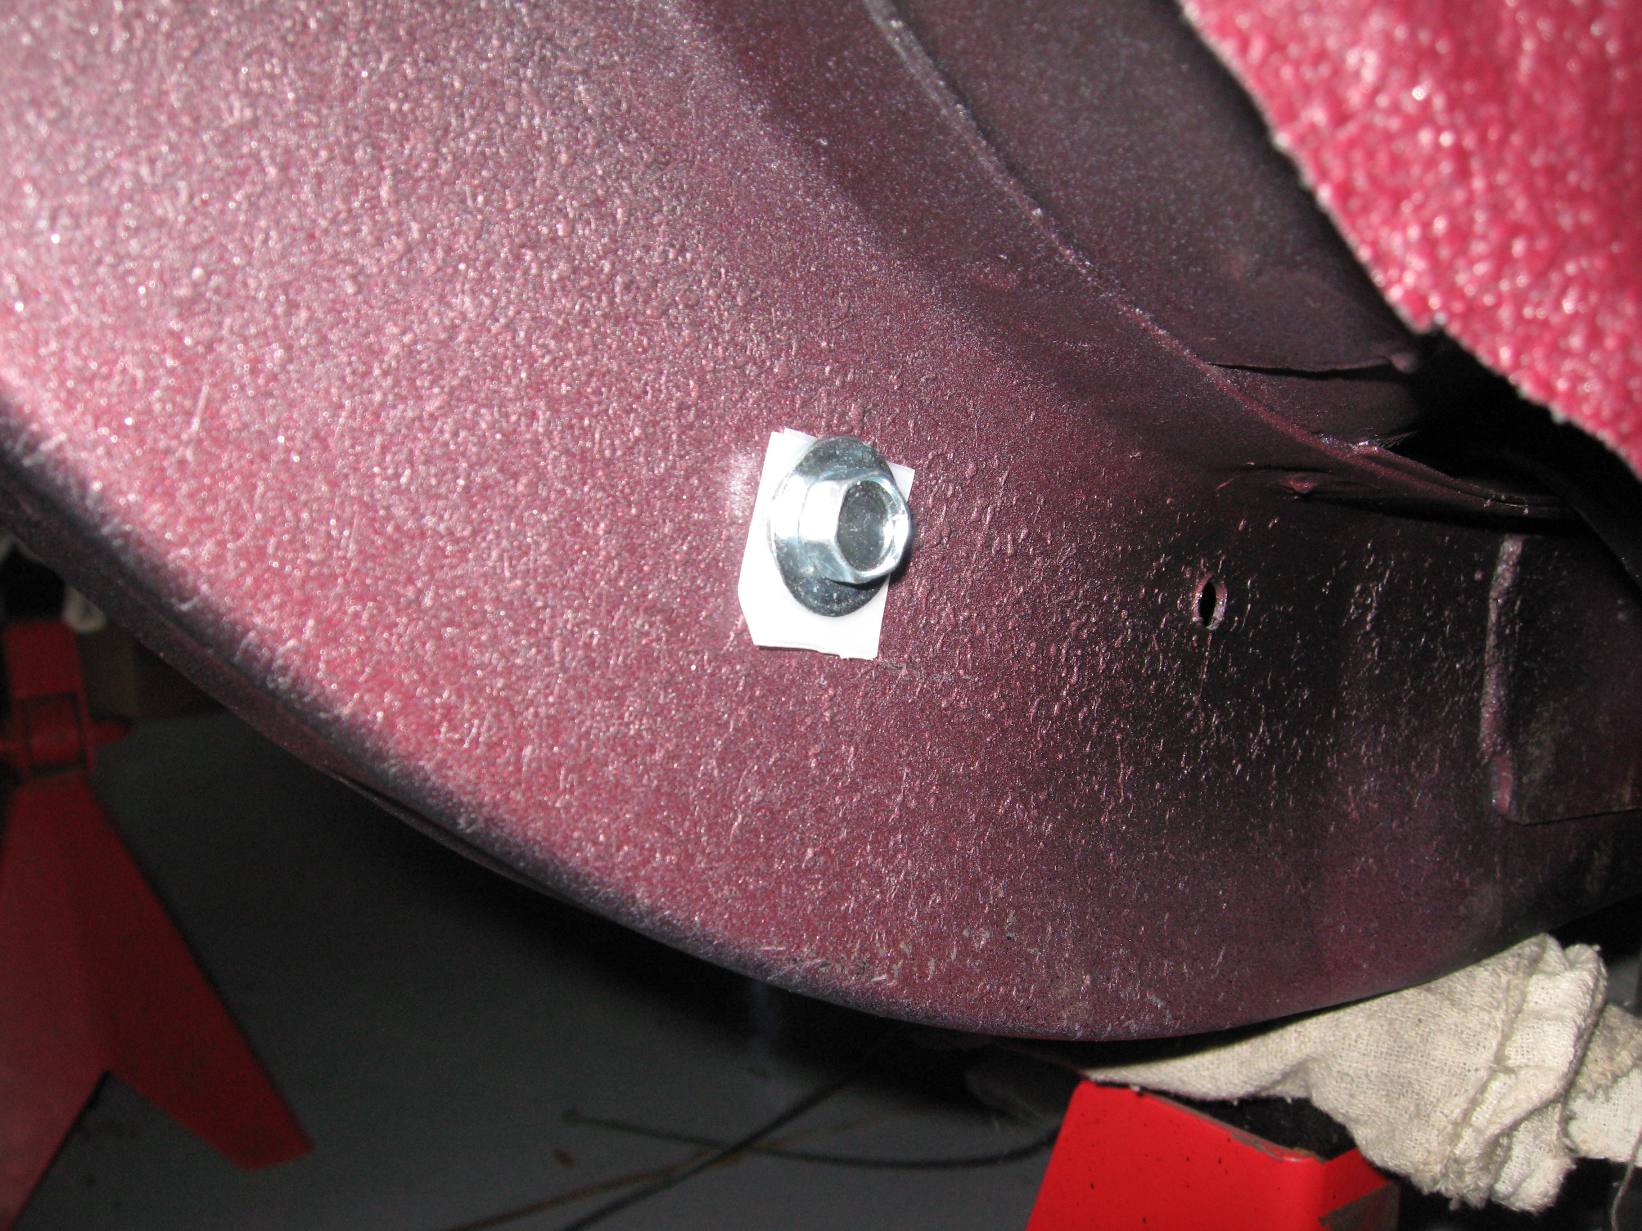
Another item I've been working on is restoring original parking brake cables and the retaining plates. I'll share some pics of the cables later, but here are the outer brackets. They were natural on this car and a little pitted. With a sanding disc and some time in the tumbler, was able to get them looking like new again. These are NOT painted. What you see in the pics is bare steel that I have treated with a rust preventative. Original fasteners were re-plated also. The plastic retainer straps were also replicated and installed. This was mainly a San Jose assembly plant detail.


Wednesday, December 30, 2009

12/22/09

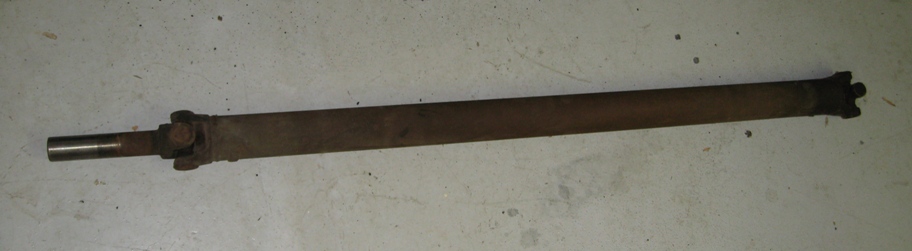
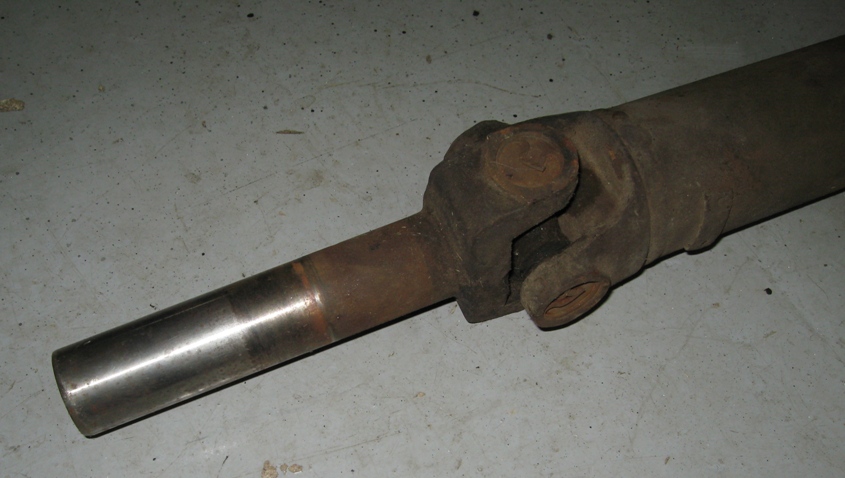
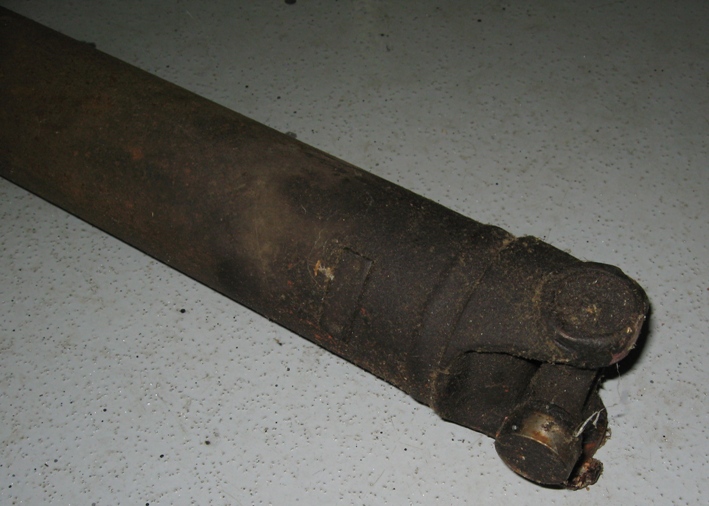
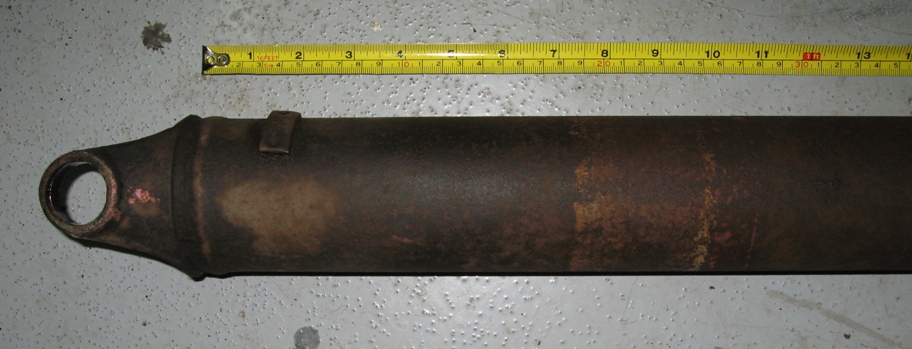
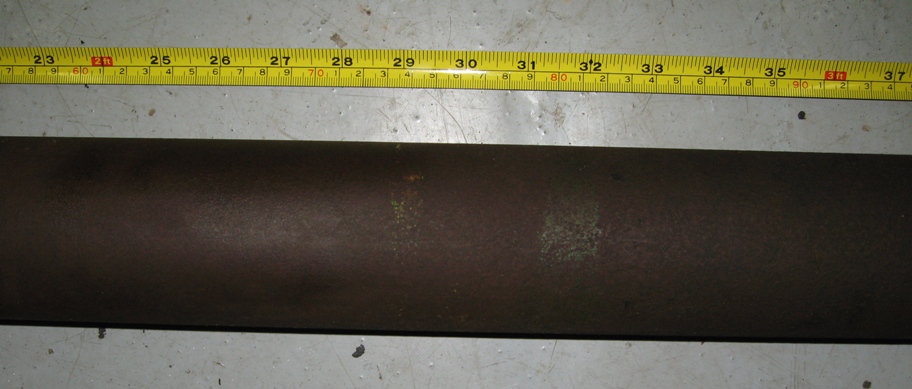
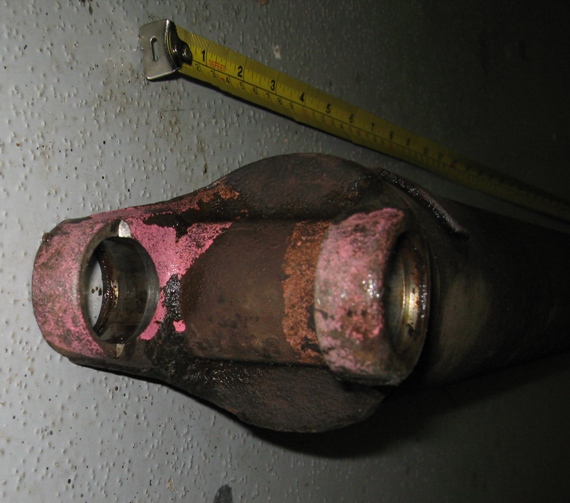
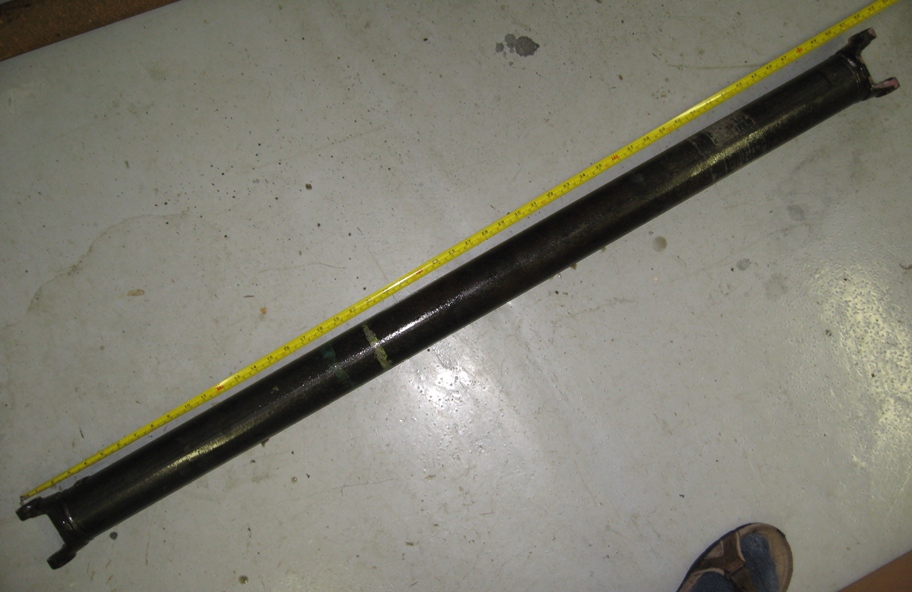
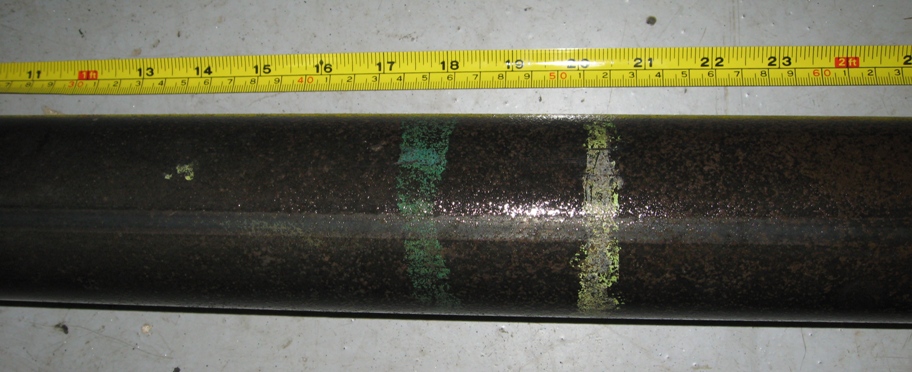
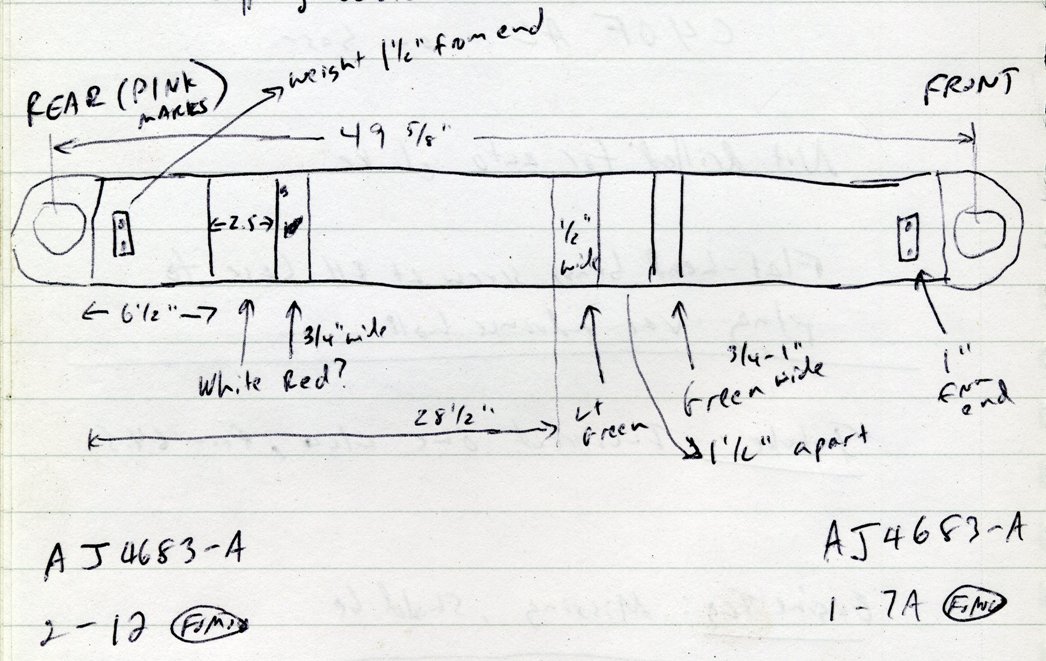
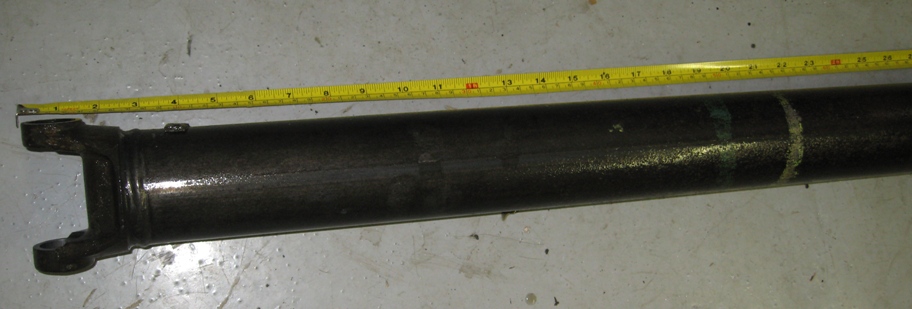
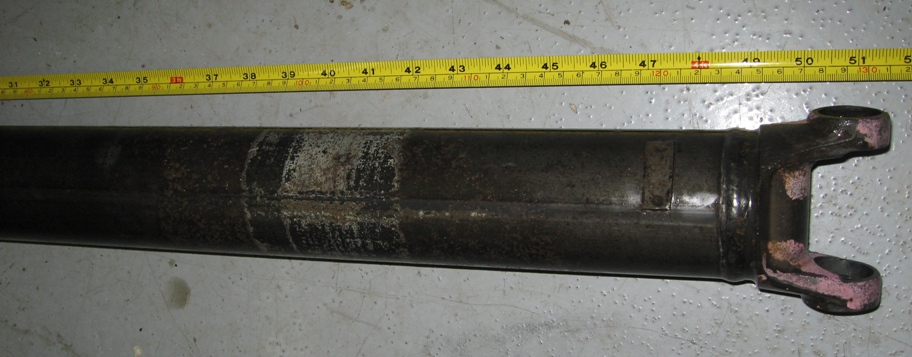
Ok, here is a big item a lot of folks will probably like to see... drive shaft stripes for a K code! As with the rest of the drive train, the drive shaft is the original from the K convertible. It's in very nice shape for being 45 years old! First thing I did was clean it with some mineral spirits in my parts washer, using a bristle brush. Hosed it off and was able to see some of the stripe remnants. They were barely legible, so I decided to soak the whole shaft in evaporust. I bought a 6' piece of 6" PVC tube and capped one end. Worked very nice and the stripes "came to life" after 24 hours of soaking. As can be seen, there are 4 stripes. I am including a drawing of the measurements From the back of the shaft going forward, there is a very wide white stripe, then a red one. Then about 20" further down, there is a light green stripe, followed by a green stripe. There are pink paint splotches on the back of the shaft on the yoke end. I didn't find any marks on the front yoke end. On the trans yoke, I found yellow paint splotches all over. It has C3 AA 25 stamped on the end on 3 of the corners around the center. Of course, this is a 28 spline yoke, so not sure what the 25 indicates. On each end of the drive shaft, it was marked 'AJ4683-A' with '2-12' on the opposite side of one end and '1-7A' on the other. I suppose they might be date codes or something, but don't know for sure.

Since all '65 hi-po's used the same drive shaft regardless of body style, I would say these are a good example of what was used at the San Jose assembly plate during '65 production. Of course, we don't know if the codes/colors might have changed during the year. Moreover, without examples, we can't be certain that the same color coding was used at Dearborn and Metuchen assembly plants. It's very likely they were, but just want to point this out. If you have a San Jose K code built around mid-year 1965, then I'd say you probably would be ok using these stripe patterns as a reference. Any other assembly plant would require more references to ascertain if they apply.

I included some 'before' pics to show that the stripes are invisible until cleaned. Click on the pics for the full-size images.


After mineral spirit cleaning:


After soaking (the red stripe dissolved after rinsing):


Here's the drawing. Note in the pictures I measured from the other end.


12/19/09

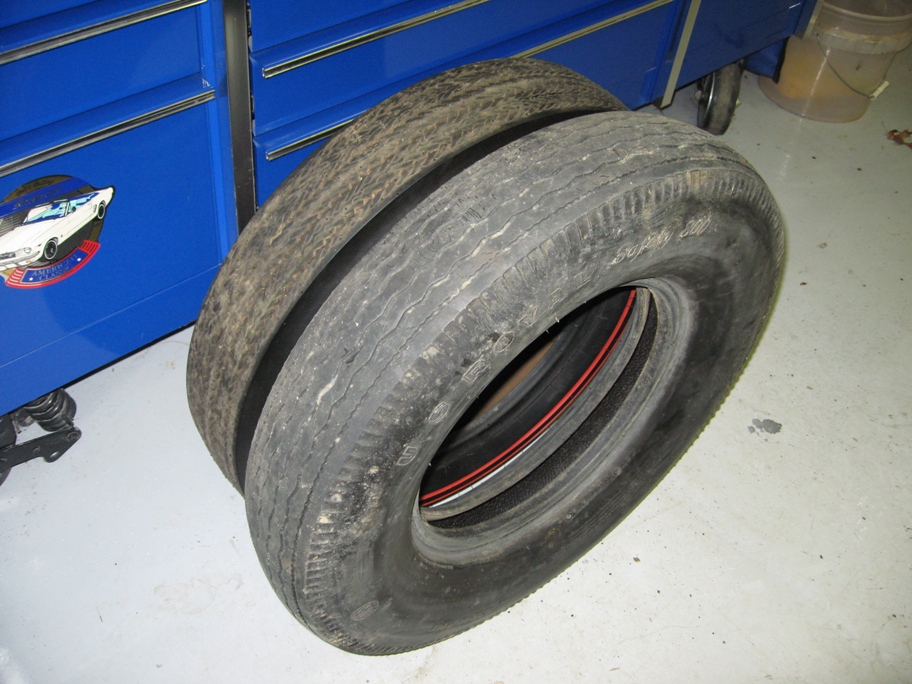
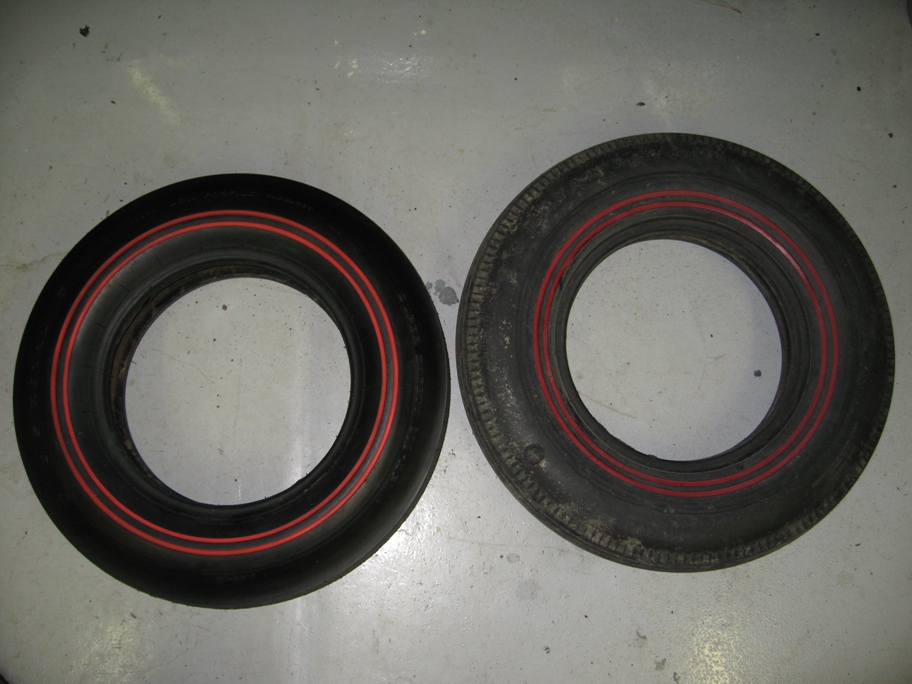
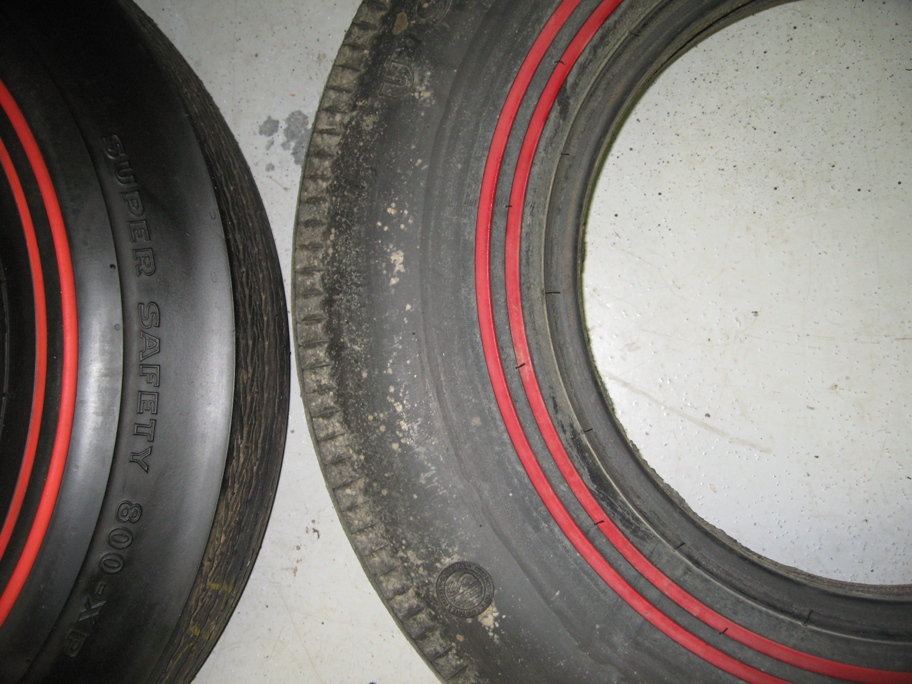
There was some recent discussion about the difference between the original Safety 800XP dual redline tires and the current reproduction. Unfortunately, there are gross differences between what came on these cars originally and the reproduction. I suppose something is better than nothing, but it's disappointing that so many details were missed in the replacement mold. The edge is wrong, the lettering is wrong, the red color is wrong, the placement of the red rings is wrong and the tread pattern is even wrong. NOS dual redline on the left, repro on the right. The repro is a well-used one as can be seen, about 10k miles on it.


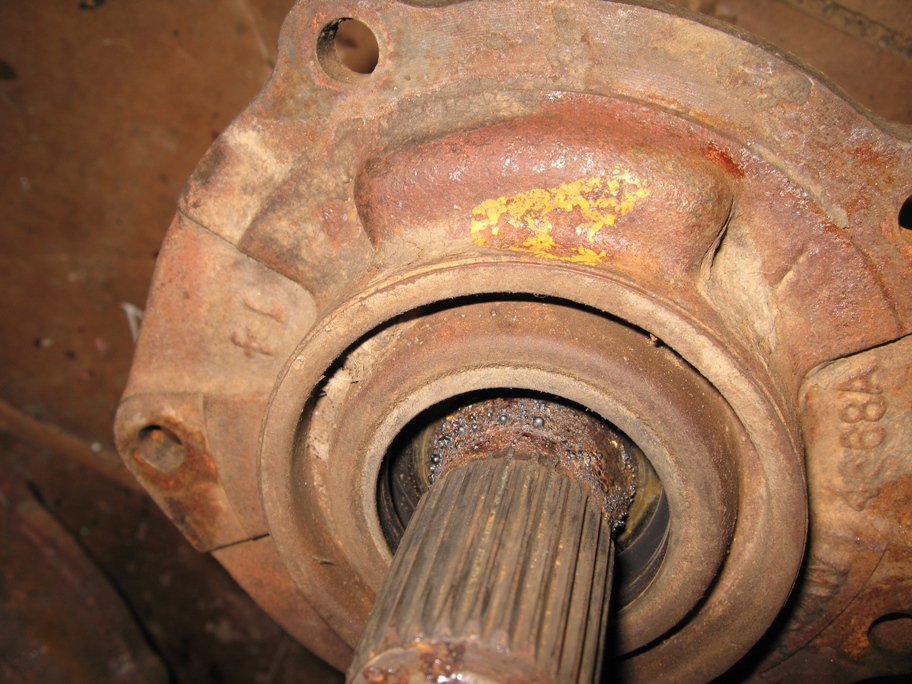
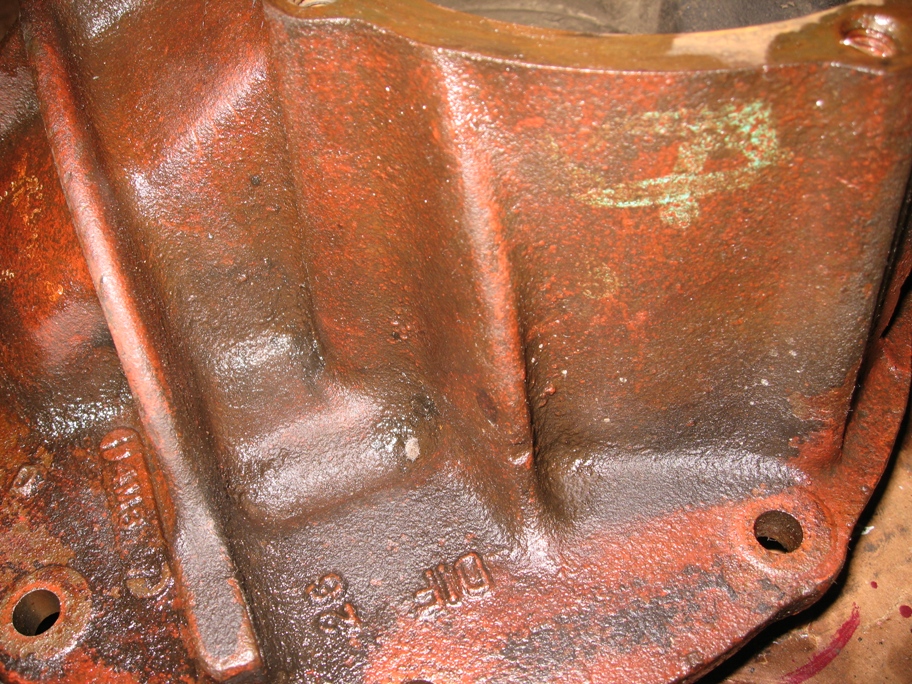
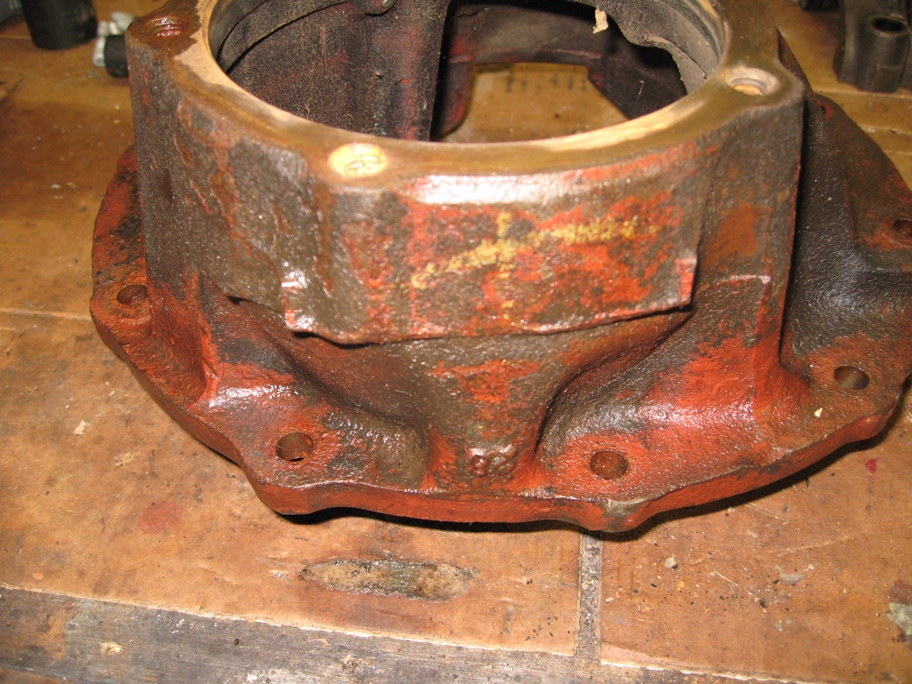
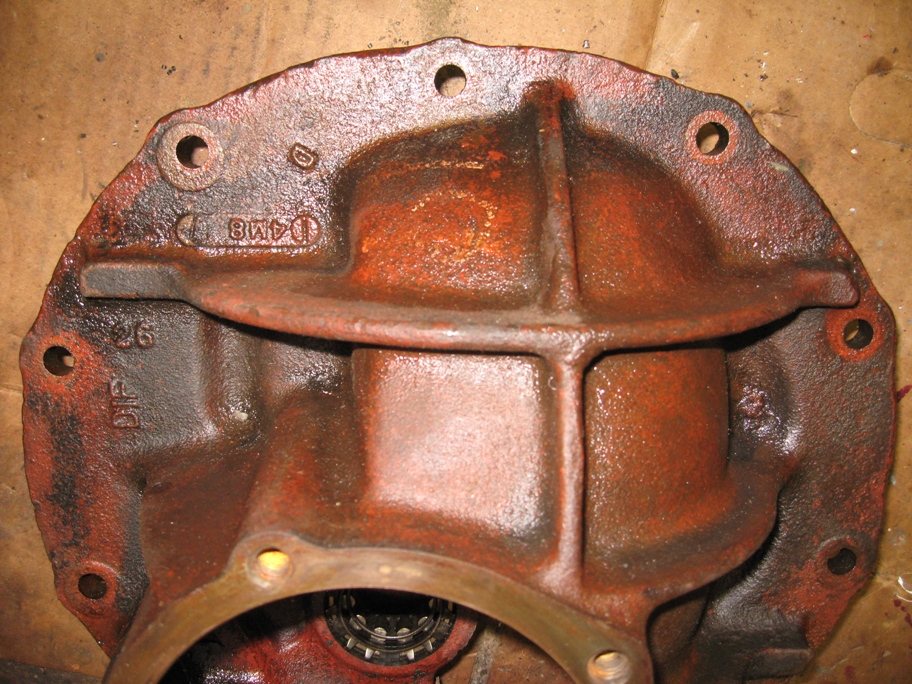
Here are some pictures of the rear carrier. I found a few markings, which can be seen in the pics. This is the original carrier from the convertible, it has December '64 casting dates. The tag reads WCZ-H 3.50 5AA 921. The WCZ-H code is found in Ford documentation to be 3.89:1, but as can be seen, that is not what shows on this original tag. On the door warranty plate for the car, a '5' code is there, which is for the 3.50:1. I suppose this could have been a an assembly blunder. Unfortunately, the ring and pinion had been replaced, so I don't know what was there originally. Someone put a 3.25:1 gear set in, D2UW numbers on the ring gear. There is no damage to the housing or carrier, so I assume a prior owner simply wanted to go with a smaller gear.


12/16/09

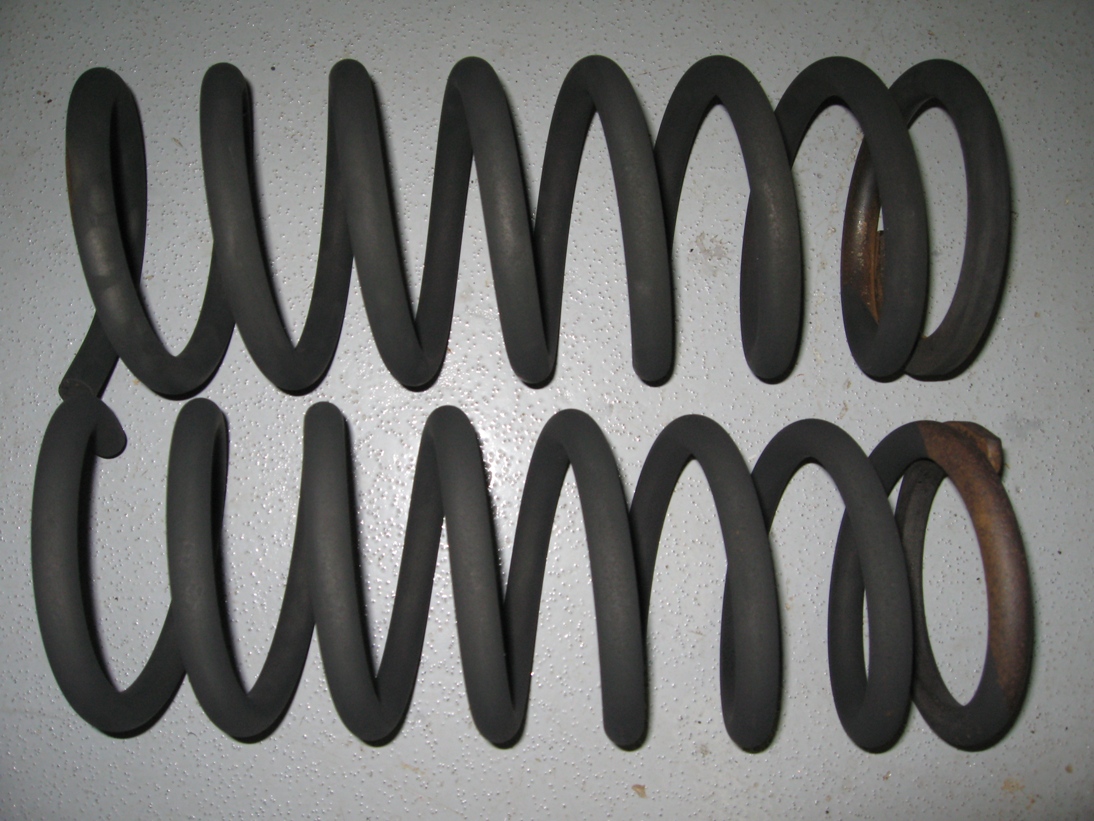
Soaked the original front coil springs, appears that they were not painted. When I rinsed them off after soaking, there was no sign of black paint anywhere. Jeff Speegle mentioned that in an interview with an ex-San Jose plant worker, they made a comment about "phosphate" coil springs. I will most likely refinish them in manganese phosphate. When I cleaned the springs for the first time, I did find a single brown stripe on each of them, which was documented previously here on the blog.

Sunday, December 13, 2009

12/12/09

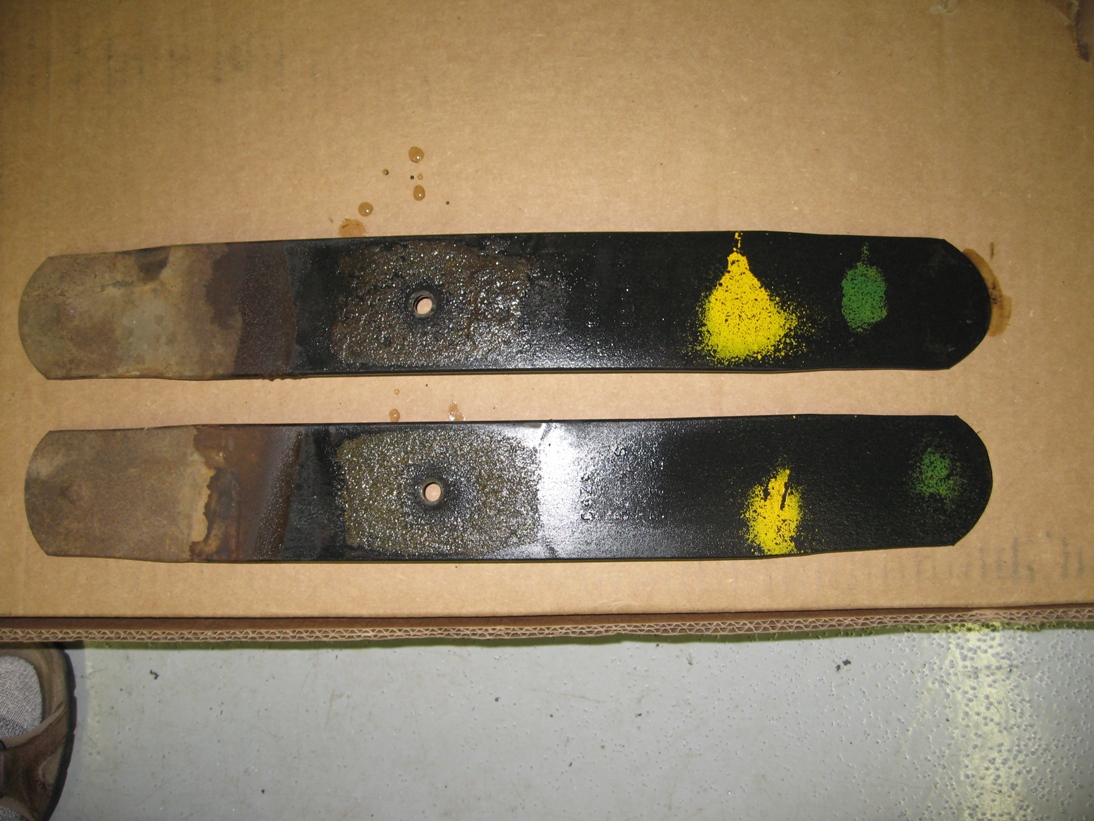
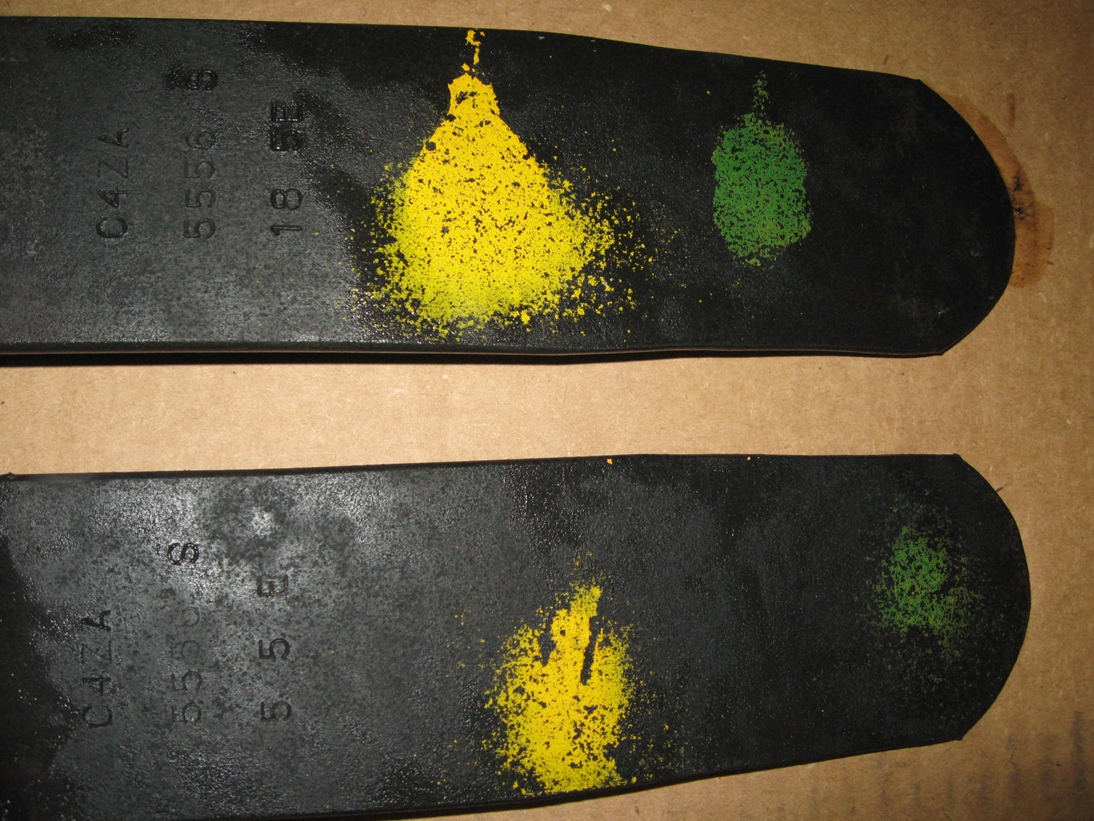
Found out about a neat chemical called "Evaporust" for cleaning parts. I have been amazed with this stuff so far. It takes about 12-24 hours for it to work completely on parts that have a decent covering of rust. The results are amazing. Paint marks are preserved like I have never seen before. Here are pics of the lower leaves of the leaf springs. The yellow and green paint marks look great! These could not be seen at all with just a regular cleaning. With some mineral spirits, I could sort of see them, but after soaking in Evaporust for about 12 hours, came out looking new. I am thinking of putting together something large enough to soak the remaining leaves.


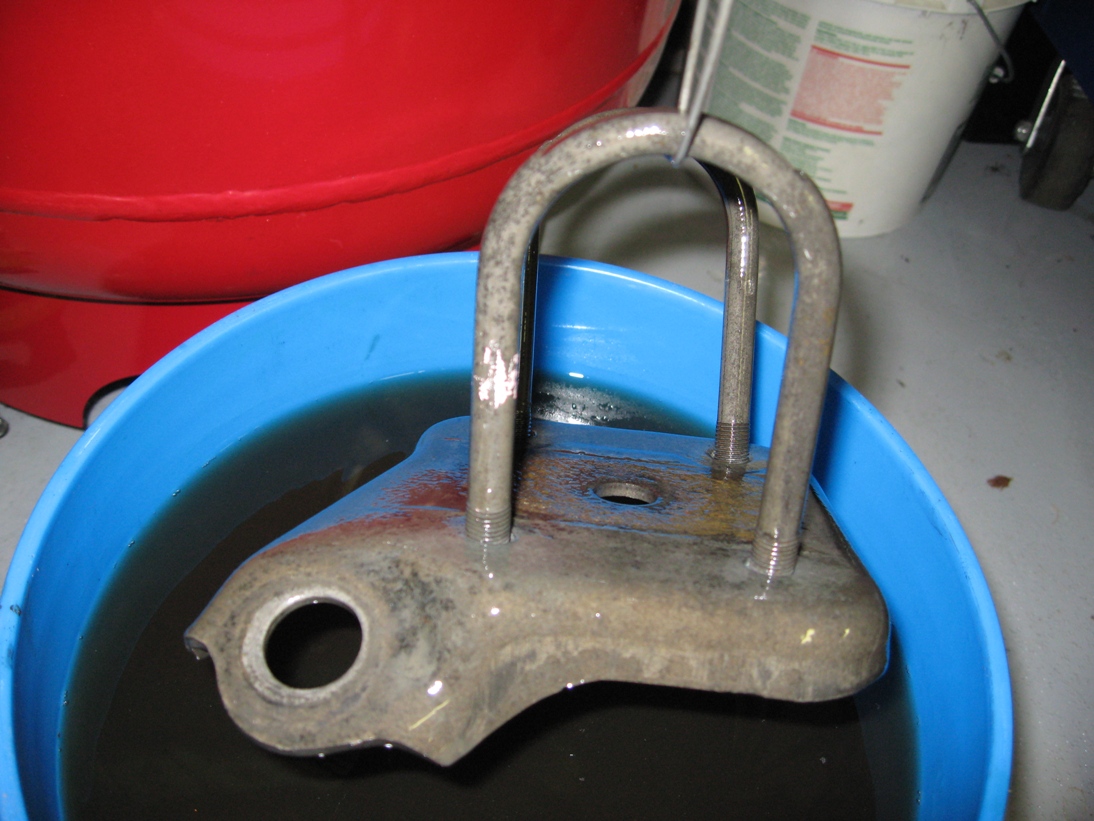
Of course, I had to soak other parts, including rear spring plates. In doing so, discovered pink marks on the u-bolts. Have seen this before on Unrestored cars, so was nice to confirm on another one.


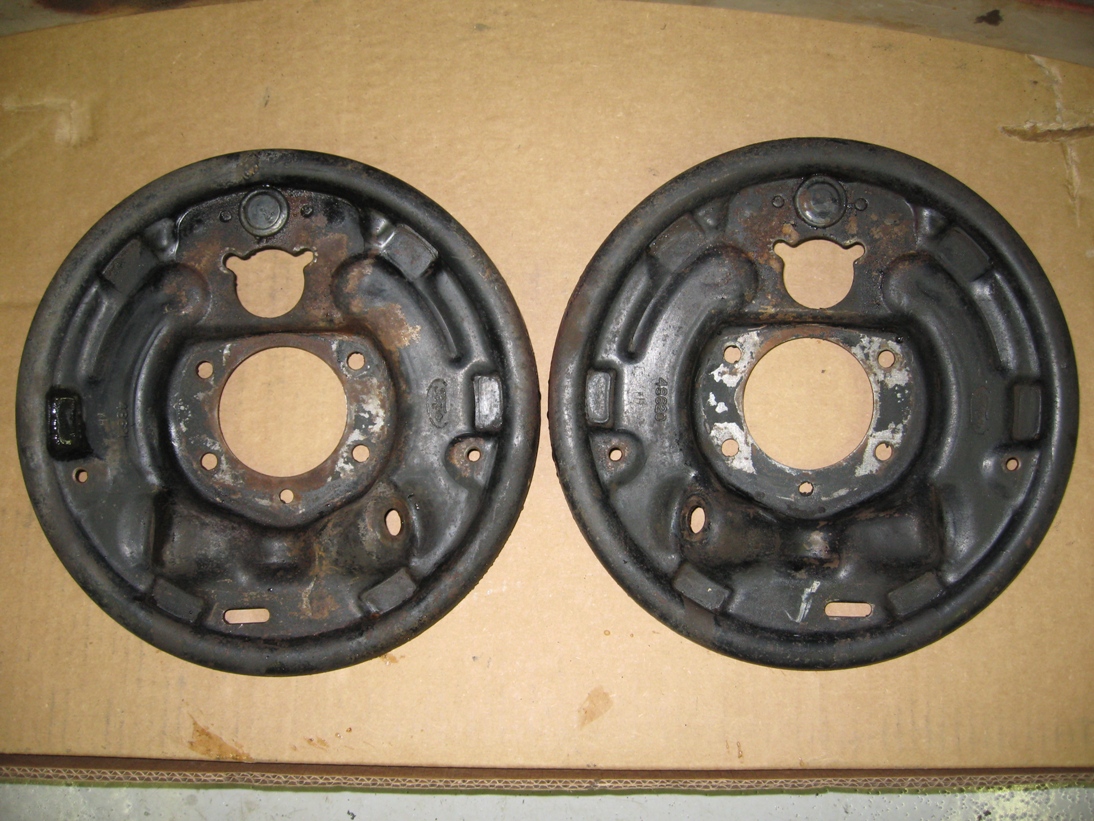
Cleaned a set of rear brake plates. The white check marks were uncovered. Have been seeing this consistently on the San Jose cars from this time period. I suppose it was a check mark to indicate the brakes had been adjusted.